
Get the underside of your car looking better than factory-fresh with some corrosion correction and prevention treatment.
Guide from Fast Ford magazine. Photos: Jamie & FJRS
Using cars as they’re supposed to be used is no doubt great fun, but all that excitement can quickly start to take its toll on the underpinnings. Not necessarily on performance, but certainly on the visual appearance of all those vital components found underneath the car.
And while we’ll religiously clean and protect the topside (c’mon, who doesn’t have an arsenal of cleaning products in their garage?), we never give the underside a second thought. In many cases, the only time anyone gets to see under there is at service time or when we’re having upgrades fitted.
We’re not suggesting that you get the axle stands out after every single drive and lay on your back armed with a multi-pack of toothbrushes blinging it all back up again – that behaviour is reserved purely for the concours elite – but the sad fact is that most cars could do with a helping hand underneath to keep them looking presentable.
Modern cars don’t have the levels of corrosion protection us enthusiasts would like to see, and very quickly start to look unsightly even with minimal use. And, cars from the likes of Ford like the Mk1 Focus RS and the Cosworth-badged models are between 20 and 40 years old now; you can imagine what decades’ worth of dirt, grime and road salts has done to all the running gear and exposed components hanging off the underside.
Underbody restoration, fighting off car corrosion
That’s why underbody restorations like the Corrosion Correction and Prevention treatment offered by Essex-based FJRS are proving increasingly popular with owners. These are not aimed at the full-blown concours level of restoration (FJRS says it can undertake that kind of thing, though); instead these services are intended to freshen up the underside and restore a factory look. Only with the added benefit of enhanced corrosion protection, which will stand up to the elements a lot better.
What’s more, doing things this way means none of the running gear is removed from the car during the corrosion correction process, which in turn speeds up the process and means there’s no hidden costs for snapped bolts, split bushes, or geometry setups waiting to increase the final bill.
To see what all the fuss was about, we followed Fred and Jonny at FJRS as they got to work on a Mk3 Ford Focus RS Edition belonging to Andy Krees. As one of the later special editions, Andy’s car is 2018 model, and has only covered 16,000 miles from new, so you wouldn’t expect there to be too much for FJRS to put right on such a new car. But you’d be wrong. Very wrong.
All protected and looking better than new
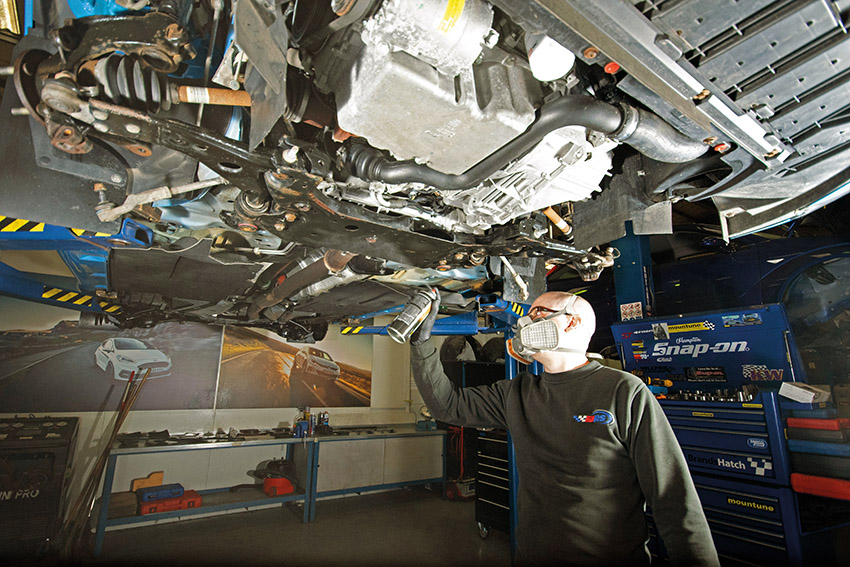
Clean & assess
The first part of the process is a thorough steam clean, using soft detergents where appropriate to remove all the road grime and dirt build-up. The car is then left to dry inside FJRS’s warm workshops – they even get the car on the ramp and have heaters blowing warm air up into the wheelarches to ensure everything is clean and dry before they give the entire underbody a thorough assessment. Therefore, FJRS says it’s impossible to give an off-the-shelf price, as each treatment is bespoke and tailored to suit the car and customer’s precise needs.
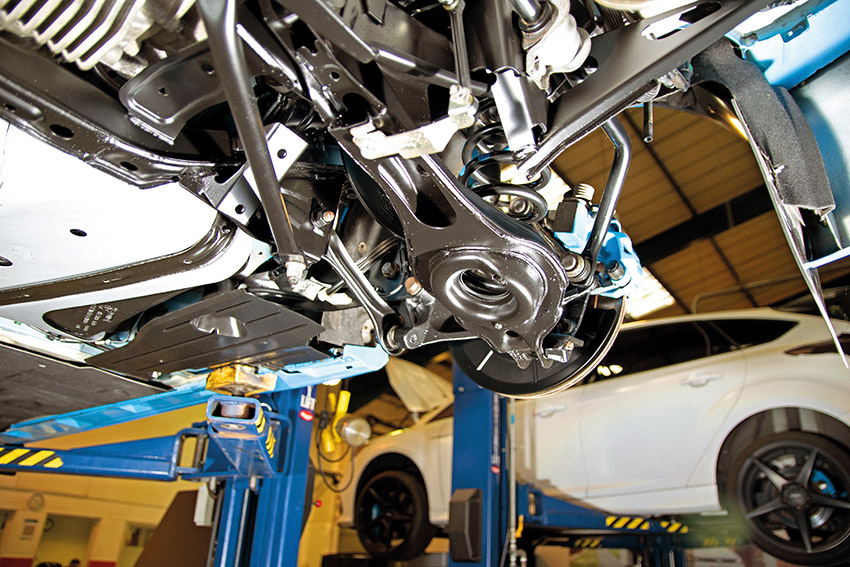
As is typical for Mk3 RSs, and quite common on many fast Fords, Andy’s car had started to show signs of surface rust. Of course, this is nothing concerning from a performance or safety perspective, but it’s certainly not very pretty to look at.
Closer inspection revealed stone chipping on the bottom arms, surface scabs on the subframes (especially the leading edges and around fixing holes), surface rust to the hubs, and the whole underside generally looking untidy and well-used.
Andy’s car also showed signs of another well-known Mk3 RS issue – the brake back plates were badly rusted, despite only being a few years old. The rears were worse than the fronts but Andy opted to have all four replaced with brand new items from Ford, which FJRS gave the full protection treatment before being installed.
Smaller components are removed from the car for painting
Prep & paint
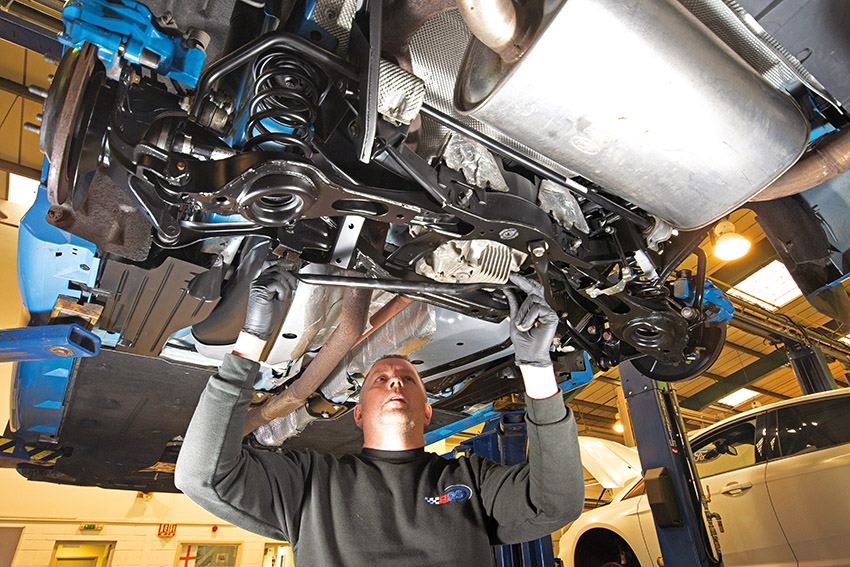
After the underbody has been cleaned and dried, and the damage assessed and a plan of action created, the first step in the rectification process is to gently remove any loose corrosion with either a wire brush or a Scotchbrite abrasive pad. It’s all done by hand to ensure only the affected areas are treated, and it’s all very gentle to prevent any lasting score marks that would be visible in the finish.
The subframes and wishbones remained in-situ for this job so not to require re-tracking afterwards, but smaller, easier-to-remove components and bracketry was removed from the car and taken to the bench. The rear springs were also removed to allow better access to the rear arms, and the front callipers were taken off (but still connected to the brake flexis, so no need to bleed the system) to get at the hubs more easily.
Next up, FJRS uses a special rust inhibitor that also converts any existing corrosion into a paintable surface. This step is designed to slow down any corrosion that had previously taken place and help prevent any future corrosion from getting hold. The coating is liberally applied to the affected areas and then allowed to cure for 24 hours.
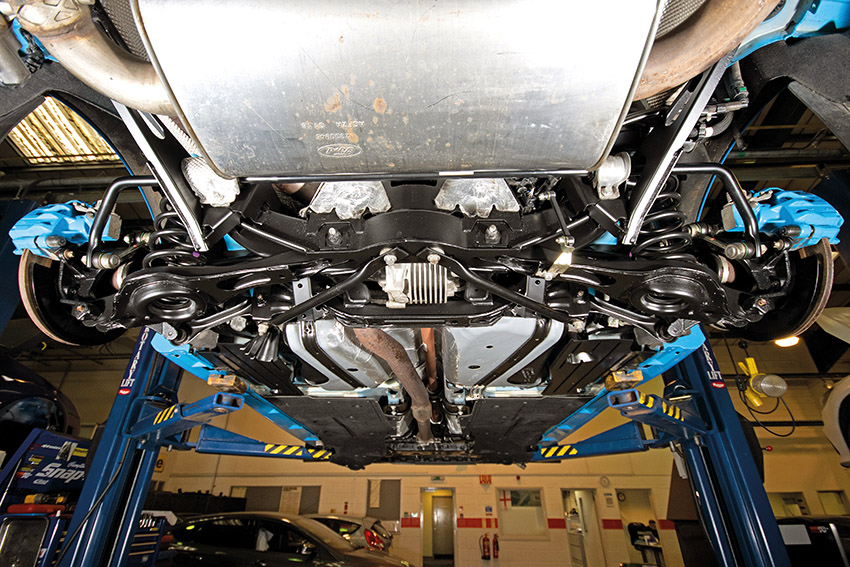
When the inhibitor has fully cured, a fresh coat (or multiple coats if required) of paint can be applied. In most cases – as with Andy’s car – the colour of choice is satin black to give that factory-original appearance, but FJRS says other colours are an option.
The underside of the car is carefully masked up so those components remaining on the car can be painted, while the components that have been removed are sprayed and then baked in an oven to give a better finish and further harden the paint.
Parts that cannot be sprayed accurately, like the hubs and driveshafts, are painted by hand. A hard-wearing enamel paint is used to offer a factory-looking black gloss finish and offer better protection to the elements.
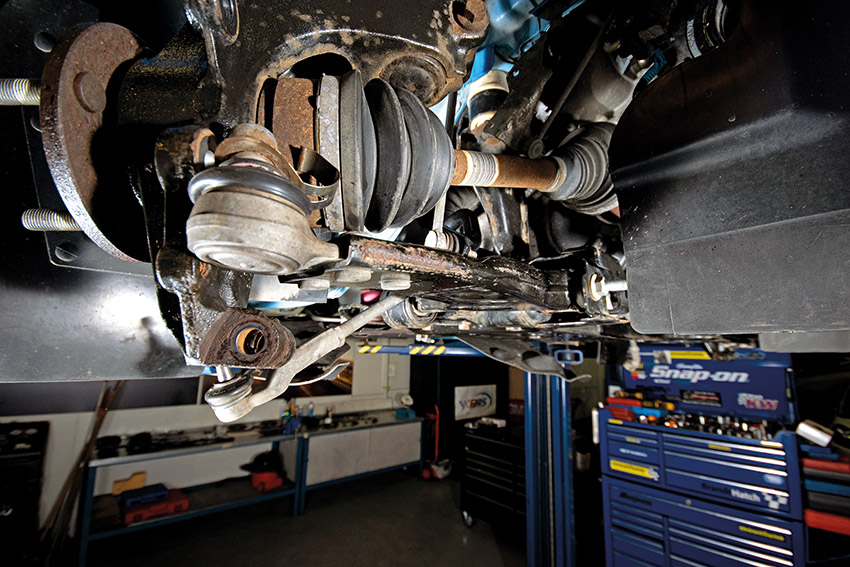
Even at three years old, modern cars show significant signs of surface corrosion
Added Protection to prevent future car corrosion
With everything painted, reassembled, and looking factory-fresh once again, the final step in the process is protection. FJRS uses a special heat-resistant corrosion protection film that is liberally applied to all the exposed components underneath the car.
Unlike traditional underseal products, this cures to leave a hard film rather than a tacky finish, meaning it can be wiped clean with a cloth without dragging everywhere. Once cured, the film offers extra protection against the elements, meaning you can enjoy using your car in all weathers without fear of dreaded corrosion taking hold.
The whole process on Andy’s car took about a week, but FJRS advises on between three to five days for similar work. Powder-coating components can increase that by several weeks (as much as four to six weeks longer), and installing additional upgrades at the same time may also increase the amount of time the car is in the workshop.
The result, though, is worth the wait. Not only does everything look like it has just rolled out of the showroom, now there’s a fighting chance of keeping it that way thanks to the extra corrosion protection applied.
Now you can have your cake and eat it; a car that you can enjoy driving enthusiastically, without the underside becoming obliterated in the process. We’d call that a win-win.

Looking better than new


