

How to wash your car. Seems simple enough, right? Are you using two buckets? A wash mitt? Are you washing in sections? Here’s our detailing step-by-step guide full of advice.
If you’re still detailing your pride and joy with one bucket and a sponge, then you’ve come to the right place. What was once the accepted way to wash is now recognized as putting you on the fast track to ruining your paint. If you care about your car, then the damage you’ll be doing and the swirls you’ll be creating will be heart-breaking. You’ll also be needing a decent product, so check out our best car shampoo guide.
To wash your car properly, firstly requires the proper tools. Secondly, you need the proper technique; we’ll be covering all the essentials here. Washed properly, your paint will thank you. Sure, it will take a little longer, but if you’re reading this how to wash your car guide, you’re not here for a quick and casual clean, you want to do the job properly; that’s what this is all about.
Be sure to check out which order you should be detailing in by visiting our ultimate detailing guide.
Wash Your Car With The Correct Equipment

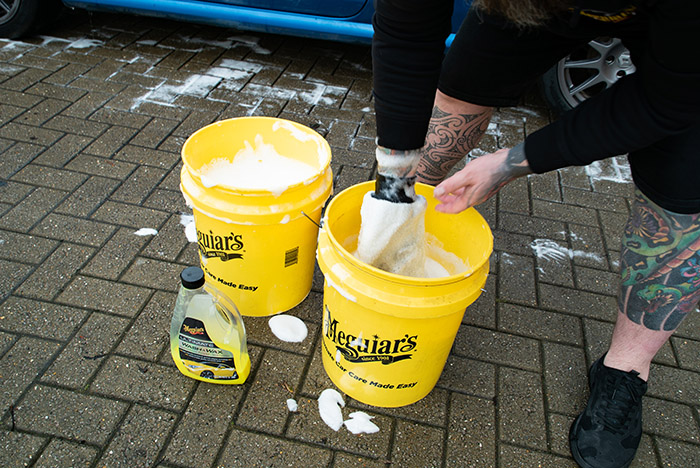
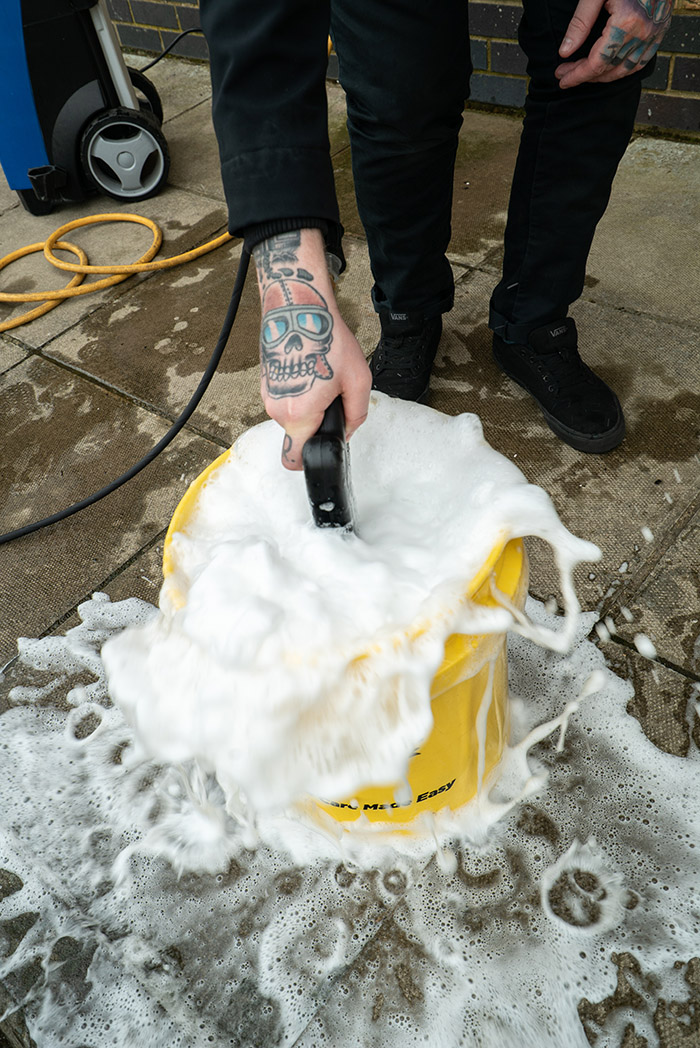
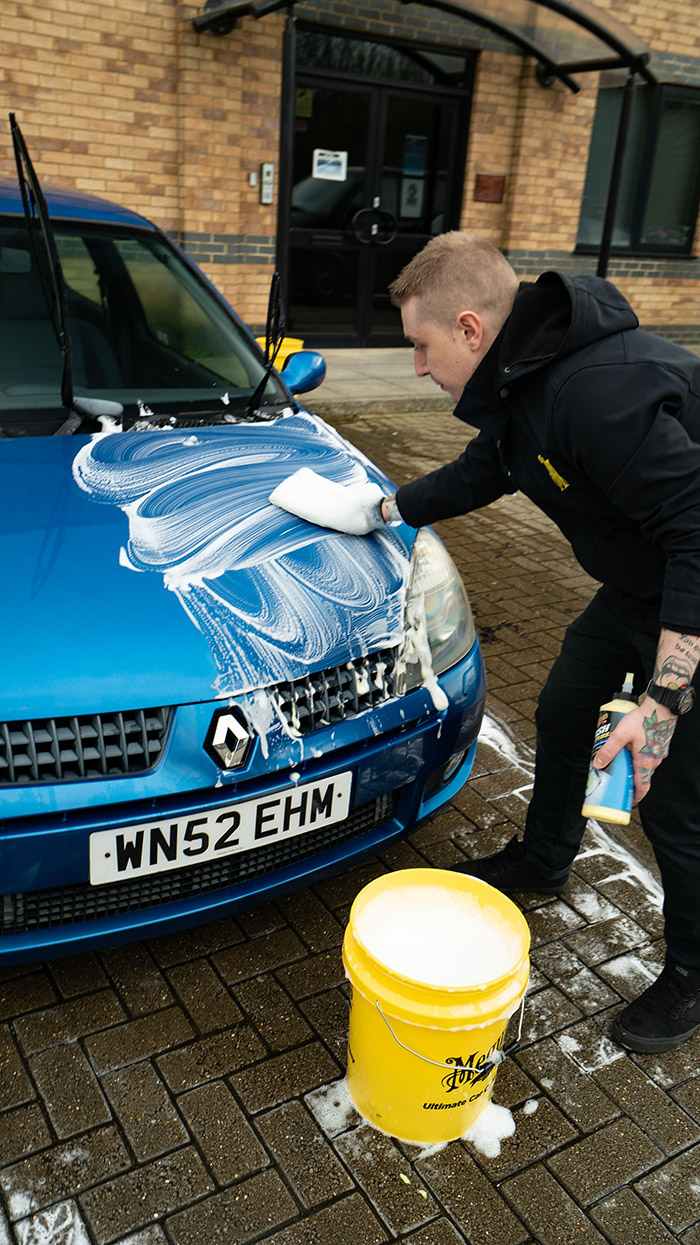
The first thing you need is the right equipment. That means what you need to do is get rid of your sponge. Swap it for a wash mitt, and get yourself two buckets.
Sponge vs wash mitt
Let’s break this down and talk about sponge vs wash mitt first. We know there will be loads of people who have been washing their cars with a sponge for as long as they can remember; this is a habit you need to break. Sponges are far too harsh and abrasive. You will immediately be putting swirls in your paint before you even take anything else into account. Another reason why sponges are bad is that dirt and grit sit in the sponge. It doesn’t go anywhere. You will be running it across the surface of your bodywork, potentially causing further marring, adding swirls and even causing scratches to the surface.
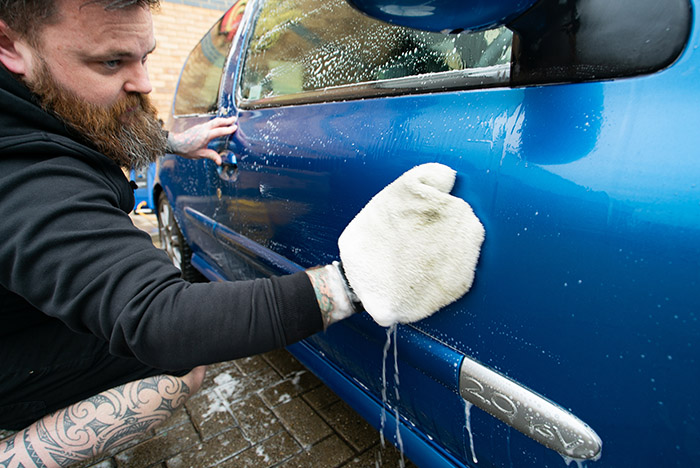
A wash mitt is everything a sponge isn’t. It’s the perfect tool for safely washing your car. First of all, it has a soft surface, meaning it won’t damage your paint, so we’re off to a good start. Secondly, whether you’re using a microfiber or lambswool one, all those many multiple fibers are perfect at trapping dirt and grime and lifting it away from your paintwork, tucking it out of the way. This means you’re not going to be scratching your paint with anything in the mitt, unlike with a sponge.
Another great thing about the wash mitt is that, because you wear it, it enables you to clean so much more effectively. It’s easier to apply pressure in the right places or clean gently elsewhere. The flexibility of the mitt means you can more easily get into tight spaces and little nooks and crannies. You can also clean more intricate areas and smaller surfaces, too.
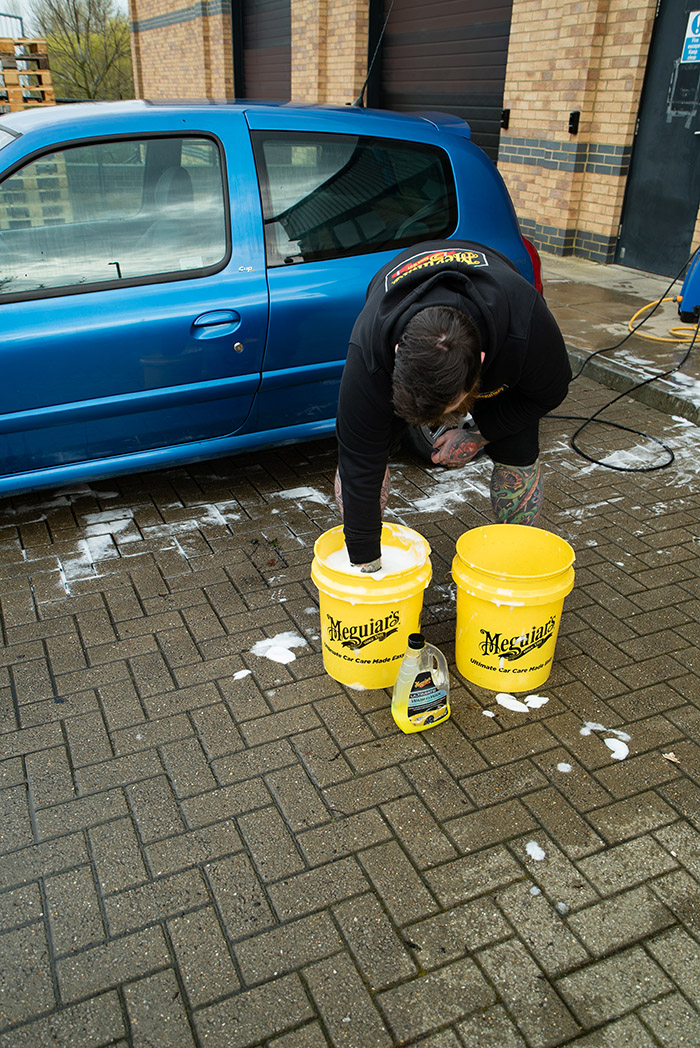
Two buckets or one to wash your car?
A question that’s often asked is, why use two buckets? Basically, it’s all about minimizing the transfer of contaminants to your paint. Think about it this way, if you’re using one bucket that’s filled with clean water and shampoo, it’s not going to stay clean for long. Every time you rinse your dirty wash mitt in there, all the dirt you’ve just washed off your car will go right back onto it. You’ll be rubbing that dirt all over your car again, not good.
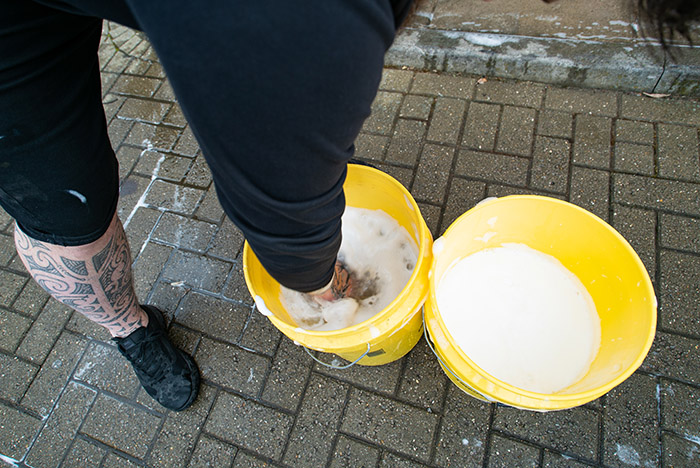
With two buckets, you have one clean shampoo-filled bucket and one rinse bucket. You load up your mitt with suds from your shampoo bucket, and after washing a section of your car. This way, you are minimizing the transfer of contaminants back onto your wash mitt by removing the majority of them first before you go in to load up your wash mitt with more shampoo. Of course, the water in your rinse bucket will get dirty during the washing process; as will the water in your shampoo bucket. You can always pour out the former midway and fill it with clean water. This will help keep the latter cleaner for longer during your wash.
Do You Need a Grit Guard To Wash Your Car?
Regardless of how many buckets you are washing with, you absolutely need to use a grit guard. Ideally, you want one in each bucket. A grit guard is a simple plastic grate that drops into the bottom of your bucket and allows you to rub your wash mitt across its surface. This helps to loosen contaminants from the mitt. As a result, leaving it much cleaner when you go in for a fresh load of shampoo.

Another benefit of the grit guard is that it helps to stop the transfer of dirt back onto your mitt. The heavier dirt and contaminants will naturally sink to the bottom of the bucket. and will be separated from your wash mitt via the grit guard. This will help to prevent you from picking up all those bits of dirt on your mitt again. If you can only use a single bucket, a grit guard will go some way to helping to keep your wash mitt that little bit cleaner. It’s an essential piece of equipment for anyone who enjoys washing their car and wants to do it as best they can.
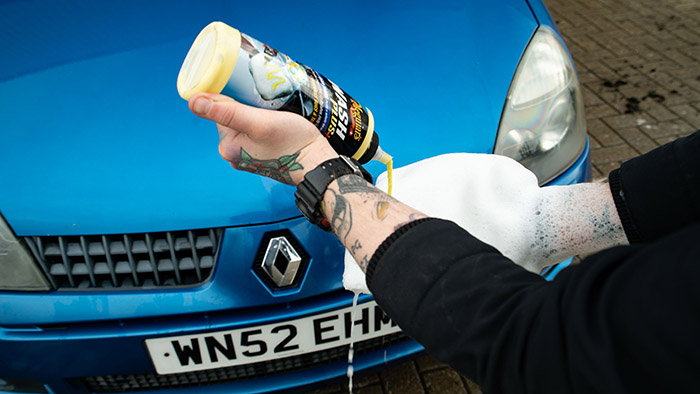
Pick The Right Shampoo To Wash Your Car With
An important thing to note is that all shampoos are not equal. Pure shampoos contain nothing but shampoo. These are perfect if you want to preserve the performance of any wax coating you’ve applied to your car previously.
In a hurry? Then a wash and wax shampoo is the perfect choice. As its name implies, it will both wash your car, while also leaving behind a wax layer. This will make drying that much quicker as water will run off the bodywork much more readily. It will also add extra gloss by virtue of being a wax and offer some protection against dirt and contamination. Remember, it won’t offer the same level of protection as a standalone wax or be as durable. However it’s the perfect way to add protection to your paint as you wash. It also saves you time when dying and you’ll end up with a car that looks stunning and with minimum effort applied.
Check out our guide to the best car shampoo in 2023 for more advice.
If your car is exceptionally dirty, you might need something more aggressive to get the job done. Some shampoos offer stronger cleaning. This particular one has been designed to effectively remove bugs and tar spots. While bug splatter comes off with a bit of additional elbow grease, tar spots usually require a tar remover of some sort, those off in one go is a huge bonus.
This shampoo will also strip any wax from your paintwork. This is worth bearing in mind before you use it, but it’s perfect if you want to remove any old leftover wax on your paint to have a clean surface for applying a new coating.
How To Wash Your Car
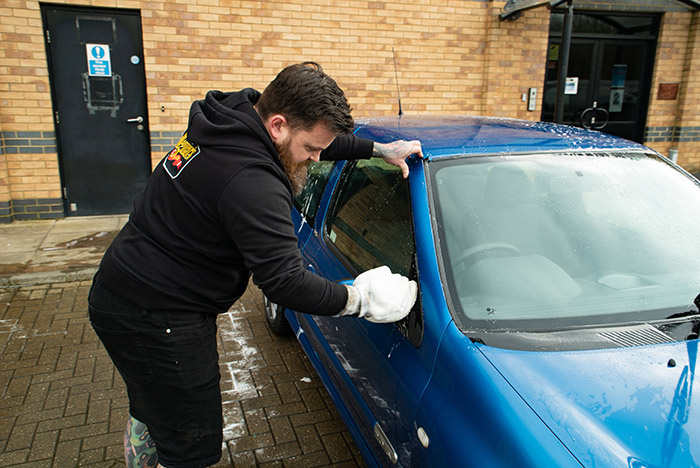
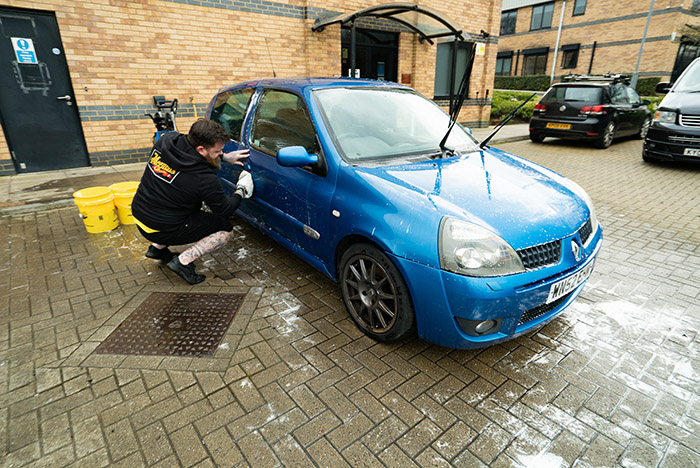
1. Start With Your Roof

There is a specific order in which you ideally want to wash your car for the best results. You always want to start at the top and then work your way down. There’s a very simple reason for this.
The top of your car will almost always be the cleanest part as it’s exposed to the least amount of road dirt and grime. Starting from the top means that your wash mitt stays cleaner for longer. It also means you’re not dragging loads of dirt over the bodywork from the dirtier sections up to the cleaner sections.
2. Wash Your Car In Sections
Always work in sections; never try to clean too much of your car at once. For example, if you’ve got a small coupé, go ahead and do the roof in one go. However, if you’ve got an estate or an SUV, break it up into sections. This way, you’re not going to be running out of shampoo on your mitt. You also won’t be letting your wash mitt get too dirty as you go.
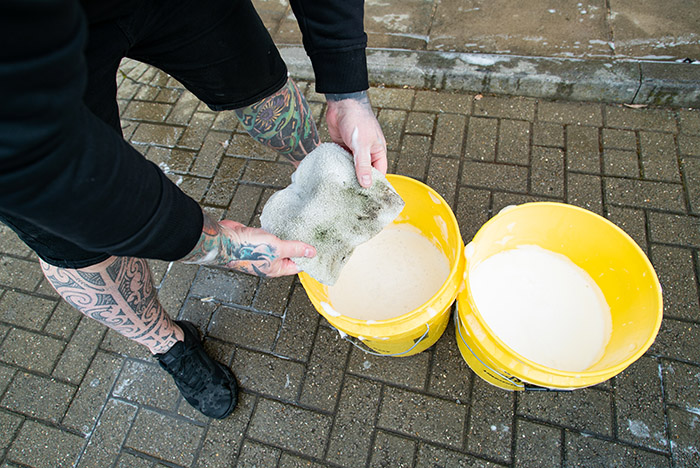
3. Leave The Dirtiest Sections Until Last
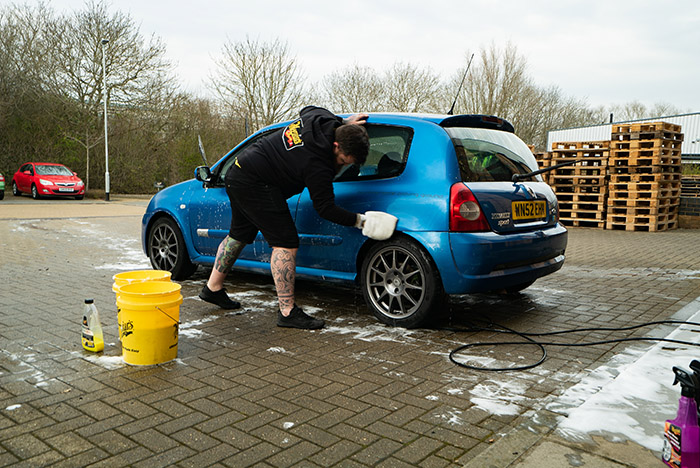
You want to leave the dirtiest sections until last, those being the front and rear of the car, and especially the lower portions of both areas, and the lower portions of the sides and the sills. These really should be the last areas of the car that your wash mitt should be touching, and the exhaust pipe should be the very last thing you wash as it’s the dirtiest of all.

If you’re particularly dedicated to the art of washing, you might even consider using multiple wash mitts for each washing session. This might sound like overkill, but there is method to what some might perceive as madness. You use one mitt for the majority of the washing process, then switch to another mitt that you use specifically for the lower portions of the car. This means that your main mitt never has to deal with these lower portions, and will stay cleaner for longer after repeated washing sessions, while your dirtier wash mitt will never be used for cleaning the upper sections of the car. Multiple mitts mean you can safely clean all areas of your car, minimizing the chances of causing damage to your paint.
4. Time To Rinse
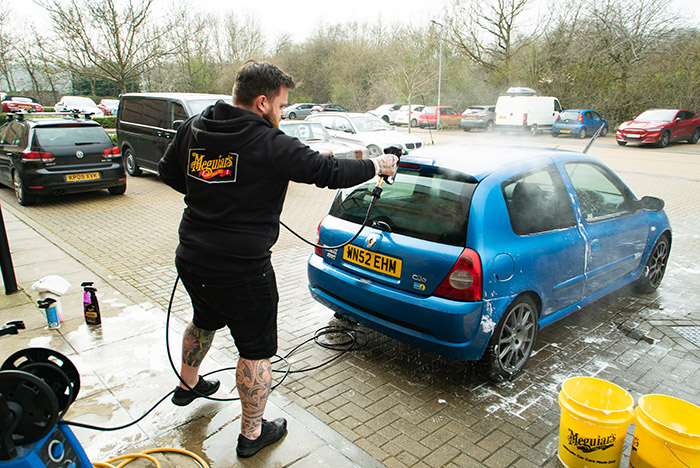
Once your car is looking clean and shiny, it’s time for a proper rinse – make sure you remove all the shampoo and any possible residual dirt from the bodywork and be thorough, get into all those nooks and crannies and the arches. There’s no time to stand around admiring your handiwork, though, as you’re ready to move on to the next stage in the detailing process.
Have you checked out our other washing guides?
Words: Elizabeth de Latour & Matt Bell.


