

Looking for a new exhaust for your pride and joy? We’ve got you covered with our comprehensive guide on how to fit a car exhaust.
Here at Fast Car we’ve fitted many a car exhaust in the workshop over the years. The truth is they’re all different, not just in their specific application but in the way they fit. That said, installing a performance exhaust is one of the all-time great basic car tuning upgrades. So, we’ve decided to tell you everything you ever wanted to know about getting one on your car. You lucky, lucky people.
Aftermarket cat- or DPF-back exhaust systems are the most commonly available because, by not replacing the emissions control device on your vehicle, you’ll not only keep the cost down but (assuming your shiny new exhaust isn’t silly-loud) it’ll also be road-legal no matter where you are in the world. That part counts for a lot, we think you’ll agree.
So, that’s exactly what we’re going to concentrate here, cat-and DPF-back exhausts. Here’s how to fit a car exhaust.
Step 1: Choose the right car exhaust
Will it fit?
Not every exhaust will fit every car. It may seem like an obvious one, but it’s easy to fail at the first hurdle. Exhaust upgrades are not only specific to the marque, model and engine spec of the vehicle, but often to the optional extras and trim-level, too. Plenty of modern cars are offered with or without electronically controlled flaps to adjust noise levels, or simply different bumper trims, and this will likely affect the exhaust you choose. Some cars have even been known to change options such as a spare wheel and where the battery is mounted on the same model, which can affect how the manufacturer routes the exhaust system.
To make it even more confusing, if your car is already running a sports cat, decat or DPF replacement, it may not be compatible with every aftermarket exhaust out there. The same goes for those sporting an aftermarket rear bumper or diffuser, an engine transplant, a different turbocharger, or an aftermarket exhaust that you’d simply prefer to change. Granted you’ll probably already know in these cases but just bear in mind that, if you buy a car that’s already modified, you might not be able to simply order an upgrade for the standard version of that car.
System vs backbox exhaust?
The second consideration is if you’re looking for performance or just the look? There’s absolutely nothing wrong fitting a new backbox without the rest of the system. It’s true that you’ll get less of a performance hike, but that’s not always the priority anyway. Where a backbox may differ to a cat back system is in the fitting, very often back boxes aren’t straight bolt-on items, they may require the cutting of the original system to make them fit. We’ll get on to that and the different types of fittings shortly….
Noise levels
On the flip side, it may well be performance you’re looking for and that’s where noise levels tend to come into play. It’s not just important on the road – chiefly for keeping the police off your back – but an excessively loud exhaust may also stop you hitting the circuit. Most racetracks have a strict noise level they have to adhere to, and it’s very likely that officials will test your car on any track day.
Many performance exhausts for the road are much louder than what certain tracks allow, even when they’re specifically denoted as ‘race’, ‘race-only’ or ‘off-road’ exhausts. All this really means is that they may not be road legal, so always keep that in mind if you’re heading to a proper circuit. We’ve seen many cases where a performance exhaust is fitted, but the car also requires a bolt-on silencer to keep the noise down on track.
Most of all look for a reputable manufacturer because, more often than not, they’ve already done all the research for you. And remember that just because you can buy a particular exhaust, doesn’t make it street legal where you happen to live.
Other car exhaust options
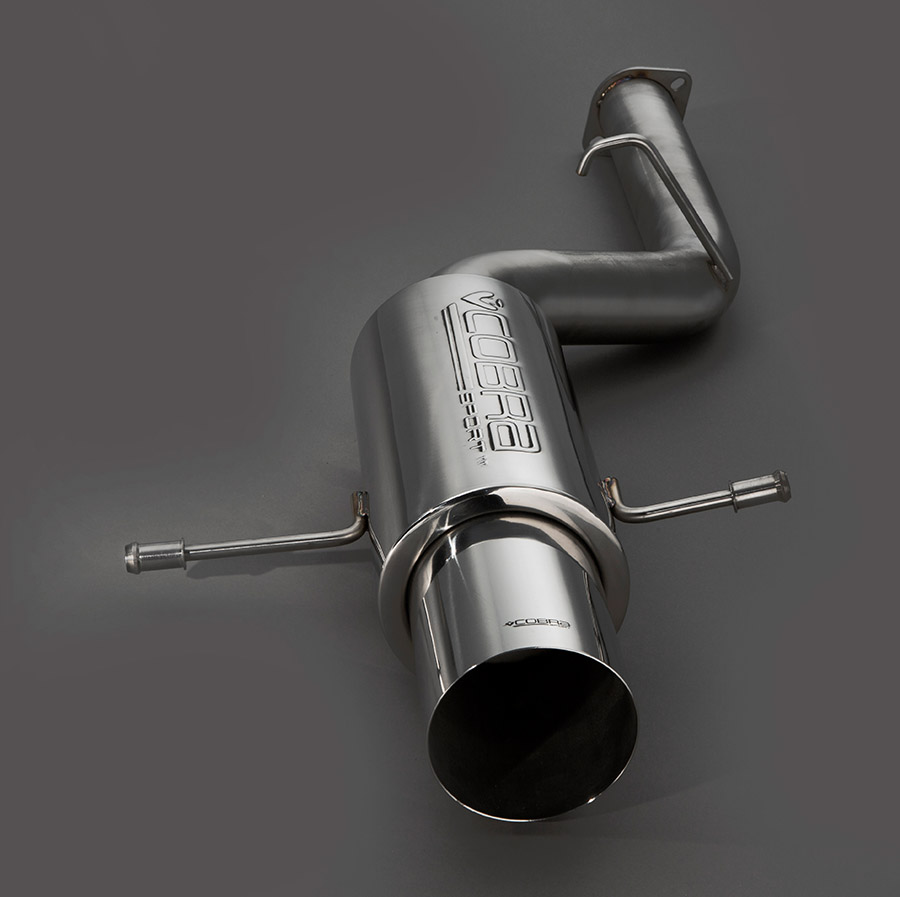
So, some aftermarket exhausts may be noisier than others, but it’s not just that, there’s often a whole load of other options, too. Different tailpipes is perhaps the most common, nowadays you can get your hands on everything from black, titanium or burnt tips, to carbon fiber and ceramic tips. In many cases these are simply clamp-on items that you can adjust to suit your particular needs. For other applications, and perhaps most commonly, you might see non-adjustable tailpipes simply welded onto the backbox.
Then there’s often a choice of what kind of tips to fit to your back box – are you after twin exit, dual exit, a 5-inch tip, slash cut, outward rolled, or any number of other options? We don’t need to tell you that tastes and modified trends have changed quite a lot of the years so just because something is still on sale, doesn’t mean that you should necessarily fit it to your car.
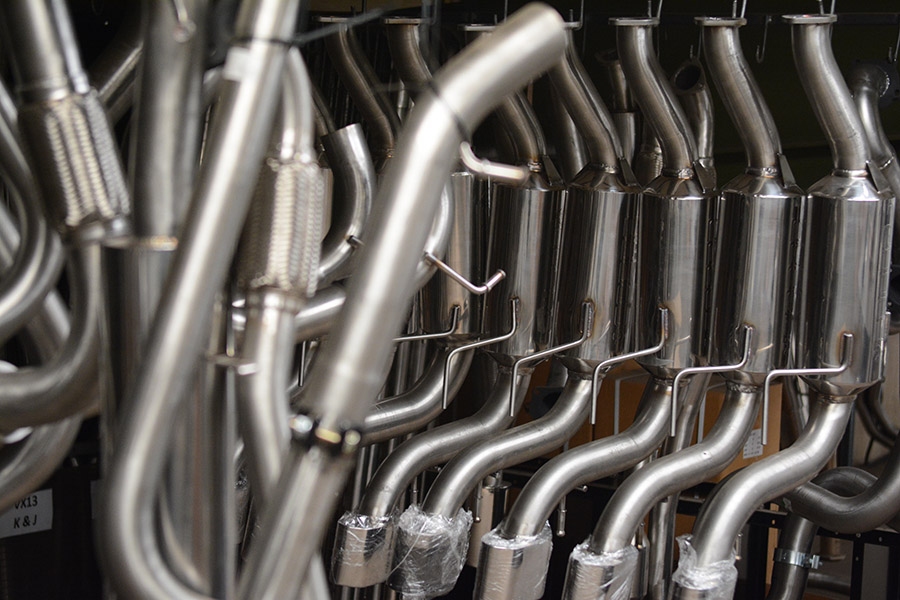
Finally, most aftermarket exhaust manufacturers are sensible enough to may make one or two exhaust options for your car. These could be a ‘road legal’ option and something a bit more fruity. But, there are a few out there – most commonly in the Japanese car market – which seem to make a mind boggling array of different exhausts for exactly the same car. It’s easy to get confused here, especially by all the silly names they seem to slap on ‘em, so it pays to do your research. If you need a little help, check out our guide to the best car exhausts brands.
Step 2: Prep for fitting the new car exhaust
This is the bit where most will say you simply bolt your shiny new exhaust on and pat yourself on the back for a job well done. But, being the professionals we are, we can tell you that there are a few other things you need to know before you start… and not just the usual health and safety stuff (like making sure everything is secure on a ramp or axle stands, and that the exhaust has cooled enough for you to touch without getting injured). How your new exhaust will actually fit together in comparison to the stock item is also important. Put simply, not every bolt-on upgrade is a bolt on upgrade.
Flange joints
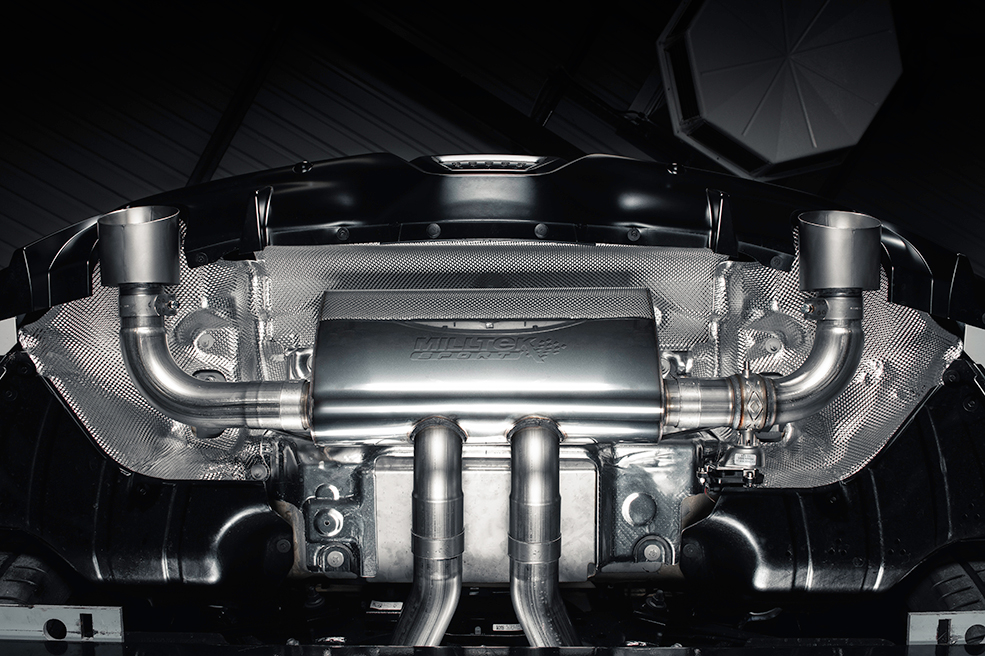
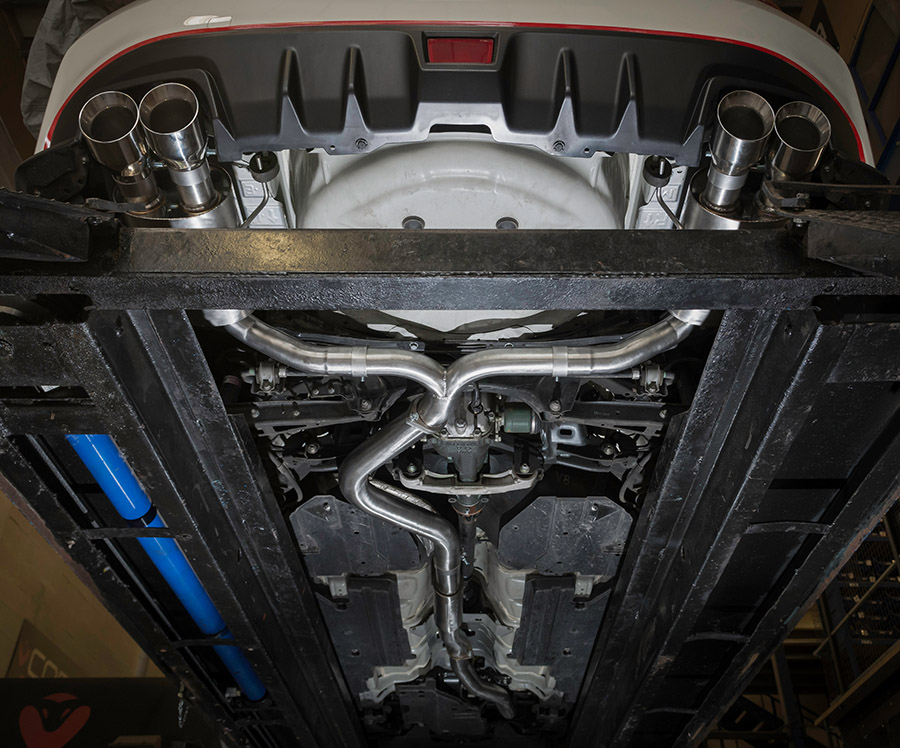
The vast majority of standard exhausts bolt onto the cat/DPF end using a flanged and gasketed joint. In V configuration engines this can also be a V pipe which runs from multiple cats and cuts down to a single outlet. The rest of the system will then be modular, bolting together using several flanges and gaskets all the way to the back. The whole system will hang on vibration isolators (otherwise known as the exhaust rubbers) which makes sure it has a little give and stops it rattling out your fillings on idle. In most cases you’ll have one or two mid pipes and then the back box, sometimes with more modular pipes from the backbox to the tips.
This kind of setup allows quick and easy replacement of any given part of the system, should it rust through or become damaged. Which is clearly more cost effective than replacing the whole lot in one go.
Sleeve joints and clamps
What’s important here is that an aftermarket system may not necessarily use flanged joints all the way to the backbox, nowadays sleeved joints and clamps tend to be even more common. This is where a portion of the pipe is enlarged in diameter (and few a few inches along its length) to enable the next pipe to slot in place and be clamped up tight. This kind of setup ensures that it’s far easier to fine tune and adjust later, should you need to slightly twist a pipe or tailpipe trim to get the fitment spot on.
On some systems and stand-alone backbox upgrades a sleeved joint may be the only fitment option, meaning that you need to cut the original system along the center pipe, close to the cat or backbox. This, as you can imagine, makes fitting more involved than with a system that simply bolts in place. You’ll need to measure and cut accurately to ensure proper fitment. That said, rather than having to remove the whole lot and break out the angle grinder, exhaust pipe cutters are relatively cheap, and make a much neater job. You can even leave the pipe on the car as you cut.

Nuts and bolts
For aftermarket exhausts that use common 2- or 3-bolt flanges for fitment, these may or may not need gaskets depending on the application, but what’s just as important is the bolts that hold them all together. Most aftermarket exhausts will come with all the necessary bolts to get the job done, but the cat/DPF end can often complicate things.
Many emission control devices use captive studs to mount the standard exhaust. These are simply bolts that are fixed in place and don’t spin, so you only have to tighten on a set of nuts to nip it all up. This also means that you don’t have to push a standard bolt through the holes in two flanges and use a nut to tighten them together.
Now while this is great in theory, if the nuts on these captive studs have rusted on over time, or the bolts themselves are too short to pass through the flange on the new exhaust, it can throw up a problem or two. In these cases it will be necessary to remove the captive bolts so you can use standard ‘pass-through’ bolts instead. If you’re lucky you’ll be able to heat them up and hammer them out. But, if you’re not, it may require a whole lot of cutting and drilling.
V-band clamps
Finally, a few cars use V-band clamps as standard. These are kind of a cross between a sleeve joint and a flange. Typically, it involves two flared lengths of pipe joining together with a heavy-duty V-shaped clamp, utilizing a specially shaped gasket in between. These are great for minor adjustment should you need to twist your pipe later. They’re not the most common, but you’ll find them on a few BMWs and a few VAG cars.
Visual inspection
Before you start your install, we’d always recommend laying your new system out on floor to compare it with the standard system. This allows you to not only check how the new one fits together (along with the position of the hangers that should slot into the standard rubbers) but helps you ascertain if it’s actually going to fit. Most aftermarket systems may be a bit larger in diameter, but they will closely follow the bends and route of the original. If something looks wrong, chances are that it is. So, don’t do any cutting until you’re certain.
Step 3: Fit the car exhaust
And all this brings us to the main event – getting your new exhaust on there. With the knowledge you now have this should be extremely straightforward, but there are a few top tips that are worth knowing…
Support it
First make sure you have enough support. A big lump of steel landing on your head is what’s known in the business as a bad day. Always use a jack, axle stands or transmission jack to take the weight off while your work.
Use lube
Penetrating spray, such as WD40, will always help you get those nuts off. Spray them up and leave it to work its magic for 15-miniutes or so before attempting removal. It’s also great for lubricating any rubbers to help you slip them off the standard exhaust hangers. If you need a little force with those a long pry-bar will be your best friend.
Clean your nuts
Rusty nuts and bolts are no good to anyone, they’re also harder to remove without shearing them off. So, when at all possible, always hit ‘em with a wire brush to clean up any protruding threads. This will make removal so much easier.

Use an impact gun
Rather than the sheer torque you’ll use when hanging off those bolts with long bar, an impact gun uses a hammer action to loosen them while cutting down on the chance of shearing. If you have one, and it’s possible to get it in there, use that rather than a hand ratchet or breaker bar.
Be cautious
Don’t forget that the cat/DPF or downpipe connects to the manifold or turbocharger. Make sure its adequately supported and check that it’s not going to break off at the other end if you go hammering away at it.
Back to front, front to back
This is usually the easiest way to remove a standard exhaust and fit a new one. Work from the back to the front during removal and start bolting on your new system at the front of the car, working to the rear. During your fitting don’t tighten everything up fully as you go, instead get it all there loosely and nip it up right at the end.
Use assembly compound
It may be a little frowned upon, and you rarely see any in those flashy pictures from exhaust manufacturers, but this stuff does help eliminate the chance of any leaks. In most cases even the pros will slap on a little, just in case.
Double check the car exhaust and adjust
Once you nipped everything up reasonably tight, check how the exhaust fits and make any adjustments. Is it banging on the chassis? Are the tail pipes straight? Is it hanging down more than it should? If everything looks good then well done, you’re finished… well, almost.

Step 4: Optimize the car exhaust with a remap
On most cars at least, it’s not the end of the world if you don’t, but about now it does pay to think about optimizing the system with a remap. All this does is help make the most of the free-flowing ability of your exhaust, along with any other bolt on tuning mods (such as a performance air filter) that you’ve chosen to install along the way. Adjusting the ecu software will help to optimize the power output, significantly upping the gains you’ll normally get from stand-alone fitment. You don’t have to do it of course, but we would.
That said, on some cars which leave the factory with a spicy tune – particularly those Japanese super-sedans with a penchant for the world’s rally stages – ‘mapping-in’ your exhaust could be vital. We’ve even heard of some cars backing off the power because the sensors tell the ECU that something is wrong, just because the owner has fitted an aftermarket exhaust. And, let’s face it, we’re not in the business of tuning to lose power, right? For more information on mapping-in yours check out our ECU remapping guide.


