

Aftermarket wheels can make a modified car build. We guide you through how to fit alloy wheels to your pride and joy the correct way.
Wheels, as you well know, make the FC world go round. So much so that everyone’s got sweet hoops in the modified car universe; a car’s just not modified without them, right? It’s a bit like lowering in that respect.
The thing is, many of you, along with a few of our own team, may think that we’re taking the mick with a feature on how to fit your new alloy wheels. We totally get that too, but you’ll be amazed how many, including some professional mechanics that are used to the standard stuff, don’t follow the correct procedure to the letter. To be honest, I’m not adverse to hoofing up wheels with a big bar myself, but that young padawans is just not the way of the force.
The short of it is that this is perhaps the most important DIY Day Job of them all – pretty much anyone can pop on a set of wheels; it’s just doing it the right way that’s the trick.
So, here we go then, the correct way to fit your alloy wheels.
What you need to fit alloy wheels
Fitting Time: A few minutes for each corner, although always take your time!
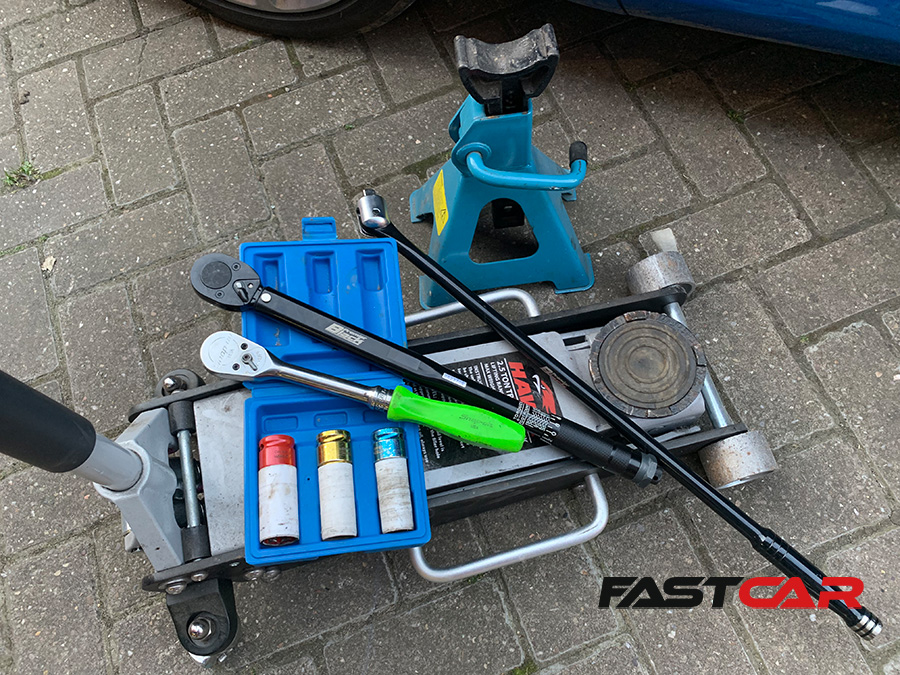
Specialist Tools: Getting the right tools for the job is as essential for safety as getting the right wheels and hardware. You’ll need a jack, axle stands, some deep wheel sockets and a torque wrench.
Being part of the ‘car scene’ means we all know that no matter the design, price or size, we order wheels for our particular make and model. In the big wide world, though, it’s always amusing how many people think that any wheel will fit any motor. “Why can’t I just stick those Mazda wheels on my BMW to get me home?” Spend enough time around non-petrolheads and you’ll hear this a lot.
Of course, us educated car nuts know the answer: it’s that wheels are PCD-specific, vehicle hubs are PCD-specific, and they must match or never the two shall meet. We’ve got a guide to allow wheels right here so you can learn more.
The point is, whether you bought them new from a dealer, or found them on eBay, you’ll already have your new wheels ordered in the correct bolt pattern, size and offset. You’ve already done your research there, and you’ll likely have a fitting kit too (we’ll get to that). So, having done the hard bit, you just need to get them on…
How to fit alloy wheels
1. Loosen the nuts
First things first: with the car on the level ground you’ll be using for jacking, you’ll want to loosen your nuts/bolts. Don’t worry if you forget, we’ve all done it a million times before, but it does mean that you’ll have to lower the car back down so the wheel is in contact with the ground, otherwise you run the risk of pulling it off the jack. Don’t forget that for some cars you may need a specialist tool to get the center caps off first (so have a fish around in your boot for that).
Now, you’re not looking to take the nuts off completely, or even have them very loose. The idea is simply to… er, crack them off, enough so they still hold the wheel on, but not leave them so tight that they spin the wheel when you’re trying to remove it with the car jacked up. We’d recommend a wheel socket and a long breaker bar to do this (and you’ll also need the locking wheel nut key if you have one fitted).
You’ll have a standard wheel brace in the car, of course, but chances are this won’t be long enough to avoid putting in a load of effort (or to risk having to stand on it to loosen the nut). To avoid damage to your wheels, it’s also worth considering the type of breaker bar and length of the socket you use. There are those that have a flat head (like a general mechanic’s bar) and others that are specially designed for wheels with a swallow neck. You may find the latter essential for dished or concave rims. Basically, you want to make sure that at no point does the bar come in contact with the edge of the rim.
Wheel sockets
As for sockets, you’re always best off with specially-designed wheel sockets. These come in all the common sizes and feature plastic covers to avoid damaging the lug holes in your wheels.
Once you’ve slightly loosened all your nuts, it’s time for the next step.
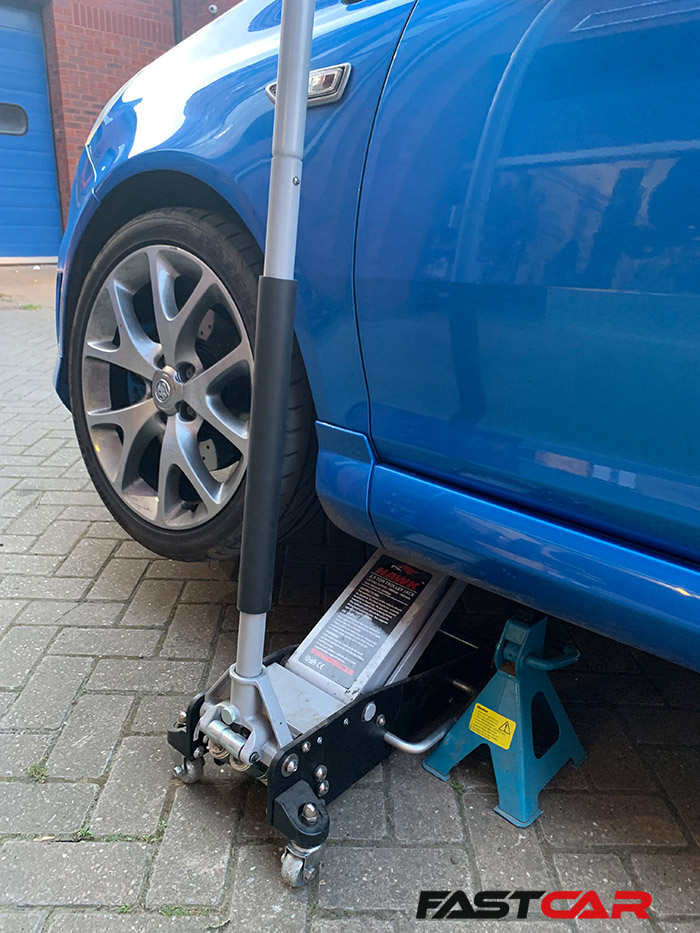
2. Jack the car up
You’ll need the car up in the air to get the wheel off, that’s pretty obvious. But the thing is, this is the second most common bit that people mess up and it’s before they’ve even started the job!
Yes, we know that every car comes with a jack, but it’s not the one to use unless it’s an emergency. The truth is that these ‘roadside’ jacks are just that: designed to be lightweight and to get you out of trouble while you’re dodging lorries changing a flat on the hard shoulder. Sure, they’ll lift your car, but they’re not the most stable, and although some manufacturers produce better items than others, we’ve heard of (and seen) countless situations where cars have toppled off. That’s bad news on any motor, but even more so with modified cars that may have kits and posh chassis mods to consider. In short, beg, borrow or buy a proper trolley jack and leave the other one in the boot.
Of course, there’s also the fact that many modified cars run low, so you’ll also need the right type of trolley jack to get under there. The majority of jacks are designed for standard cars, so you may find yourself needing a special low-rise item. If you’re running with an extreme static drop that’s so epic it makes cat’s eyes pucker up with fear, you may need a set of race ramps just to get the car high enough to get any jack in place!
Jack adaptor
One last thing to consider is that some cars, particularly BMWs and MINIs, need a jack adaptor. This is because they have a special slot incorporated in the jacking points making it a bit fruity for a normal jack that won’t clip in. Safety first and all that.
Okay, with that said, now you can actually start. But don’t just whack your jack under the nearest sill and pump away, instead have a look in the manual to find the correct jacking points. Admittedly, most cars can lift on the sills, but always check to avoid causing damage. Once you’re up too, always use an axle stand under a solid part of the chassis, just in case the jack malfunctions or the car topples. Axle stands save lives, it’s that simple, so no excuses.
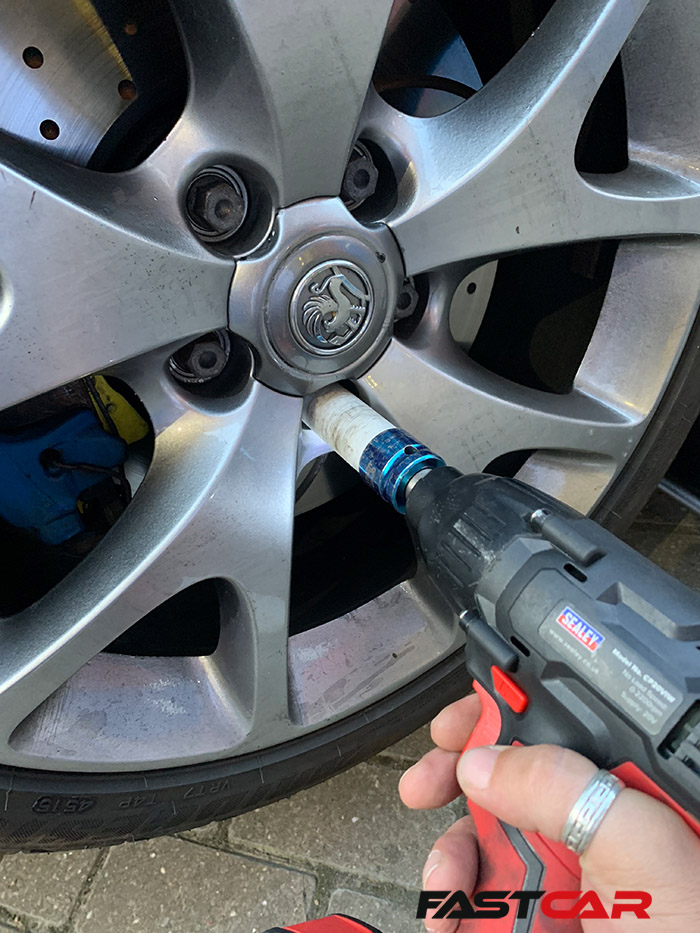
3. Removing the old alloy wheels
Once you’re up, all is secure, and there’s no possibility of dropping the car on your nut, you can get the old wheel off.
For this, it’s a case of using a shorter bar/ratchet and socket combo, an impact wrench or your standard wheel brace to unwind and remove the hardware. As we all know, some cars use bolts, others use nuts, and this can make all the difference in your approach. Generally speaking, you don’t want the wheel falling off prematurely (and you REALLY don’t want it landing face down on your drive), and this is more likely with bolts. It’s always best to position yourself directly in front of the wheel (just in case you need to catch) and leave the nut/bolt at the top until last.
If the wheel still doesn’t slide off the hub when all the fixings are out, it’s probably because heat and grime have kind of welded it on. In that case, you’ll need to give the tire a careful whack and a shake (top, bottom, side to side) a few times to free it up.
With the old one off and ready for storage, it may be advisable to keep these nuts or bolts (just enough for one wheel). Pop them in your boot with your roadside jack. If you ever get a flat and the fittings on your new wheels don’t fit your spare, you’ll definitely thank me for it.
4. Fixings
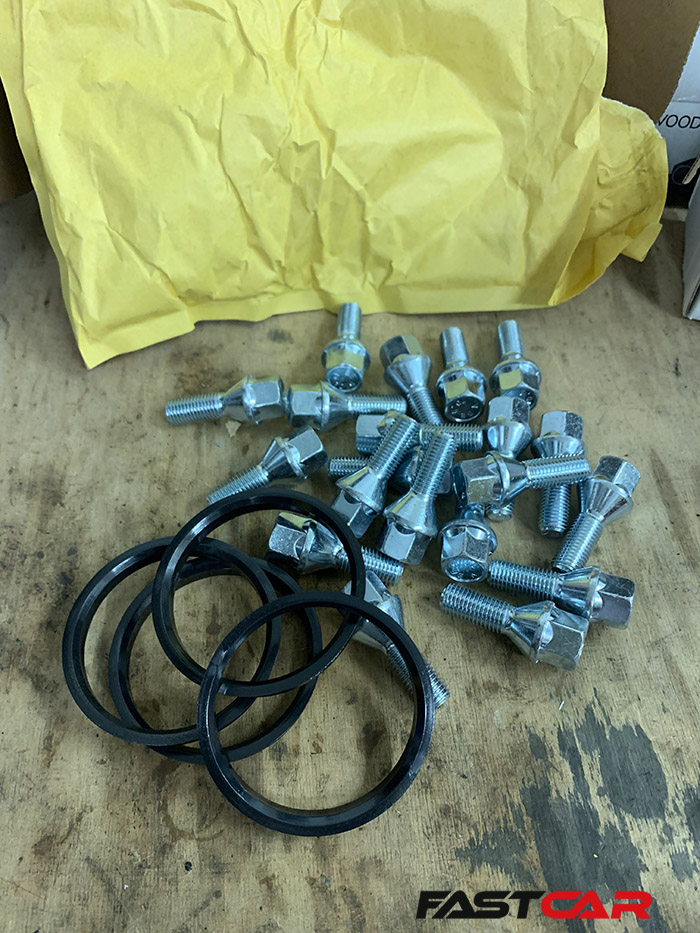
Most aftermarket wheels will come with a fitting kit and using this is an essential part of getting them on safely. So, if you’re buying rare second-handers or even OEM+ options, and you haven’t got a specific kit, this bit is essential knowledge.
Aftermarket fitting kits generally contain two things – the fixings and some spigot rings. The fixings will be nuts or bolts in the specific thread to match your car and, crucially, will have a ‘seat profile’ identical to PCD-holes in the wheels you’re bolting on.
This seat profile is important because it’s the bit that holds the wheels to the car, and while most aftermarket wheels employ nuts or bolts with a 60-deg taper seat, that’s not always the case. Plenty of high-end hoops, and many standard alloys need to use their own type of fittings; these can be flat rounded, or have thick profiles designed to center wheels with massive lug holes. The likes of Audi, Subaru and Nissan are notorious for using these.
Some specialist tuners and wheel suppliers, such as the ones linked to particular car manufacturers (think Nismo for Nissan and Revo for VAG), will supply wheels designed to use the factory style-fittings, rather than tapered aftermarket nuts. So always know what you’re buying.
Some standard steel wheels use nuts that are too hard and sharp for alloys and, even though they have a similar taper seat, can cut right through the metal.
All these factors are the reasons why the nuts or bolts you just took off usually won’t be correct for your new wheels. It’s also something to look out for if you’re thinking of buying trendy aftermarket wheel nuts.
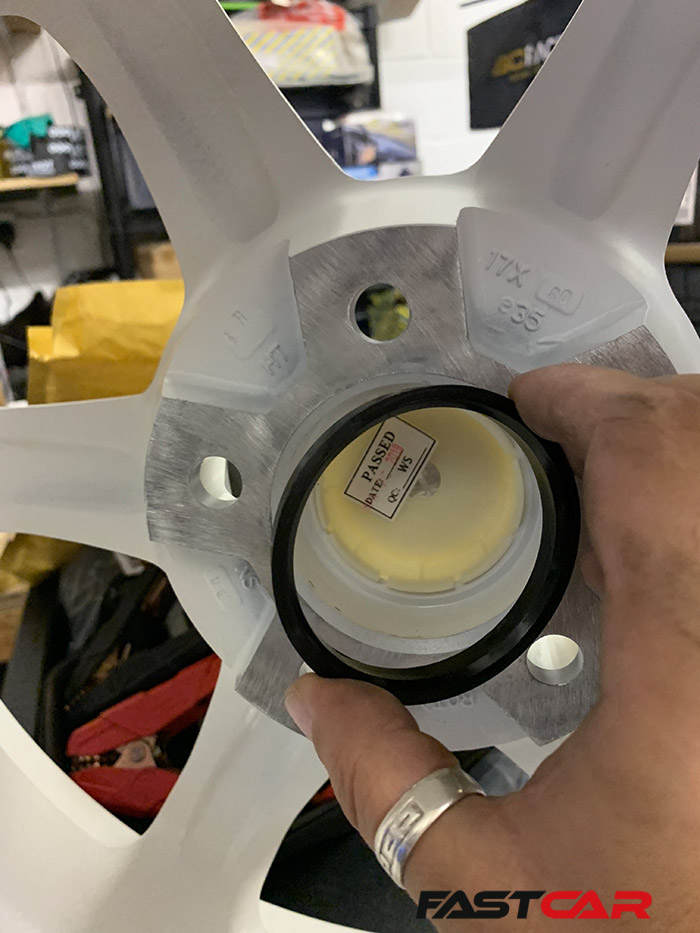
5. Spigot rings
The other thing you will usually (although not always) find in your fitting kit is a set of spigots. These (usually) plastic rings ensure that one wheel will ‘adapt down’ to the many different center bore sizes found on different cars that use the same PCD. These little items are more important than you may actually think too, because they are what make the wheel hub-centric. And by that we mean that the hub and center bore of the wheel take the weight of the car, rather than the studs or the bolts.
Aftermarket wheels only need one of these popped in the back if the vehicle center bore doesn’t match the wheel exactly. Some wheels will already fit perfectly on the car without a spigot because, through sheer luck, they’re made in the correct center bore, others (like forged wheels) may be custom machined to the correct size when they’re ordered. Standard wheels, of course, are designed specifically for that car anyway, so they won’t need an adaptor.
6. Fit the new alloy wheels
Once you are ready to slot your wheel on the hub, my top tip is to always give it a good waxing (or use a shield product) inside and out. This will help protect the bits you can’t normally get to from brake dust. Why not start as you mean to go on, eh?
Another top tip is to give the center bore in the wheel and the flange on the hub a light copper greasing to help stop the wheel seizing on. This is particularly useful for wheels that don’t need spigot rings, or ones that use metal items rather than plastic.
Next, you can slide the wheel on, either lining up the bolt holes as you go, or sliding them over the studs. I like to get the top fixing on first to hold the wheel, then the one opposite, and go on from there. The idea is to hand tighten your fixings to pull the wheel back squarely onto the hub. Be careful not to pinch the spigot (they can sometimes pop out and get wedged stopping you getting the mounting surface flat against the hub) or it’ll be wobbly wheel time!
I say hand tighten too, because you don’t really want to use an impact gun for this bit. Yes, we’ve all seen garages do it, but most are far too powerful for this. Just put them on tight, but don’t feel the need to hang off them – they’ve just got to hold the wheel on for the next step.
Oh, and if you’re using a locking wheel nut, don’t forget the key isn’t always attached to the socket you’re using, making it far too easy to slip and drop the bugger on your new hoops… there goes that polished lip!
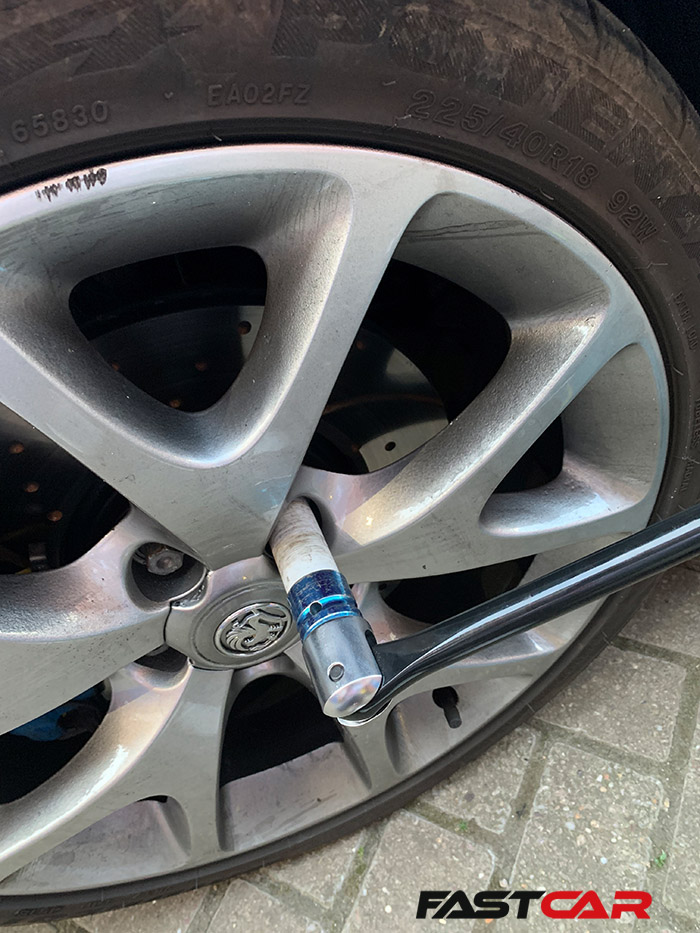
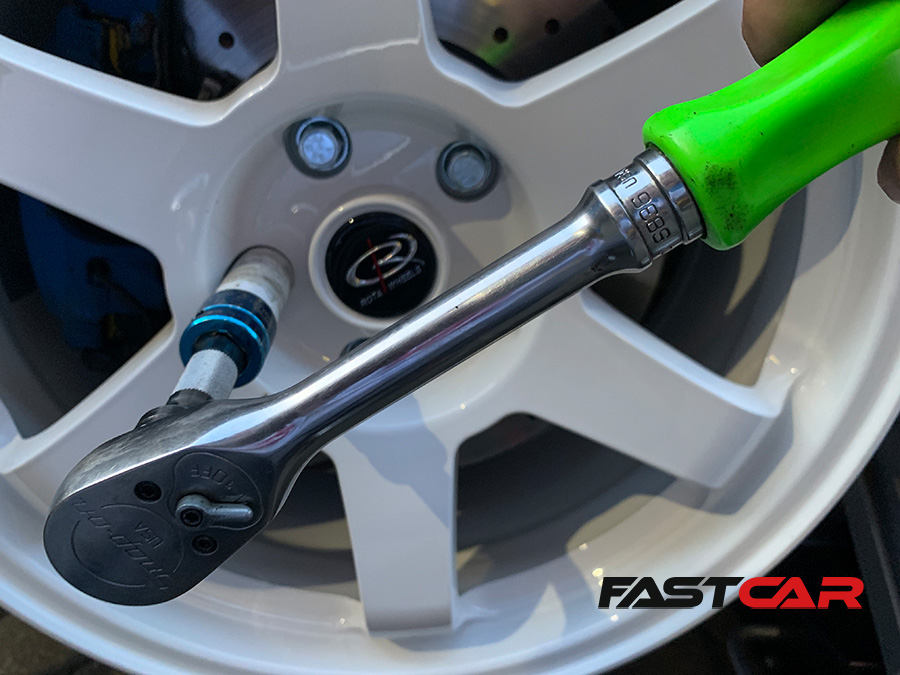
7. Correct Torquing
Now you can drop the car back on the ground and proceed with the most important part, and the number one most common thing that people ignore. I’m talking, of course, about correctly torquing the nuts/bolts.
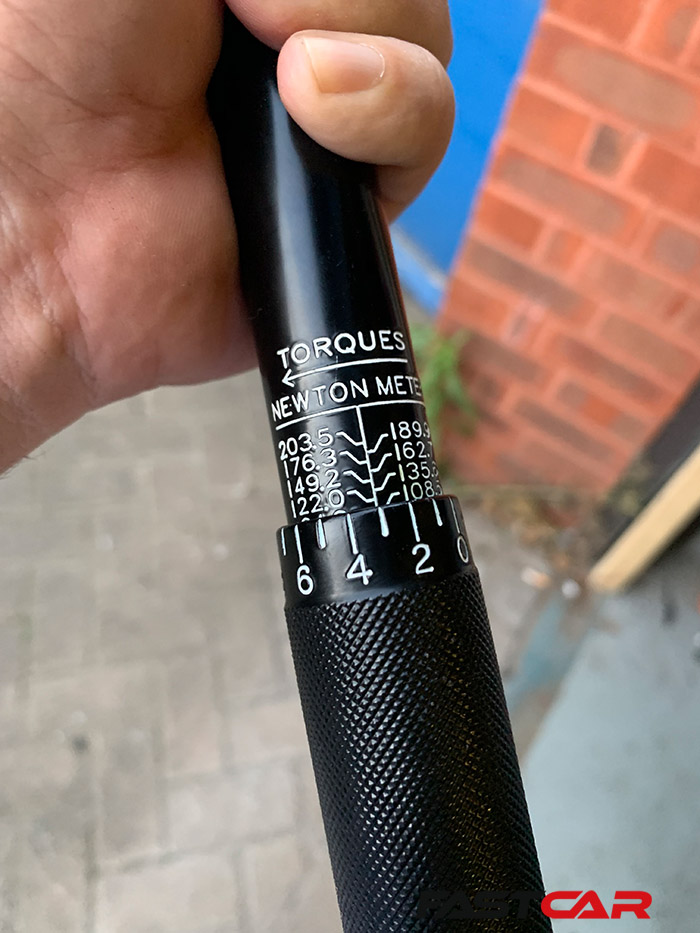
Now, there is a reason you should do this rather than use an impact gun or a 14-foot scaffold bar, and it’s simply that a stupid amount of torque can damage the threads on your hardware, rendering them useless under load. Over-tightening is common because, although your wheel nuts need to be tight, very often they are not as tight as you think. And, aside from the F1 pit crews that have posh windy guns set to a specific level, the only way of correctly measuring torque is with a torque wrench.
Usually wheels are torqued at around 100-120Nm, which isn’t actually that much when you consider that many guns can pull off nuts at over 400Nm. It differs for every manufacturer though, so you’ll have to look up your setting, and bear in mind that some lightweight alloy nuts use their own torque setting too. Next, you’ll need a hefty half-inch torque wrench that can actually get up to that figure – a small quarter-inch job that only goes up to 40Nm won’t be much good here.
When all that’s sorted, set your wrench to the right torque, tighten the nut (going opposite to opposite in sequence) until it clicks… and then leave it alone. Don’t be tempted to turn it just that little bit more!
Now, assuming nothing is rubbing that’s your lot. It’ll take you less time to do the job, than to read this feature on how to fit alloy wheels!
Relevant content:


