
Need to restore a set of scraped rims? No worries, this alloy wheel refurbishment guide has got you covered.
On a modified car, a fresh set of aftermarket wheels can often make or break the look of your car. Scraping those rims on the curb – bad times. Bagging a bargain set of rare wheels on a forum or well-known auction site – good times! Both have one thing in common though… pretty soon you’ll be looking for a refurb.
Well, as ever, here’s all the advice you’ll ever need. Don’t spend hard cash on getting your alloy wheels refurbished – our step-by-step guide will show you how easy it is to repair your rims at home. Be sure to check out our alloy wheels guide for information on PCD, offsets and more.
Alloy Wheel Refurbishment Guide
1. Remove The Tires
Deflate the tires and break the bead, (push the rubber away from the edge of the rim). Mask them up with paper and masking tape. It’s best to take the tires and valves off completely but not essential.
2. Scrub Them Clean
Firstly on our alloy wheel refurbishment guide, you need to give your wheels a good scrub. You need to get in there with a brush, wheel cleaner and plenty of soapy water. Any dirt, grease or brake dust has got to go! You’ll be surprised how long this first step will take but the prep is worth it.
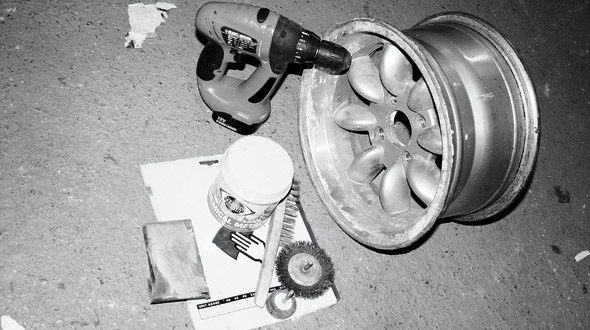
3. Get Scraping
Remove any loose or flaky paint with a wire brush and give the whole lot a good going over with some medium wet and dry or a Scotch Pad. Get into all those fiddly corners because ‘keying’ the entire surface will make the paint stick.
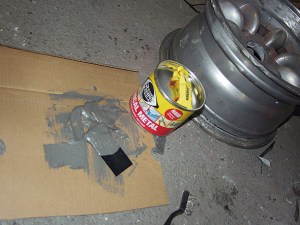
4. Smooth Out Any Dents
If you have any kerbing or small dents that won’t sand out it’s time to break out the Liquid Metal. Apply a liberal amount and sand it back when it’s dry. Get it smooth though, as jagged edges will mess with your rubber! Once that’s done, give the whole lot another clean – you’ll need to get rid of all the dust and grime from your fettling. It’s a good idea to give it a once-over with some panel wipe or degreaser too.
5. Apply Some Primer
For the best possible finish, layer each rim with a couple of coats of primer before the topcoat. Or to be quick, use Hammerite. Spray in a well-ventilated area and, to help the paint stick, make sure it’s nice and warm too.
7. Get Painting
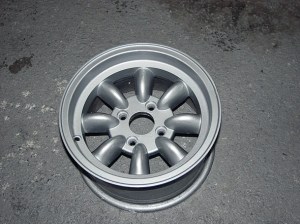
It’s now time for the final step of your alloy wheel refurbishment. You can unleash your inner artist and start spraying the rims with a topcoat of paint. Depending on the paint you use, it could be anything between a few hours to a couple of days before your wheels dry and harden enough to go back on the car. Usually, the longer you leave them alone the better. In the meantime though, it’s job done, so feel free to be proud of your handywork and generally strut around like you own the place.
Check out our in-depth guide to painting alloy wheels if you want more info on how to do so.


