
Fitting a new head unit has to be one of the all-time classic mods. So, if you want to have a go yourself, here’s how to install a car stereo…
The first question of course, is why would you want to install a new car stereo? Well, there’s the obvious answer, which is getting yourself the most up-to-date functionality. You may be after some of this new-fangled Apple CarPlay or Android Auto action, want to be able to use apps such as Waze or Spotify, or you may simply like to be able to plug in your phone, access your essential playlists and use hands-free calling. It’s certainly a good idea nowadays, right?
There can be some not-so obvious reasons, too. Sound quality is the most common: you might want to upgrade your car speakers in future and an aftermarket head unit will certainly kick out more power. In many cases, the desire for the ability to add an external amplifier and a subwoofer to your system trumps any other reason. Let’s not forget that without a sub reproducing the bass frequencies originally recorded in the studio, you’re just not getting the full picture.
Anyway, whatever your reason for a cheeky head unit upgrade, you can easily do the job at home with a few simple tools and one or two tricks of the trade. We believe in you!
So, check out our DIY guide on how to install a car stereo, and what to look out for along the way…
Step 1: Can you actually fit a head unit in your car?
Before anything else, you’ll check that it’s possible to fit an aftermarket stereo into your particular car. Of course, we’re all well aware that you can make just about anything work if you don’t mind building custom dashboards. But, for the most part, a successful DIY swap comes down to just a few considerations…
Size
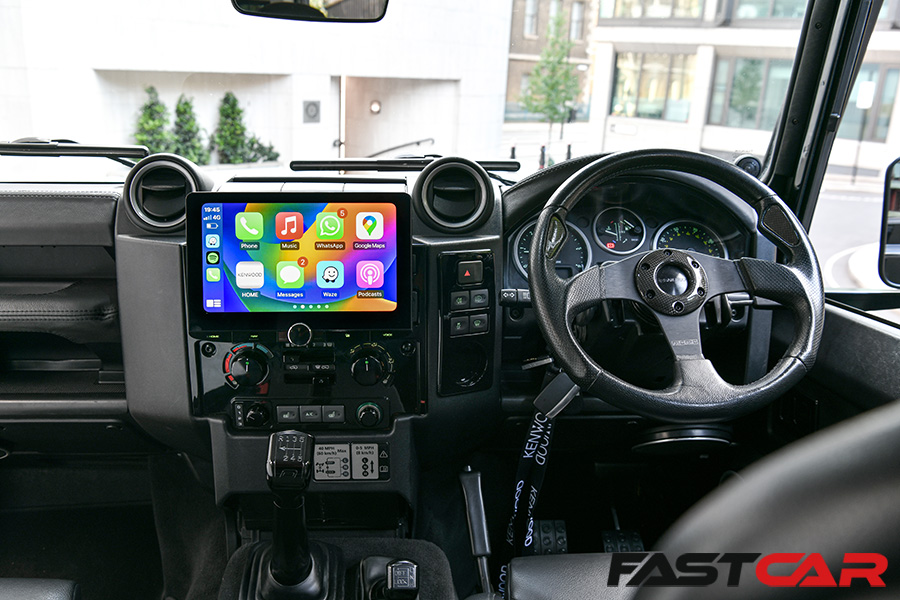
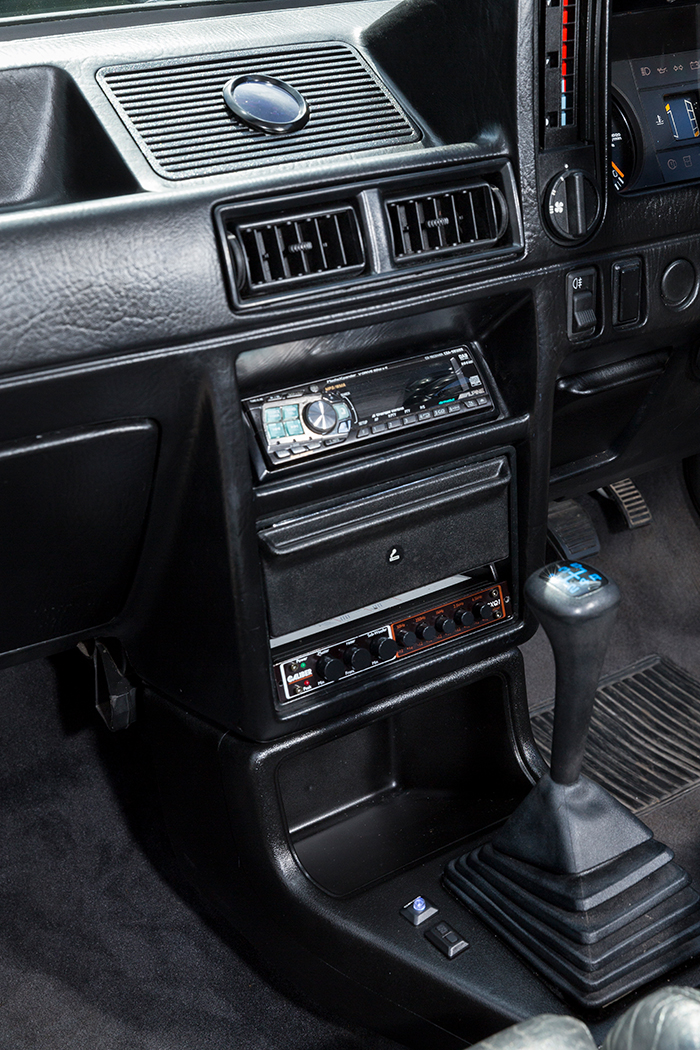
Discounting vehicle-specific head units (there’s quite a few on the market shaped to fit directly into VAG cars, Vauxhalls and Fords), aftermarket head units are universal items and available in two standardized sizes. There’s the 8x15cm Single DIN sized head units that we all know and love, along with Double DIN screens which are, quite predictably, twice the size. For a start, these larger units may not fit in all vehicles, simply because of the room that’s available in the dash.
There’s also the fact that it’s unlikely that any given aftermarket head unit will fit neatly without some sort of facia adaptor. Unlike many older cars, which often come with DIN or Double DIN size head units as standard for an easy swap, most cars since the ‘90s have head units that are built-in, or more specifically an integral part of the dashboard design. So, you’ll probably end up needing a bit of plastic to fill in the gaps.
‘Conversion’ adaptors are more advanced options which (providing there’s enough room in the dashboard) can convert a DIN (ish) size stereo hole into a Double DIN by relocating standard switches and buttons. These are particularly popular for noughties BMWs, where they move the climate control and a whole load of other stuff to enable the fitment of a big screen Double DIN. In short – check you’ve got the right hardware for your car.
Car Stereo Wiring
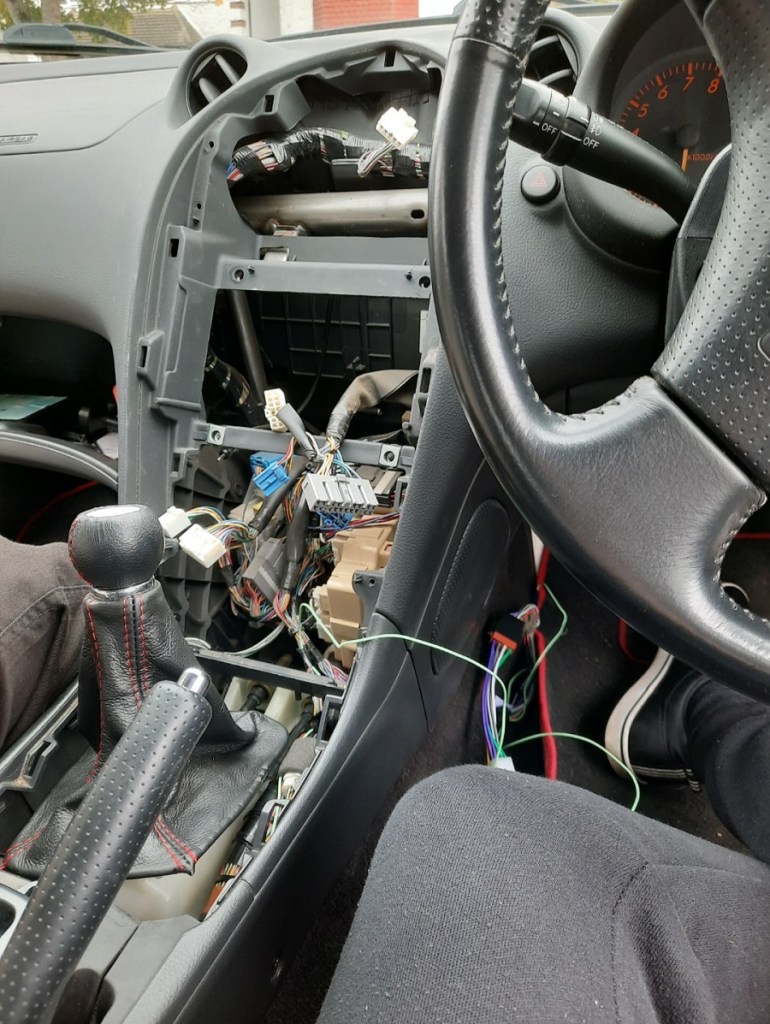
Aside from the physical fitment, you’ve got to be able to connect your new head unit up, right? That’s a given. Luckily, all aftermarket head units have come with standardized wiring for the past 30 years or so. You’ll find that any new head unit will have a female ISO (or more specifically 1995 ISO10487) plug in the back, which is basically two 8-pin connectors with one designed for the power circuit and one for the speaker outputs.
Developed by the International Organization for Standardization (hence ‘ISO’, get it?), what these do is ensure that the positions for each wire is exactly the same for every head unit. Before ISO came along all aftermarket head units had to be ‘hard wired’ to the car harness, requiring plenty of cutting and soldering of wires, not to mention finding the correct wires in a whole mountain of electrical spaghetti to be mated together. Not the easiest DIY job ever conceived.
Car Stereo Harness Adaptors
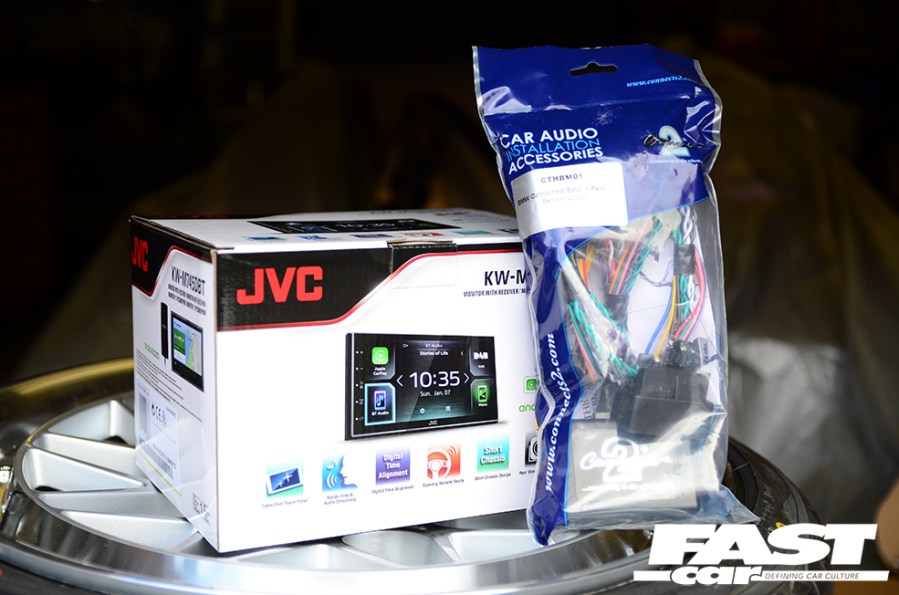
So, that’s the head unit end sorted, but unfortunately not all cars come with standard wiring that can be slotted straight into a female ISO plug. So, this is where finding the correct harness adaptor for your vehicle comes in to ensure you can install the car stereo.
The purpose of a harness adaptor is simple – to convert the standard stereo connector plug at the vehicle end (whether that’s ISO, Quadlock or any other type of connector) into one that lines up with the standardized ISO plug on the head unit. This way you know that all the wires on the car are connected to their corresponding wires on the new head unit. Clever, eh?
Again, there’s loads of these available for all popular cars, and many include special electronic modules that allow you to keep your audio controls on the steering wheel, along with standard clocks and other displays.
The short of it of course, is that you’ll be needing one of these, too. So, always check that a compatible harness is available for your car before you shell out on a new head unit.
Integration
An ISO harness that allows the steering wheel controls to work is a form of integration for sure, but the final consideration takes this even further and solely depends on your particular car. It all comes down to a simple question; will your new head unit integrate nicely with all the other vehicle features?
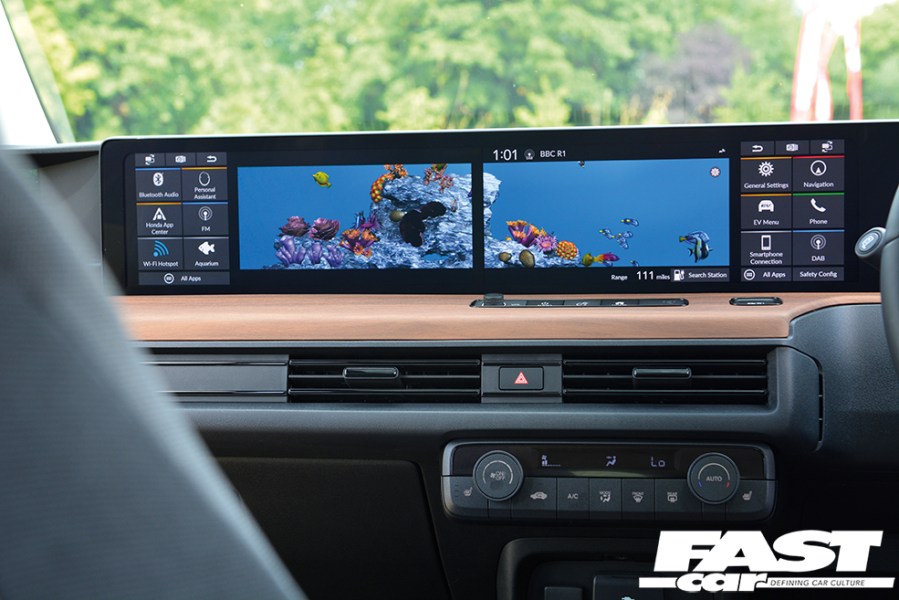
Plenty of the of the newest cars out there already have all the features you need, all the good stuff like CarPlay, a decent amplified system (with a woofer or two) and, perhaps most importantly, loads of screens controlling other vehicle settings such as heaters, suspension and all sorts of other bits and pieces. It’s pretty obvious that you don’t want to be turning all your extra screens off, or not be able to use all the vehicle features. We’re trying to enhance your modified car here, not make it worse.
Let’s say you have a Tesla Model X, a Honda E, C63 AMG or any number of modern or luxury vehicles which tend to look like they have a store’s TV section hanging out of the dash, it’s unlikely you’ll be looking to throw a little Double DIN screen into the mix, too.
And, although there are some high end head units out there that are specifically designed to compensate for extra vehicle features by offering interfaces for climate control and drive settings, the vast majority of aftermarket head units don’t. So, make sure you choose wisely.
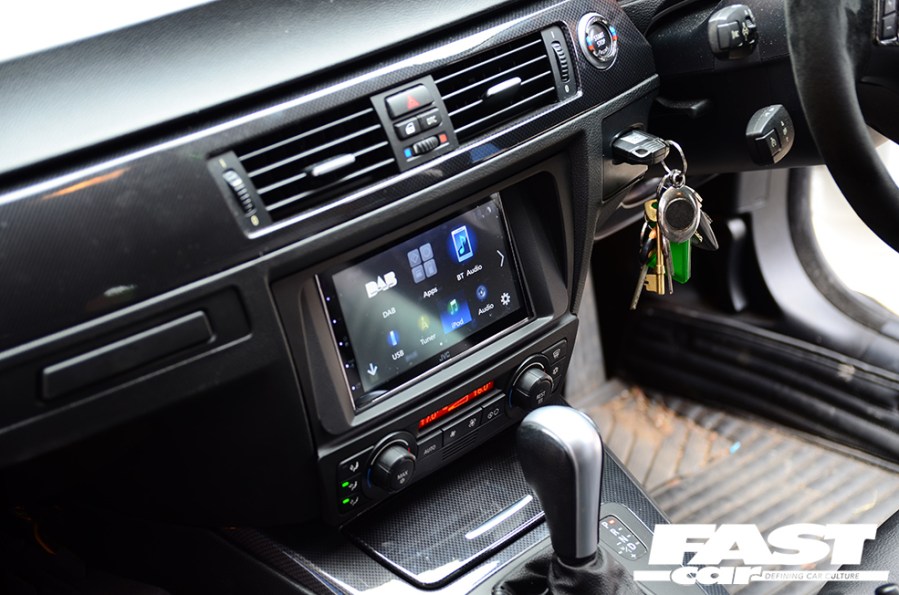
Step 2: Install the car stereo
So, you’ve got your facia adaptor, a new harness and chosen your head unit. Now to get it all in which is, quite frankly, relatively easy after all that lot. As always though, we have a couple of top tips to help you along the way…
Removal:
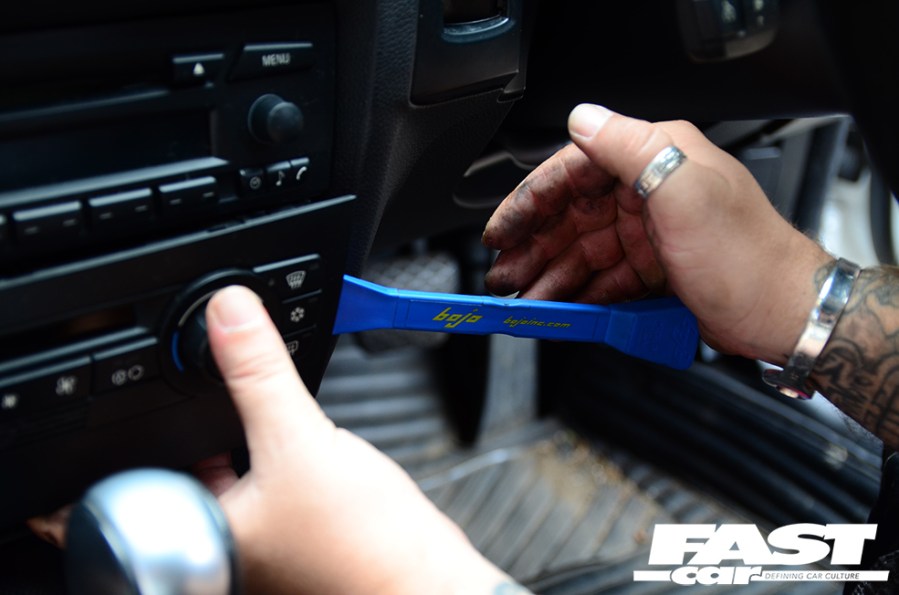
First, you’ll need to remove the old stereo, and it almost goes without saying that this is different process on different cars. The good news is that most head units are designed to be removed in a relatively straightforward way for main dealer maintenance. For many older cars it’s extremely easy, you can simply buy a removal tool for a couple of quid, pop it in and pull out the head unit. With other more modern vehicles it can be a little more involved and may require various of pieces of plastic trim to be removed. But again, the process is usually extremally straightforward.
If it’s not immediately obvious, we always recommend doing your research on the removal method. 99% of the time you’ll find all the info you need online, it’s highly unlikely that you’ll be the first to do the job. With that in mind, too, don’t go digging around with a screwdriver and risk causing damage to your interior. Instead get yourself some plastic trim removal tools which are specifically designed to remove plastics without denting and scratching.
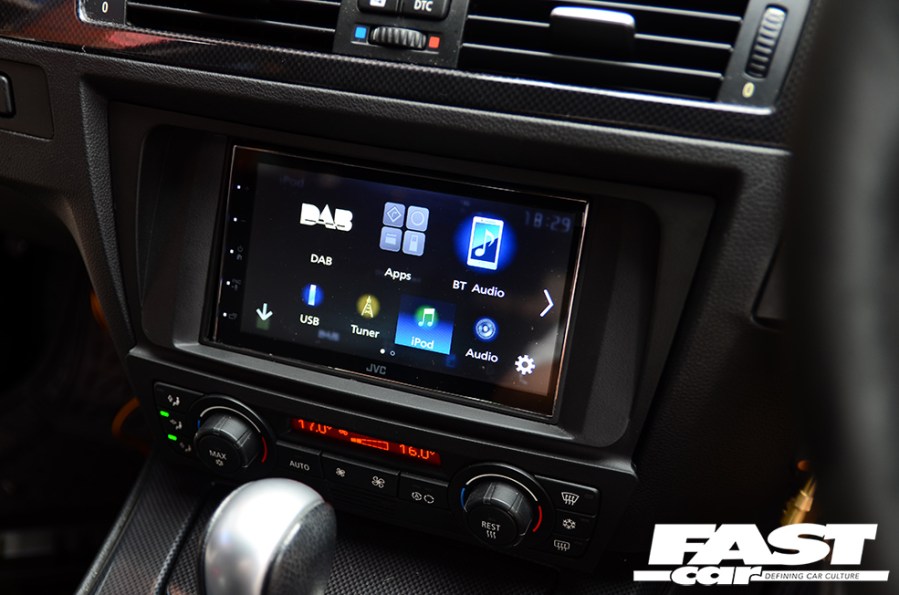
Step 3: Testing
Finally, always test your new head unit before you fully fit it into the dash. Plug in the wiring harness, reconnect your battery and switch the ignition on. Before you set up all those random personal preferences such as EQs, Bluetooth, bass boost and your Mum’s telephone number, tune in your favorite radio station, save it as one of the pre-sets, and then turn the ignition off. The head unit should shut off and, when you turn the ignition back on, it should remember the station. If it does, you can finish off the job by securing the head unit in place.
If however, your head unit doesn’t switch off automatically, or it resets and doesn’t remember the radio pre-set, it’s likely that the wiring needs a slight adjustment. It’s an easy job, albeit one that’s seriously annoying if you have to remove everything all over again – the whole reason we always test.
Your ISO wiring feeds two types of power source to your head unit. These are a permanent (constant) 12-volt live, which keeps your settings saved. Along with a switchable 12-volt live designed to turn the main power on and off with the ignition. On a standard ISO plug the permeant live will be the yellow wire, and the switch live the red wire. You’ll need to switch these around to make sure that your head unit is getting each power source to the correct connections. Most ISO harness adaptors will already have connector plugs so you can swap them over easily.


