
Car struggling to start? Your battery may be needing a top up then. Here’s how you can charge your car battery, and what to look out for along the way.
There are all sorts of reasons why your car battery can go flat. From leaving the lights on overnight, blasting your subwoofers without the ignition on, or simply old age (that’s the battery, not you). It’s surprising how often these small human mistakes can happen. The other fact is that most car batteries will only last four or five years at best. Many experts recommend replacing your battery after 3 years or so of normal use, which we all do, right? Of course we don’t! Here in the real world, car batteries are replaced when they start to struggle, we’ve all been there. But, then again, it’s worth considering that nearly half of all breakdowns are due to an insufficiently charged battery, too. Do you really want to take the risk?
Whatever the reason, it’s worth remembering that a standard car alternator will likely never fully charge any car battery, even on a long run. It can take up to 8-hours of constant driving to top up a flat battery to around 60% capacity. Winter temperatures also plays havoc with car batteries, cutting down on their ability to hold a charge or crank out sufficient power to start your car. It makes sense to check and charge yours periodically, especially if you happen to make loads of short journeys.
Whether you have a battery problem right now, you’re looking at simple car maintenance or you intend to store your project and keep the battery in decent useable condition, here’s our step-by-step guide on how to charge your car battery, including all the things to look out for.
Step 1: Get the right battery charger
First and foremost, this will depend on the battery you have in the car. Although there are still a whole load of conventional lead acid car batteries out there, plenty of the more modern cars – especially those with stop/start technology or modified motors with massive audio systems – utilize EFB (enhanced flooded battery) or AGM (absorbent glass matt) batteries. An old manual 12-volt charger won’t charge these sealed units. Instead, you’ll need a relatively modern smart charger to do the job.
While it’s not an issue with lead acid batteries anyway, the vast majority of chargers on sale nowadays have a smart charging circuit at the very least, so will be able to handle all types of car battery. Some will also have auto detection, so they’ll know which type of battery is connected as soon as they’re hooked up. Many of these can safely charge the 6v battery in your lawnmower or a 24v HGV battery, too.
Asses the battery condition
Instead of dumping in all the power at once, many smart chargers assess the condition of the battery and complete a controlled charging cycle which uses microprocessors to ramp up the amps through a series of stages. Limiting the current in this way can not only help to prolong the life of your battery, but in some cases help recondition completely flat batteries to give 70-80% of the performance of a brand-new battery. In other words, most modern chargers are extremely clever, there’s also a few cordless battery chargers on the market, too. These are particularly handy if you happen to live in a flat or have a garage en bloc.
So, first of all make sure the charger you have is the correct type for the battery and, if in doubt, have a little look at our guide to the best car battery chargers in 2023.
Step 2: Prepare your car battery for charging
Although it’s entirely possible to charge your battery while it’s still connected to the car, in most cases we’d recommend disconnecting the whole unit to prevent any major power surges through the car electronics. In some situations of course, if you happen to be using a smart charger that’s specifically designed to offer an extremely slow, maintenance (trickle) charge at low amps while the battery is still connected to the car, you can simply hook up your charger and leave it to run.
To help prevent the risk of shocks or causing a short between the positive and the ground, first remove the negative battery terminal clamp. Then you can remove the positive, tucking both of them out of the way securely. Unless you’re planning on moving the battery to another location to charge there’s usually no need to fully remove it from the car but, if you do, make sure that it’s placed on a flat, level surface in a well-ventilated area. Also, when applicable, make sure you have the radio code handy for when you hook it back up.
Most car batteries have lead terminal posts, if yours (or the terminal clamps) are suffering from a build-up of dirt or corrosion, it’s important to clean these up to get the best possible connection. In most cases a wire brush will do the trick, or you can opt for a specialist terminal cleaning tool. Carefully wipe away any residue before charging, and be wary of any powdery white substance on the terminals, usually dried sulphuric acid.
Check electrolyte level on unsealed lead acid batteries
Finally make sure the battery is ready to charge. For sealed batteries, which tend to be ‘maintenance free’ you should be good to go. But for many conventional, unsealed lead acid batteries it pays to check the electrolyte level. Carefully remove the battery cell caps and ensure that the electrolyte fully covers the metal plates inside, you can top up with distilled water if required. Remember that battery acid is corrosive, so gloves and eye protection is essential here. It goes without saying that you should never move the battery and risk spilling the electrolyte without cell caps. These plugs should also be left out for charging to help the battery vent any gasses when charging (other batteries will already have breather holes to prevent this gas build-up).
Car batteries vent hydrogen gas when charging (especially when fast charging at high currents) so it’s also important to consider where you’re charging up yours. Hydrogen gas is explosive, so avoid charging in your living room, under your bed, next to your mum’s gas hob and the like. Stick to the garage or garden shed instead.

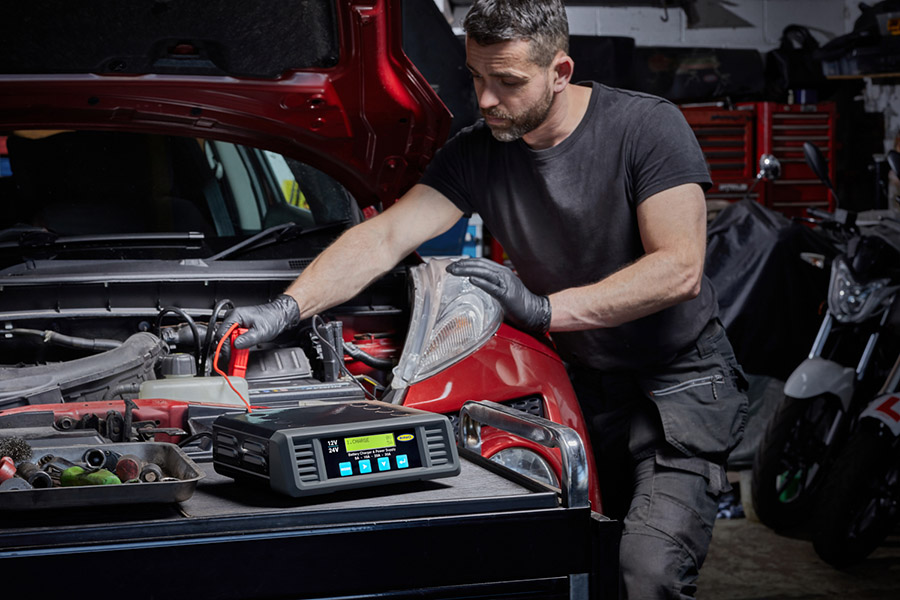
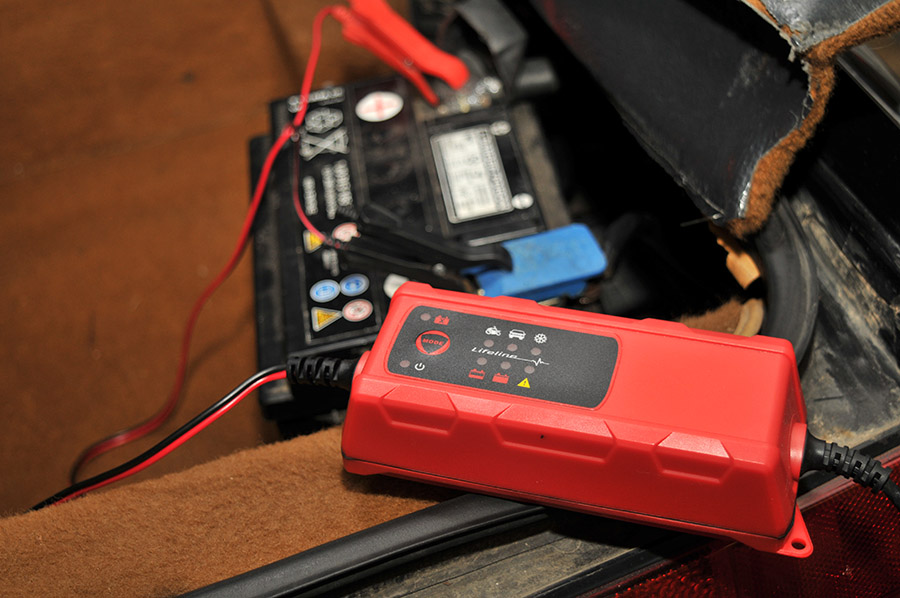
Step 3: Hook up your car battery charger
First, make sure the mains supply to your your charger is of. Then, connect the clamps to the corresponding battery terminal. Positive for positive, negative for negative. Easy, eh?
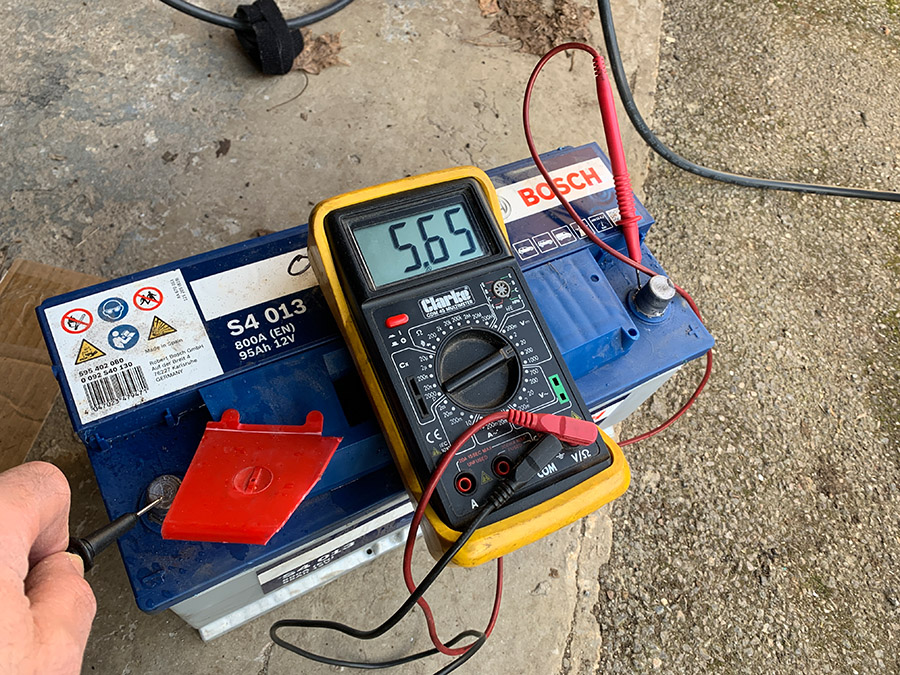
Many chargers have a voltage indicator which will give some indication of the condition of your battery. Obviously, if it’s sitting at 2-volts, you may have issues. That said, chances are your battery won’t be completely dead, in most cases when a battery drops below 12v it won’t crank over the engine, but you may find that there’s still a good 10 volts or so in there. Most of the time the battery will simply need a relatively quick top up.
Even so, the most important figure isn’t so much the voltage, it’s the battery percentage. Most car batteries need 75% plus charge to offer the best performance, but most will still crank an engine at around half charge. Basically speaking, a battery with anything lower than 60-75% will benefit from charging up to as close as 100% as possible. Your battery holding this percentage over time in the real world dictates the overall condition and usability. If the percentage drops back down after charging, a replacement may be in order.
Don’t forget that your battery will be venting when charging, so it’s also a good idea to keep the charger as far away from the battery as the cables allow.
Now you can switch on your battery charger at the mains.
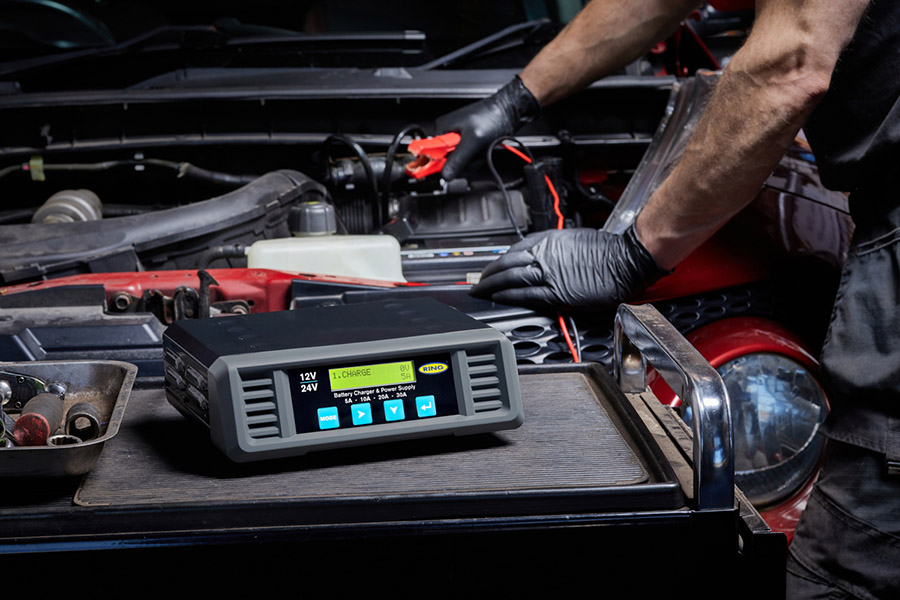
Step 4: Select the charge rate
As we said, many smart chargers will automatically detect what type of battery you have and its condition to set the charging rate accordingly. Even so, some will still have an option for fast charging, which basically maxes out the amps and voltage to cut down on the time needed to restore the battery to full charge. With standard chargers you may have to select the battery type and charge rate manually, so make sure you’ve actually read the instructions, there’s nothing unmanly about that, right?
Most chargers will read 14-volts or so when charging, but what’s even more important here is the current your charger is serving up at any given time. The maximum amperage output of your charger will dictate how fast it can physically charge the battery. Most smart chargers top out at around 6-10amps and will have a low trickle setting of around 2amps but, even so, remember that faster isn’t necessarily better.
Low amp charging
If you have the time, it’s far more preferable for battery performance and longevity to gradually charge at low amps over an extended period. Most of the time a ‘normal charge’ setting (or the lowest possible setting) should be used, reserving the fast charge option for when you’re in a rush and it’s absolutely necessary. In conventional lead acid batteries, this also helps prevent warping of the metal plates, too much current can start to boil batteries from the inside.
Keeping your charger on a low setting is especially important if you’re not going to be there to turn off the charger when the battery is at full capacity. Most smart chargers will turn themselves off – or switch to trickle charging – automatically when the battery is fully charged. But that’s not always the case with every type of charger. Generally speaking, if you’re using a manual charger, you won’t want to leave it alone. You should also be aware that older batteries may not be able to charge right up to 100% (it’s not uncommon for batteries to stop charging at around 80%) so, if yours won’t ramp up past 70% or so after a good few hours, it may be time to replace the battery.
Once your battery is fully charged, turn off your charger from the mains first, and then disconnect the clamps. A top tip for chargers that indicate the battery percentage is to wait for a few minutes, and then turn it back on. If the percentage has dropped back down significantly (particularly any lower than 50%) it’s likely that you’ll be needing a new battery very soon.
When reconnecting your battery, connect the positive clamp first, then the negative, before checking if your car cranks over.
Words: Midge Burr.


