
Here’s our guide on how to change brake fluid – find out what processes are involved, and which tools you may need to use as part of your car maintenance.
Brake fluid is a largely uninteresting topic in the grand scheme of cars, but it’s one which you shouldn’t ignore if you want to keep your ride in top shape. If you’re unsure where to start, fear not – this guide has got you covered.
Why do I need to change brake fluid?
The fluid contained inside most cars’ braking system is a non-compressible, glycol ether-based, hydraulic fluid. Most of us simply know it as either DOT 3, 4 or 5.1 brake fluid. Unfortunately, this type of fluid is hygroscopic, which means it absorbs water. This can then cause internal corrosion of steel components inside the braking system, such as the pistons inside a brake caliper.
Whilst internal corrosion is a problem, that unwanted water can also adversely affect braking performance. Particularly if the temperature of the brake fluid rises above 212 Fahrenheit (100°C), which is the boiling point of water. The water inside the brake fluid boils and results in a spongy brake pedal, or worse (no braking pressure).
Silicone-based brake fluid isn’t hygroscopic (it’s hydrophobic), but water can still get into the fluid. In such circumstances, it will settle at the lowest level, which is often at a caliper, causing corrosion.
How often should I change brake fluid?
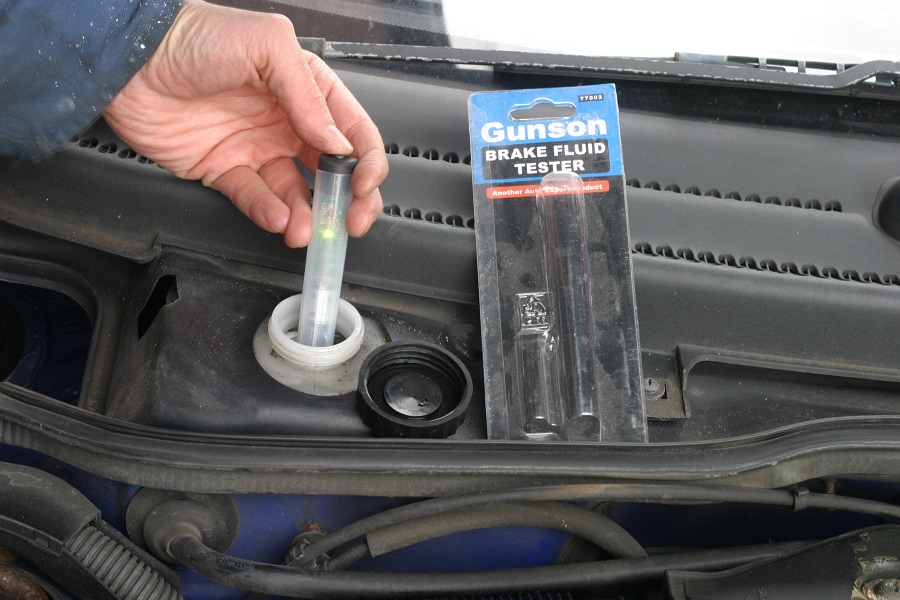
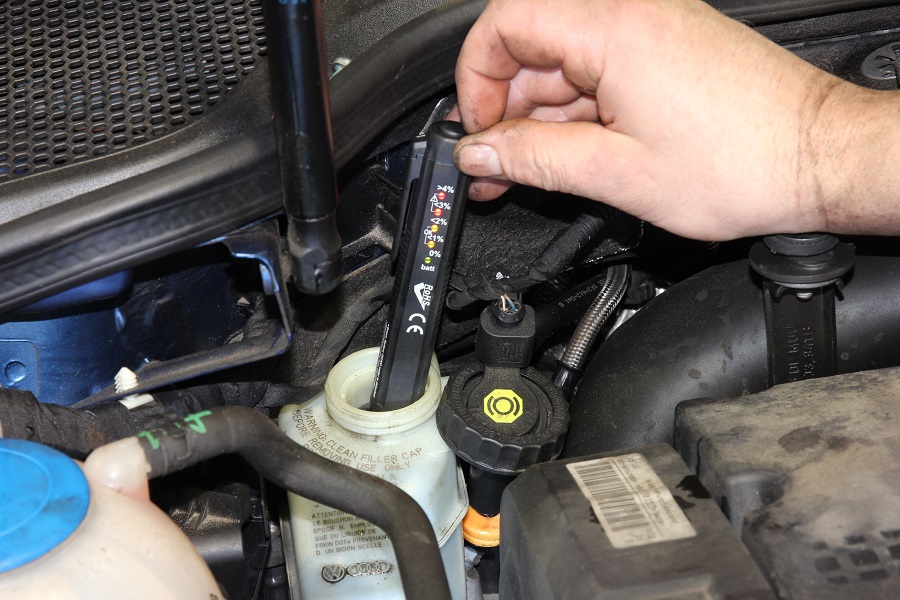
Most brake fluid should be refreshed every couple of years to help reduce the risk of it becoming contaminated with moisture. However, there are a number of tools that you can use to test the moisture content of the fluid. This helps to determine whether or not you should change it. Expect to pay upwards of a tenner for a battery-powered brake fluid tester. Most can be dipped into the brake fluid inside the reservoir.

Tools needed to change brake fluid
Modern equipment such as anti-lock braking systems (ABS) means DIY methods of changing the brake fluid aren’t possible on some vehicles. This is because the ABS needs to be operated to push the brake fluid through. It can sometimes be done with diagnostic equipment or a separate pump. The Mk2 Toyota Prius, for instance, requires equipment to communicate with its ECU to refresh the brake fluid.
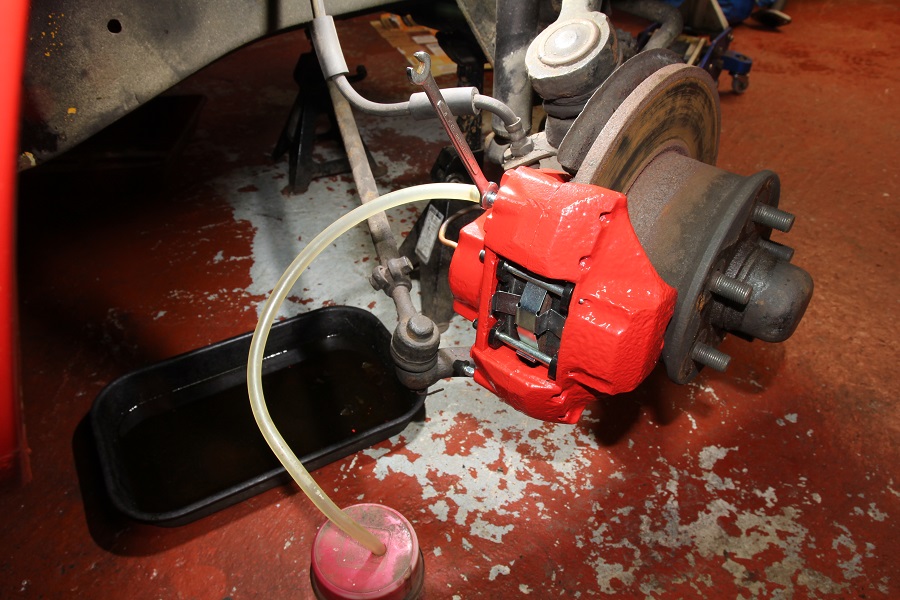
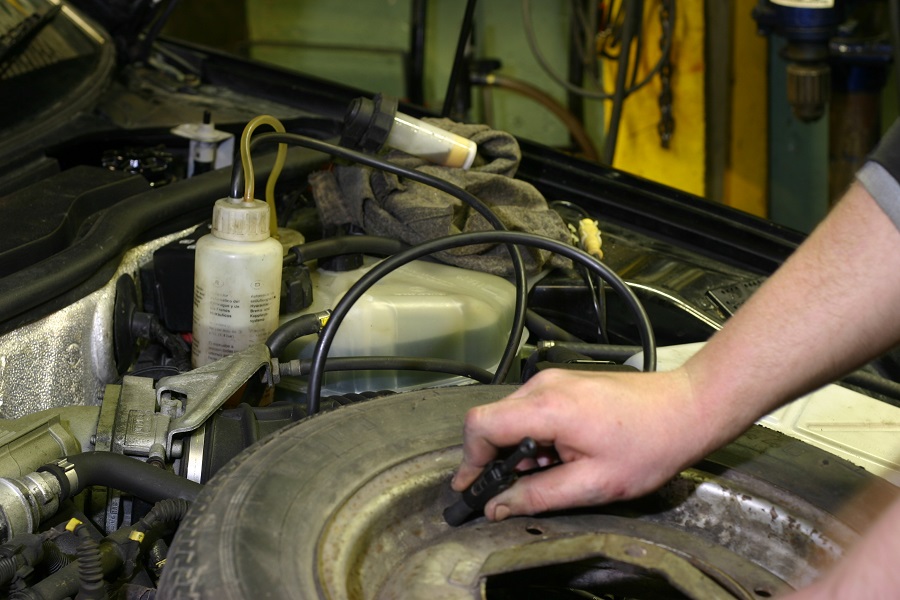
If you are confident you can refresh the brake fluid without such equipment, then you will need a few tools. It’s all about bleeding the brakes. And it starts with the correct-sized wrench to be able to open each bleed nipple at each brake caliper or wheel cylinder. This will enable old brake fluid to be forced out and replaced by fresh fluid.
You’ll need some means of collecting the old fluid, such as a glass or plastic jar. Plus, a clear hose to fit over the bleed nipple to direct the fluid into it. This is less messy than allowing fluid to drip out and potentially peel the paint off your wheels. These are the basic tools, but there are more specific tools, which we’ll cover later.
How do you change brake fluid in a car?
Where to start
Make sure that all of the bleed nipples on the brakes can be slackened. There’s no point trying to refresh the brake fluid if you can’t extract the fluid through them. If any are seized, apply penetrating fluid.
It’s worthwhile extracting the old brake fluid from the reservoir first. This is easier with a syringe to suck it out. Most brake fluid is corrosive to paintwork, so carefully transfer the fluid to a container.
With most or all of the fluid extracted from the reservoir, top it up with fresh brake fluid. Keep checking the reservoir throughout the job to keep it topped up. Start at the brake that’s furthest away from the brake fluid reservoir. So, if the reservoir is on the left side of the engine bay, start at the rear right brake.
Ask a friend
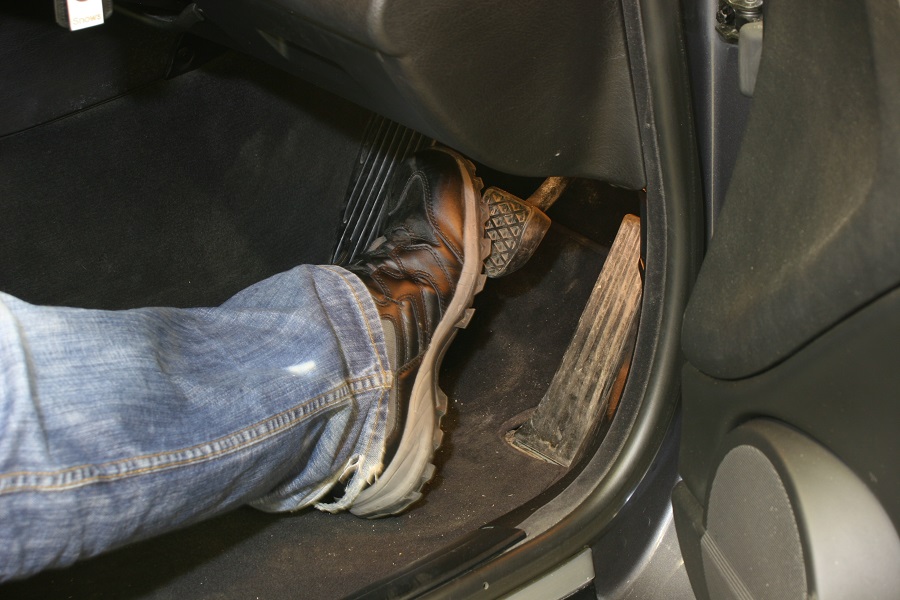
If you can find a volunteer, ask them to sit in the driver’s seat and to pump the brake pedal. Then hold it with the pedal pressed. Attach the clear hose to the bleed nipple of the brake furthest away from the reservoir. Slacken it and collect any fluid that squirts out. Your volunteer should notice the brake pedal has sunk to the floor. Tighten the bleed nipple and ask them to release the pedal.
You can now repeat this, although they won’t need to pump the pedal several times, just hold it pressed. You’ll then be able to slacken and tighten the bleed nipple to allow the brake fluid to exit. When you’ve flushed enough fresh brake fluid through the first bleed nipple, move on to the next. Finish at the brake that’s closest to the reservoir and don’t forget to keep checking the fluid level in the reservoir as you’ll need to top it up.
One person methods
If you can’t find a volunteer, then there are several solutions to bleeding the brakes on your own. Equipment such as a Gunson Eezibleed kit uses the pressure from a tire (around 20psi is enough) to push the fresh brake fluid through. It’s supplied with several caps for the brake fluid reservoir to connect to the Eezibleed. So, providing you have the right size of cap, all you need to do is walk around the vehicle, slackening and tightening each bleed nipple. Always start at the one furthest from the reservoir.
A one-way bleed valve is another one-person method of refreshing brake fluid. This attaches to a bleed nipple, but won’t let air or fluid back in. So you can slacken a bleed nipple, gently pump the brake pedal to push fluid through, then tighten it afterwards.
Using a hose attached to a bleed nipple at one end and a container with brake fluid already in it is another one-person method. Gently pumping the pedal will draw fluid in, but not air. Hold the pedal down (e.g. with a length of wood) before tightening the bleed nipple. This will reduce the risk of air being drawn up the hose and through the nipple.
Final checks
When you have bled the brakes with fresh brake fluid, check all bleed nipples are tight and look for leaks. Press the brake pedal to ensure it feels firm and doesn’t become firmer after several presses. If it gets firmer the more you press it, air may have got inside, so bleed the brakes again.
Finally, run the engine and make sure the brakes still work, then slowly set off and test them again. Go for a test drive, braking regularly, then return, check for leaks and check the reservoir’s level.
Relevant content:


