To me, two of the biggest appeals that a dash cam can have are simplicity and image quality. You want a device that doesn’t take up much space, isn’t too difficult to set up, and that you can rely on to capture high-quality footage. For that reason, I personally tend to prefer dash cams that are pretty straightforward and compact. So, when Viofo got in touch with news of the launch of its VS1 model – self-described as a “tiny 2K dash cam” – I knew I had to give it a go. Check out my full Viofo VS1 dash cam review to see how it performed.
RRP: $149.99, buy here. £118.81, buy here.
How I tested this dash cam
It’s important to get across how a product performs at each stage of ownership. So, with that in mind, I’ll be covering everything from installation to practical testing, giving you a snapshot of not only what it’s like to fit one of these to your car, but also what you can expect from it once it’s up and running.
To do this, I’ve documented how I installed it into my own car, and I’ve included footage from two different journeys – one during the day, and one during the night.
What’s in the box?
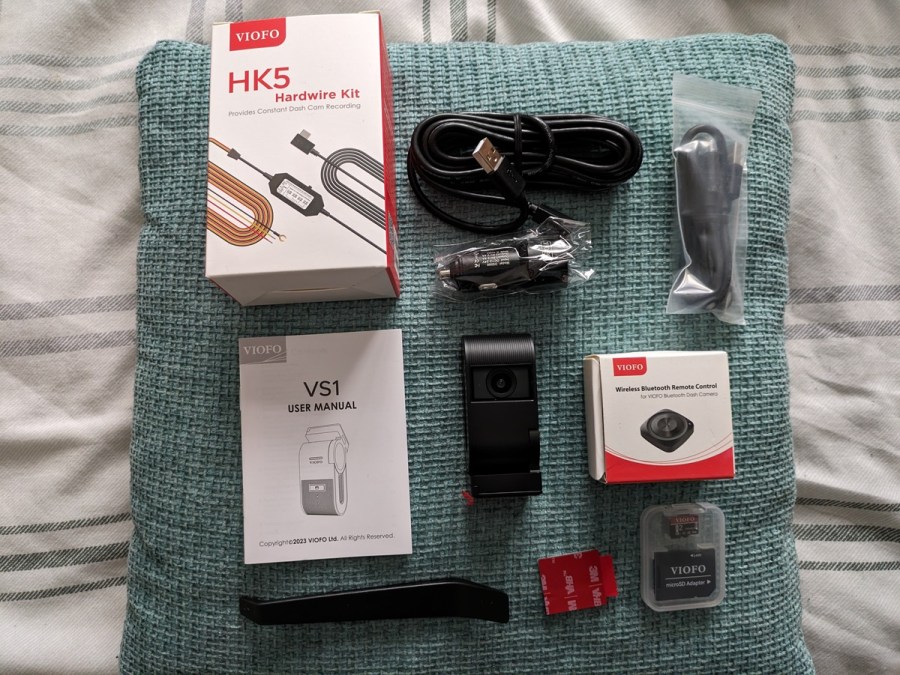
Before we get started, I just want to go over what you’ll find in the box when you order a Viofo VS1. Remember when I said I loved simplicity? Well, it doesn’t get more simple than this. Camera, power lead, PC connection lead, trim tool, spare adhesive back plate – job done. You get a user manual too obviously, although it’s worth pointing out that the hardwiring kit, bluetooth controller and even the memory card are actually optional extras. Each were included in this press kit, however if you want to buy a VS1, you’ll have to pay more for those.
Installation
Positioning
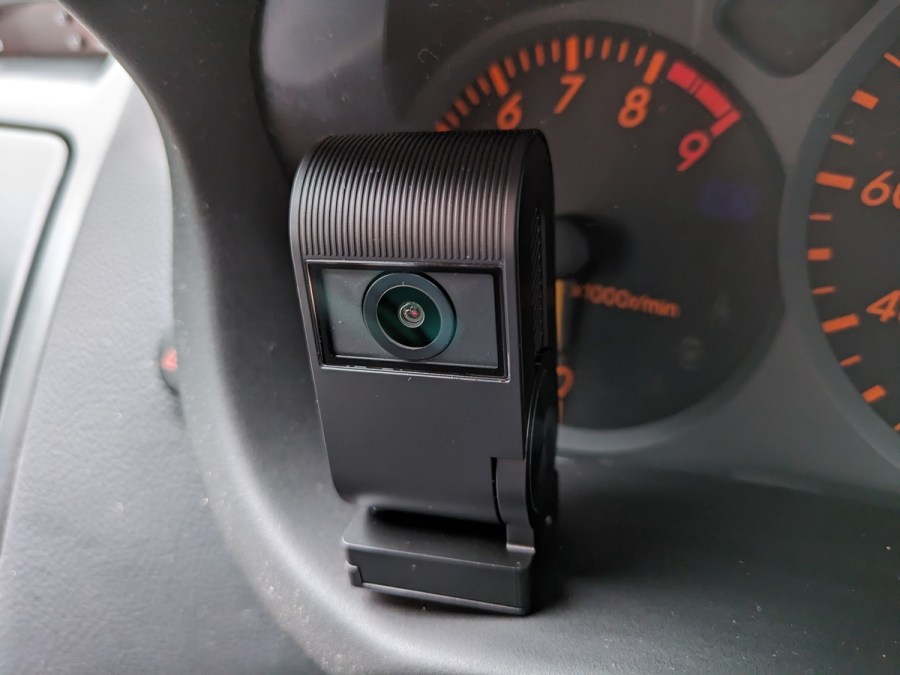
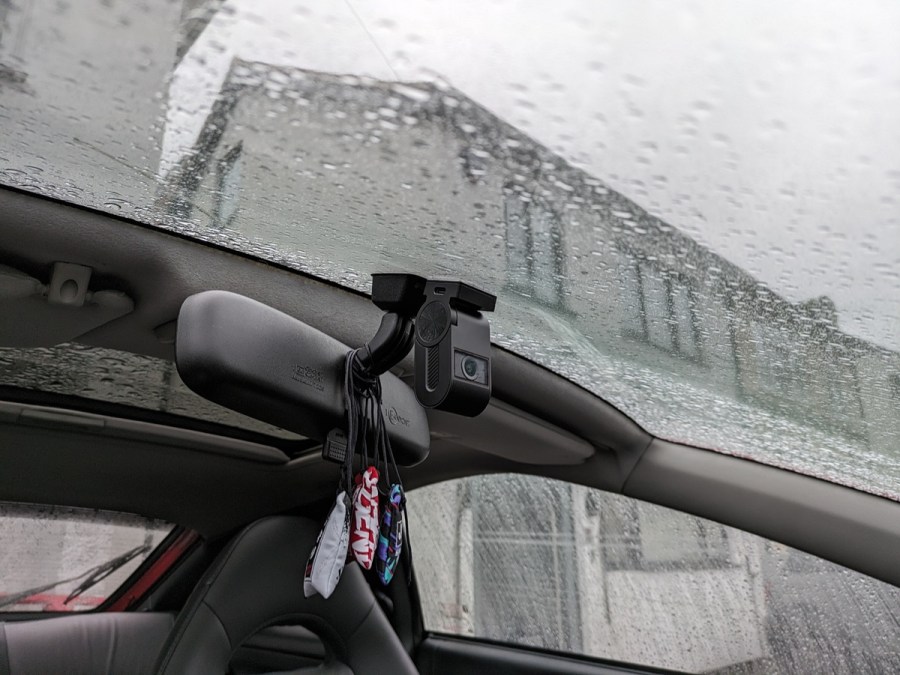
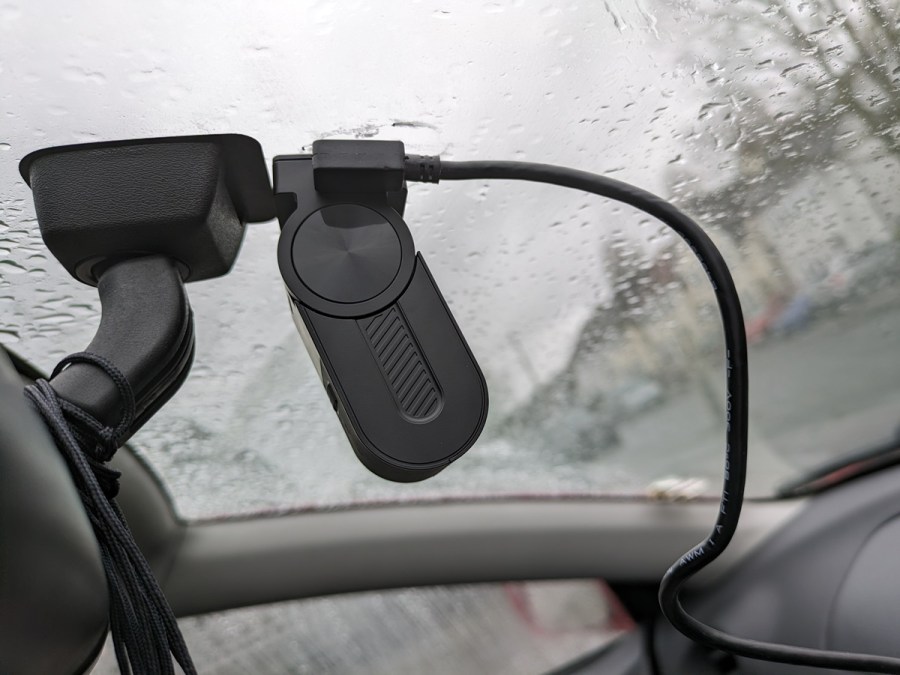
The first thing to consider when installing any dash cam is where to place it on the windshield. As a rule of thumb, the best idea is to put it somewhere high up and central, as that means that the camera will not only get a good view of the road ahead, but also be out of your own line of sight. For that reason, I always choose to put dash cams up behind the rearview mirror.
In the case of the Viofo VS1, this really couldn’t be simpler. It comes with an adhesive backplate with a protective cover that cleverly has a little tag to make its removal nice and easy. Then, once you’ve stuck the camera into position, the main body pivots around a hinge so that you can get the angle of the lens correct. It can be a bit stiff at first, so don’t be afraid of applying a little bit of force.
Connecting to power
There are two ways in which you can connect the dash cam to a power source. The standard way (which is the option I chose for this test) is to plug the camera into your car’s 12V outlet with the supplied power cable. This provides the camera with a source of energy as long as the car’s ignition is on, and shuts off once the car switches off.
Alternatively, you can order a hardwiring kit at additional cost (£15.04). This will allow you to directly wire the dash cam into the car’s electronics, thus ensuring that the camera receives a constant power supply. This is necessary if you wish to use the camera’s ‘parking mode’, a feature which allows it to pick up incident footage even when you’re away from your car. There’s no need to worry about your car’s battery either, as the device will sense when the battery reaches a maximum low threshold. When this happens, it’ll stop drawing energy to ensure that it doesn’t completely deplete the battery.
Parking mode
Parking mode can come in various different forms too. The standard setting is classed as ‘auto event detection’. Essentially, it’ll only record when it notices a moving object. If no movement occurs, visual or physical, the camera will lay dormant. The next option is ‘time lapse’. This does what it says on the tin, and records continuously at a low frame-rate without audio. Then, finally there’s low-bitrate recording, which uses extra small file sizes to enable continuous recording with audio.
Finishing touches
Once you’ve successfully installed the camera, insert the memory card and press the microphone button for a long time until the camera responds with audible feedback. This is how you format the memory card, which is crucial to do before use. If you don’t do this, the camera won’t record footage as it’s intended to.
With that done, the only thing left to do is to tuck the wires away behind your car’s plastic trim and/or roofliner. You can use the supplied trim tool to help you with this, but be prepared to get creative. Just make sure that the wires are out of sight and unable to interfere with any of the car’s controls.
Bluetooth controller
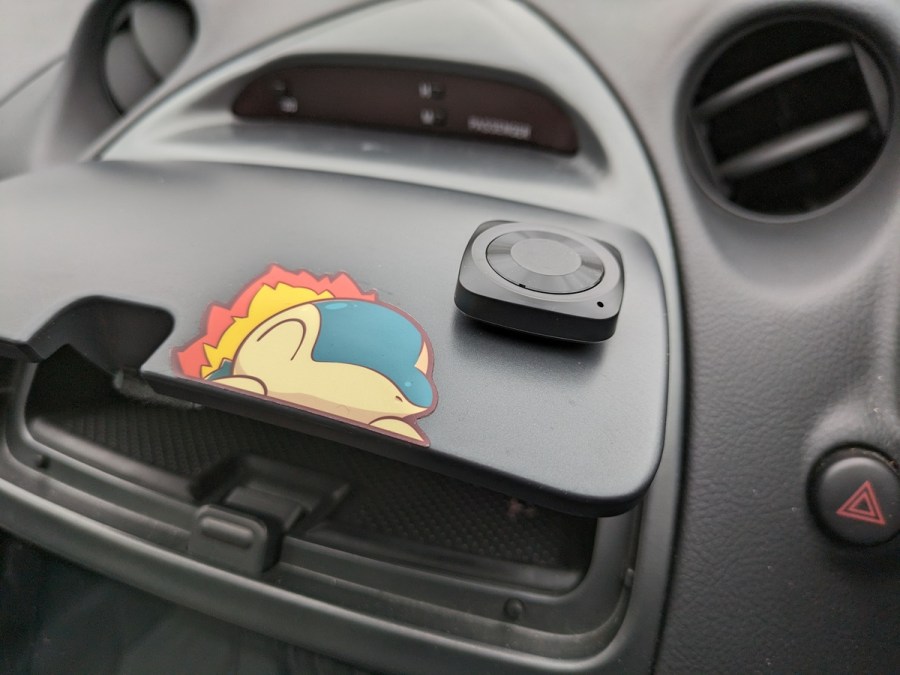
Now, if you order the basic Viofo VS1 package, you won’t have access to this as it is an optional extra (£15.83). However, since they sent me a Bluetooth controller to try out, I figured I might as well give it a go.
The first thing to note is how small and light it is. This is great news as it means you have more choice regarding where to place it. For example, I placed it on the lid of a storage compartment in my car’s center console, and because it’s so light, the controller doesn’t affect the lid’s ability to support itself upright when open. As for how the controller works, simply press its central button for three seconds when the camera is powered on and the two should automatically pair. Then, when driving along, you can manually save precise recordings by pressing the button. This will often be easier to do (if you place it within arm’s reach) than the alternative; pressing the corresponding button on the camera itself.
Happily, I had no trouble getting the two devices to pair with each other, and the controller worked as intended.
Additional features
I’ll be honest, if you want lots of features from your dash cam, then this isn’t the device for you. Some dash cams I’ve encountered are incredibly features-rich, like the Nextbase iQ, for example. However, the Viofo VS1 focuses purely on the basics. That’s not necessarily an issue though, as it executes those basics well.
The only additional features incorporated into the VS1 which I haven’t already spoken about are the fact that it comes with GPS, voice control, a G-sensor, and an emergency recording function. GPS is a welcome inclusion, especially at this price point, as this means the dash cam will track your location and speed – two things which could be important for car theft recovery or forming a legal defense in the event of an incident.
Impressively, this is something which the Viofo VS1 has in favor over one of its market rivals, the Garmin Dash Cam Mini 2. In fact, the Viofo also offers better image quality than the Garmin; 1440p resolution versus 1080p. However, you can power the Garmin through your car’s OBD2 port, which is something that the Viofo misses out on. That OBD2 connection is particularly handy as it means you can use parking mode without the need to hardwire.
The emergency recording function, meanwhile, can be operated manually at the push of a button or automatically if the G-sensor detects an impact.
Performance at day
*Due to media compression the footage you see may be lower quality than the raw 2K 1440p file*
Now, with the theory out of the way, it’s time to get practical with some road tests. The Viofo VS1 dash cam powers up automatically when you switch your car’s ignition on, so that eliminates the chance of you frustratingly forgetting to turn it on. It records in short 1-minute segments by default, and will overwrite the oldest files when it runs out of storage capacity.
The Viofo VS1 makes use of the Sony Starvis 2 image sensor, which should mean there is less visual noise and motion blur than there otherwise would be. To test this, have a watch of the video above and see how many fine details you can pick out, such a license plates, sign texts or people’s faces. For the best results, try pausing the footage on certain frames. I think you’ll agree that the VS1 performs well in this area.
Performance at night
Darkness is always difficult for cameras, but again the VS1 does a reasonably good job. The finer details are naturally lost unless there is a direct light shining on them, and as for glare, I’ll let you decide on whether the results are positive or not.
I should note that, given the wet conditions, this was a particularly difficult test of camera clarity.
How can I access my footage?
There are a couple of ways that you can access the dash cam’s video files. One way would be to insert the camera’s memory card into your PC or laptop and view the files directly on your desktop. The alternative way would be to download the Viofo app and pair your smartphone with the camera via WiFi. On the app, you can manage video files and even view a livestream of the camera’s viewpoint.
Verdict
So, would I recommend the Viofo VS1 dash cam? Absolutely. It’s a master of the art of combining performance with simplicity, so if you want a competent budget dash cam that won’t take up much room in your car, you can’t go wrong with a Viofo VS1. I was particularly impressed with its inclusion of GPS and 1440p image resolution – two features which are not always seen at this price point. In fact, the only gripe I have with it is the lack of OBD2 power support, and as I mentioned earlier, if you want a more complex dash cam with a wider range of functions, then you’d need to look elsewhere. Overall though, I think the majority of people would be served perfectly well by the Viofo VS1.
However, if you are looking for more comprehensive coverage, with additional cameras for the cabin and rearview, perhaps consider the Viofo A229 Pro instead.