RRP: from $259.99, buy here. £205.76, buy here. (RRP of version tested is $359.99, buy here / £284.91, buy here)
Viofo is a brand that’s been jostling with the big boys in the dash cam industry for a while now, so I decided to take one of its products for a test drive. In this Viofo A229 Pro dash cam review, I’ll be putting one of the company’s most popular models through its paces to see how it stacks up against the established guard of Garmin, Nextbase, and Thinkware.
How I tested this product
Whenever I conduct one of these reviews, I always aim to cover as many aspects of ownership as I can within a short space of time. That involves installation, assessing the main technical features, and reporting on the camera’s performance at both day and night. I’ll be setting the device up in my own car, but will only use the equipment provided in the box to do so. Hopefully, this will give you a fair and comprehensive overview of what it’s like to own the Viofo A229 Pro dash cam.
What’s in the box?
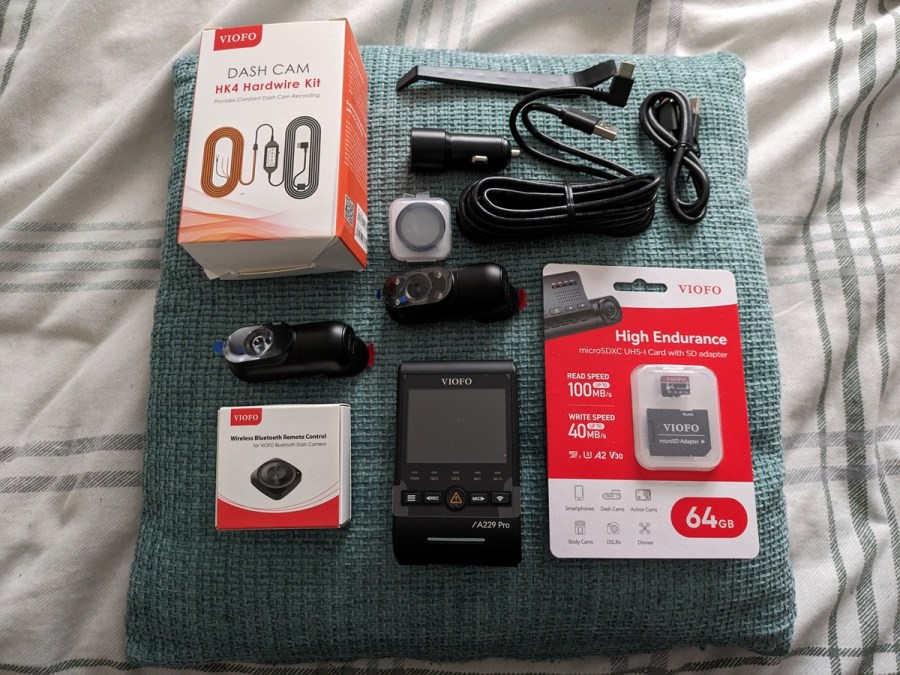
It’s worth noting straight out the gate that there are various different bundle packages you can opt for when buying any of Viofo’s cameras. In this case, I’ve been supplied with not only the A229 Pro, but also an additional rear camera and cabin camera. It’s the most costly of the A229 Pro bundles, retailing for $359, though you can buy the A229 Pro alone without any add-ons for $100 less.
In addition to the actual camera hardware, the box contains a 64GB microSD memory card (with adapter), a wireless bluetooth remote control, and plenty of wires. These include the regular power cable which you can use in conjunction with the 12V plug and a full-on hardwiring kit. There is also a polarizing lens filter to aid the camera’s performance, and a plastic trim tool to help with wire tucking during the installation phase.
Importantly, when you come to buy your own kit, you should take into account that the bluetooth remote and hardwiring kit are optional extras that come at an extra cost. If you want both, it’ll add $46 or thereabouts to your total bill.
Tech Specs:
Resolution: Front – 4K @ 30fps; Rear – 2K @ 30fps; Cabin – 1080p @ 30fps.
Field of View: Front – 140 degrees; Rear – 160 degrees; Cabin – 150 degrees.
Extra Features: Built-in WiFi, GPS, G-sensor with parking mode, voice controls.
Installation
Installing the main dash cam
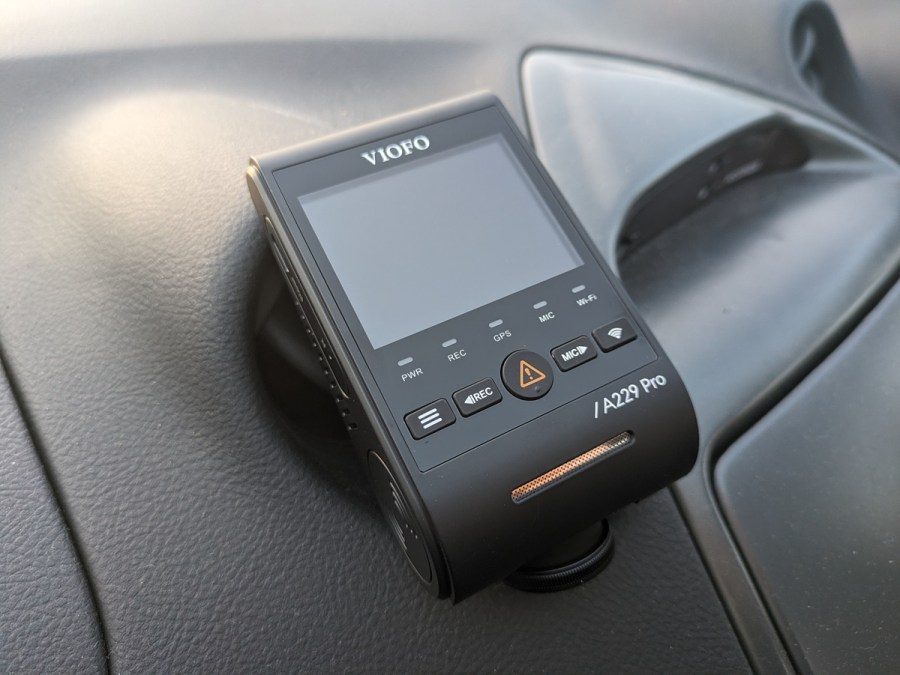
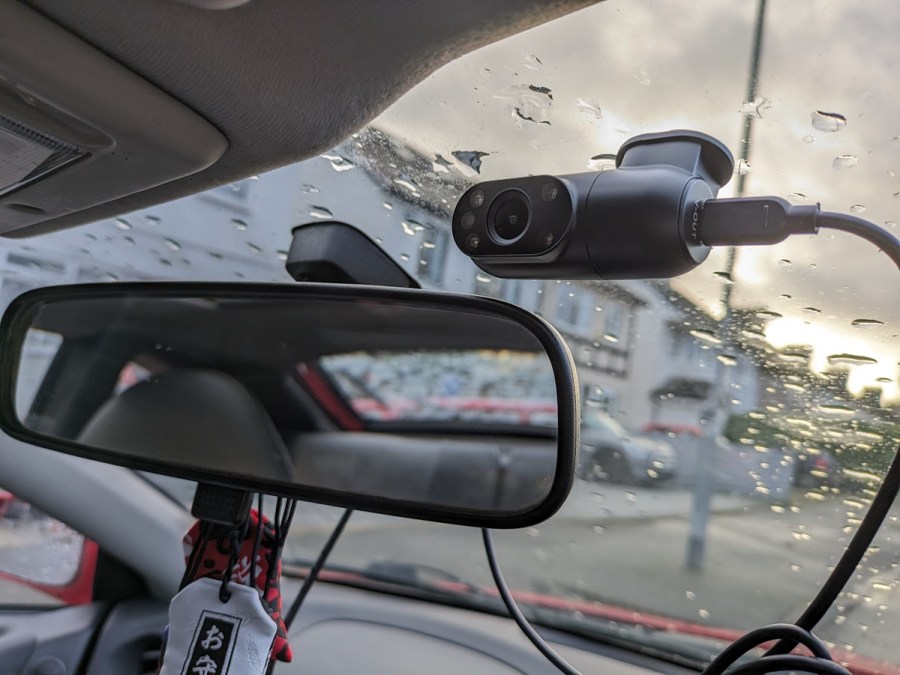
To get started, the first thing you’ll want to do is find a location for the main forward-facing dash cam. I always like to go for a central position, high up the windshield. This not only gives the camera lens the best vantage point, but also ensures that the camera is out of my own field of view while driving. In the Viofo’s case, the main body of the camera is quite chunky, so depending on the design of your car’s cabin space, you may need to be careful that it doesn’t get in the way of the rearview mirror et cetera.
Once you’ve found the perfect place for the camera to sit, remove the 3M protective wrap from the adhesive mounting plate and simply press it onto the windshield. It may be worth pressing down on it for a few seconds to ensure a tight grip to the glass. You can then rotate the lens’ pivot so that it’s facing straight out of the window.
Connecting to power
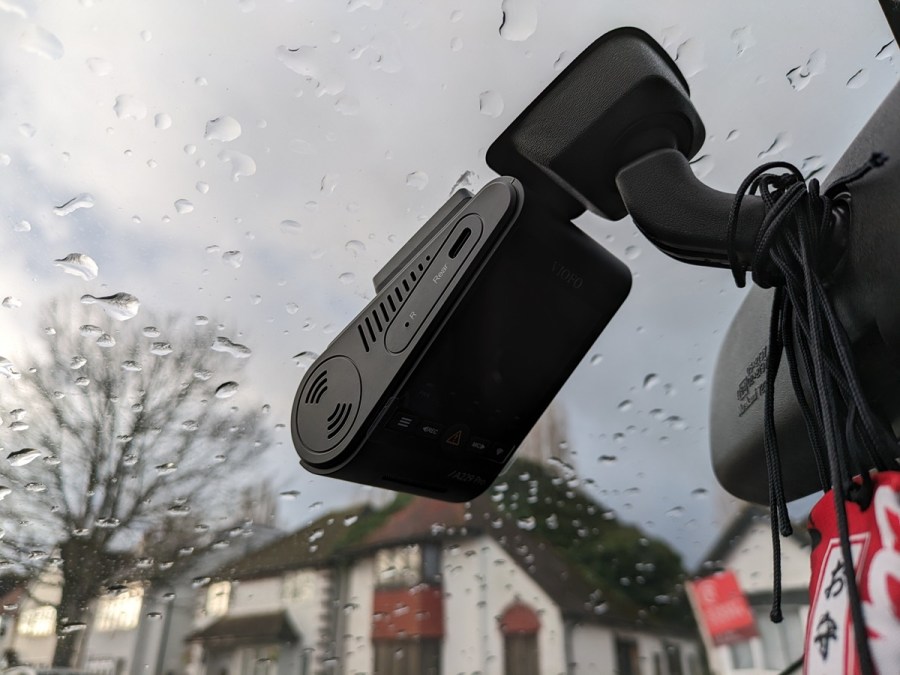
As mentioned earlier, Viofo does provide an optional hardwiring kit. However, for the purpose of this test, I’ll be using the standard 12V plug to power the camera instead. This solution is nice and simple, but will only draw power form the battery when the car’s ignition is on (I’ll talk more about the importance of that later).
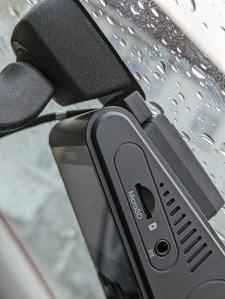
One thing to be aware of when hooking your Viofo up to a power source is the location of its power socket. The socket is located at the top of the device within its adhesive mounting plate. That’s not a design choice I’ve come across before, and can make the simple task of plugging the power lead into the camera more difficult than necessary. Keep this in mind if there’s a lack of space available at the top of the camera. I had to reposition it during installation after realizing that I hadn’t allowed for enough room between the power socket and the mount for my car’s rearview mirror.
Installing the rear camera
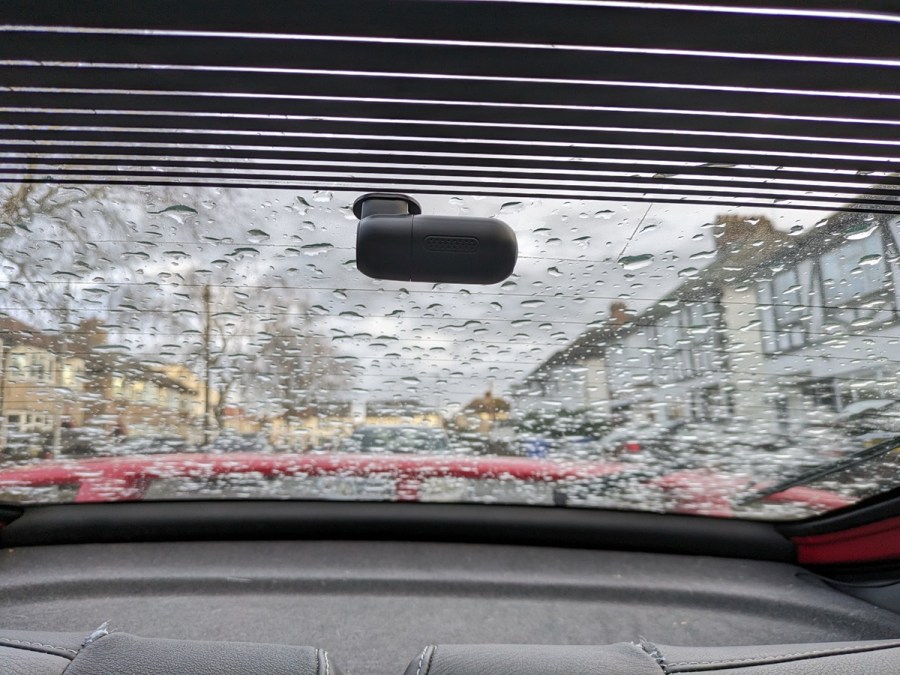
As for the rear camera, again, you’ll want to choose a location on the rear screen that’s high up and central. It’s easier to find the rough center if you’ve got something visual to guide you. In my case, I attempted to line the camera up with the central mount of my car’s rear wing. Another thing you’ll need to be aware of is any sun strips that your car might have. As you can see, I’ve positioned the camera just below the ones on my car. This is important to do, otherwise the strips will obstruct the camera’s lens.
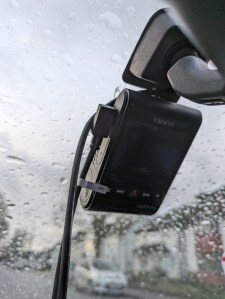
The rear camera piggybacks off of the front camera’s power supply and memory storage, so you’ll need to connect the two with a cable that runs down the length of the car. It plugs into the main camera on the left-hand side.
If, unlike me, you were doing a permanent install in your car, you’d need to do some comprehensive cable management at this point. Otherwise, all the loose wires will not only be an eyesore and inconvenient for passengers, but they could also pose a safety risk if they end up obstructing controls within the cabin.
Installing the interior camera
That just leaves the interior camera. Disappointingly, the Viofo interior camera is a separate unit entirely, rather than offered as part of the main camera, as is the case with the admittedly high-end Nextbase iQ. The downside of the interior camera being a separate unit is that, firstly, it takes up more space on the windshield, and secondly, it means you have to do even more cable management.
Nevertheless, when positioning the interior camera, make sure that it isn’t obstructed by the rearview mirror. You’ll want to place it somewhere vaguely central though so that you can get a good view of all interior extremities.
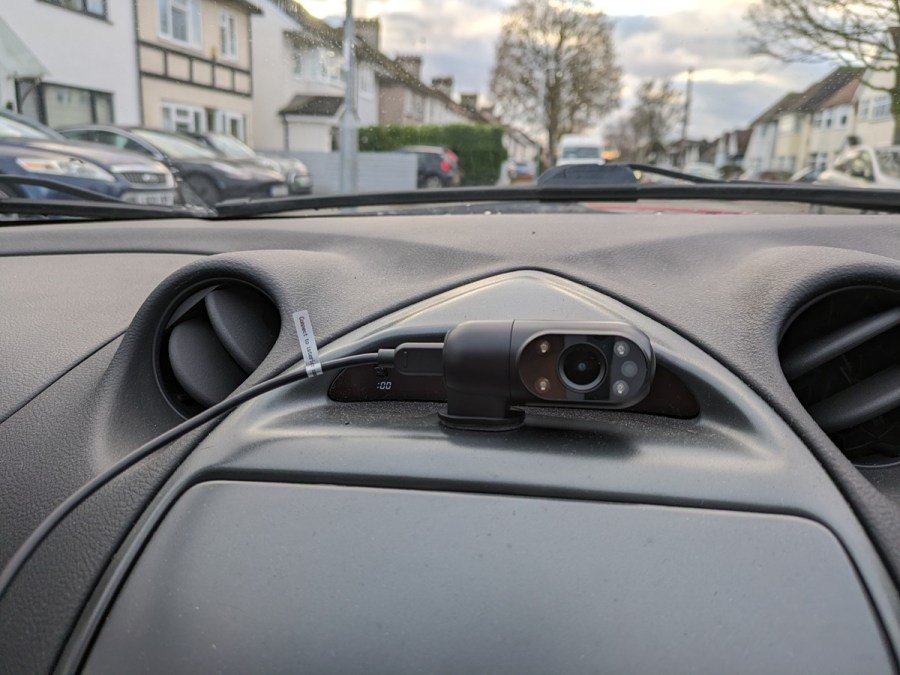
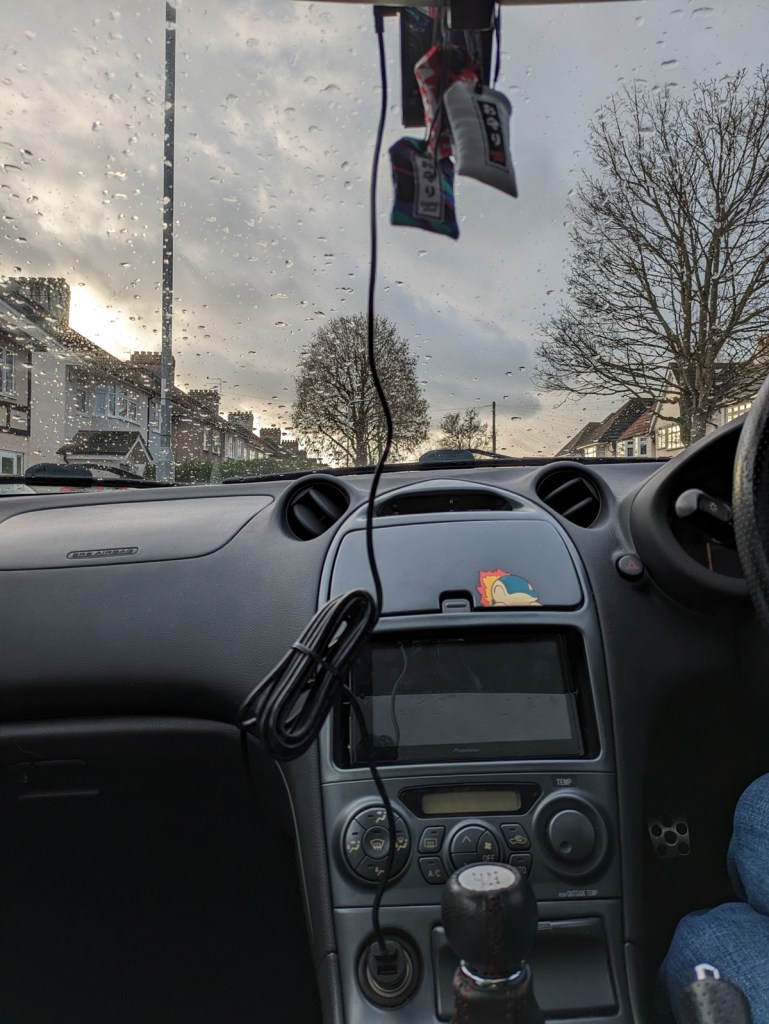
Aside from the windshield, one other possible location for the interior camera is any relatively high flat surfaces on the dashboard or center console, as demonstrated in the picture above. In the end, I chose to keep the camera here so that I had less clutter on the windshield.
Again, it’s worth stating that for the sake of speed, I’ve skipped the wire management job, but you would have to keep this in mind when choosing an alternate location in your own car. If it’s going to be there for the long-term, it needs a channel to have its power lead tuck into out of sight.
Setup
Setup is nice and straight forward. Upon its first use, the camera will prompt you to do the usual things like pick a language, set your preferred measuring system for speed, and so on. Remember to insert the memory card before use as well. You’ll need to format it before the camera can start recording, but this is all very simple to do – the camera guides you through the process with only a push of a button required.
Functions & Features
In addition to simple video recording, there are a few other functions and features that the Viofo A229 Pro has up its sleeve.
Voice control is a big plus, as it means you don’t have to reach for buttons and look at the camera’s screen while driving. There’s also a Bluetooth remote control which comes as an optional extra at added cost. I had it on hand to try in this test, and can confirm that it works as described – when you press the button (which you can locate anywhere within easy reach), it sends a signal to the camera to protect and save the footage immediately surrounding the moment you pressed the button. Handy if you suddenly see something noteworthy taking place ahead.
Another really important feature for a dash cam to have is in-built GPS. This means you can track important information such as location and speed, which could be vital when trying to locate a stolen vehicle or forming a legal defense.
Parking mode
Finally, as this is the ‘Pro’ specification, it has the capacity for a parking mode if you hardwire it into your car. As mentioned earlier, I relied on the simpler 12V socket during this review instead, so I haven’t been able to test this aspect of the A229 Pro directly. However, I’ve experienced these systems before, and they’re largely the same across all manufacturers. To make best use of parking mode, you’ll need to download the Viofo app. With the camera hardwired into your car’s electronic circuits, it’ll receive a constant power source, allowing you to livestream whatever it sees, through the app.
Furthermore, Viofo’s parking mode is enhanced by a G sensor. Essentially, this sensor is able to detect impacts and movements, and as such will trigger a saved recording when it does so. That way, if your car is hit or vandalized while you’re away, you’ll have the culprits caught red-handed.
Performance
The single most important factor when considering which dash cam to buy is undoubtedly the quality of the images it produces. Happily, the Viofo A229 Pro is well-equipped in this department. As outlined in the tech specifications at the top of this page, it comes with some pretty impressive hardware. Performance is enhanced by Sony Starvis 2 image sensors, which provide better image quality across a wider dynamic range, and more sensitivity to light than older Starvis and Viofo models.
Viofo also throws in a circular polarizing lens (CPL) free of charge, which is quite rare for manufacturers to do. Usually, you have to pay extra. The idea behind having a CPL fitted is that it’ll reduce the amount of reflection you get back off the dash and center console.
Anyway, here’s a brief snapshot of how each camera performs. Do bear in mind though that, due to compression issues, the footage you see below may not come across as high definition as reported in the tech specs above. However, having studied the raw footage prior to upload, I can confirm the validity of Viofo’s image resolution claims.
Front camera
Here is how the A229 Pro performs in regular daytime conditions. Colors are vivid (even when the environment doesn’t offer much in that regard) and detail is sharp. A good test of this is to pause the video and try to read as many pieces of text (bus signs, shop signs, registration plates etc.) as you can, or look to see how identifiable the people are. In my opinion, the Viofo does a great job of picking out these finer details, even at a relatively far distance.
A note on the reflections you’ll see in these shots – this footage was recorded without the extra CPL filter in order to get a good baseline understanding of the camera’s performance. However, with the CPL fitted, those reflections are indeed reduced.
All cameras struggle at night. It’s an unavoidable weakness caused by a lack of natural light. However, to my eye, the Viofo’s color palette becomes a little more washed out at night compared to rivals. That said, there’s still a reasonable amount of definition in the image and it does well to minimize glare from headlights or street lights et cetera.
Rear camera
By industry standards, the A229 Pro’s rear camera is of unusually high quality, its resolution being rated as 2K. That comes across in the crisp video captured here. Again, small details and identifiers are picked up well.
Just like the front camera, the rear camera struggles to pick up those finer aspects at night, but as I explained, you can’t really critique it too much for that. It does still pick up some text on the signs I pass by, which is more than I can say for some dash cams I’ve tested in the past. Overall, the rear camera gets a thumbs-up from me.
Interior camera
After running this test, I concluded that the ideal location for the interior camera depends heavily on what you intend to use it for. If you intend to use it for content creation such as vlogging, then a mid-height central location like the one I’ve opted for here is best. However, if you want to use it for legal protection, a higher vantage point is best for a clearer view out of the rear and side windows.
As for the image quality, the interior camera has the lowest potential (1080p) but that’s still enough for a clear image. Oh, and don’t mind all the wires – a proper install would tuck all those away tidily, but this does at least give you an idea of the sort of cable management that’ll you need to do.
As is the case with many interior cabin cameras available for dash cams, this Viofo unit switches to a black and white recording at night. It has four infrared LEDs built into it which allow the camera to record in high-definition black and white once the camera detects low light levels. The results are impressive. Although the light available at the time of recording was indeed minimal, the Viofo manages to pick out a good level of detail; not just inside the car, but outside too.
How can I access my footage?
There are a couple of ways in which you can access the videos that your Viofo records. The simplest way to do so is by inserting the memory card into your laptop and downloading them. However, you can also look back at recordings via the Viofo smartphone app, or indeed livestream the camera’s viewpoint so long as there’s a constant power supply.
Verdict
The Viofo A229 Pro can certainly go toe to toe with some of the slightly bigger brand names in the dash cam sector. It masters the art of providing the core basics of a dash cam, but at a high standard. It doesn’t fall into the trap of adding extra rarely-used functions at extra cost, so for that I applaud it. I’m also a big fan of the lack of subscription service required to make full use of it.
There are some shortfalls though. Its design could be sleeker, and the sheer volume of cables required for this three-channel setup makes installation marginally more difficult than most. I also would’ve liked the option to power the camera from the OBD2 port as other manufacturers do. Plus, while its image quality was admirable, I wouldn’t quite describe it as class-leading.
Nonetheless, I still really liked the Viofo A229 Pro. It’s quite clearly a premium product which offers a high standard of video capture all around the car. The accompanying app is fairly basic compared to those of rival manufacturers, but I quite like that about it. Ultimately, the Viofo A229 Pro is a highly competent, no-nonsense dash cam, and I have no doubt that it would serve you well if you bought one.