No matter how good your photography skills may be, a bit of digital tweaking can completely transform your shots. This Photoshop tutorial for beginners will get you started on turning simple car photos into automotive masterpieces.
First appeared in Performance BMW. Words & Photos: Rich Pearce
During the lockdown we’ve all had to learn new ways of keeping ourselves busy, ways to pass the time and hopefully feel in, some way, productive afterwards… Back at the start of the lockdown, I made a decision to learn new skills and enhance existing ones, concentrating on Adobe Photoshop. Now, I don’t declare myself as being an expert, but I’ve learnt a lot in my time, and am happy sharing with others, so they can have a go and see what they can create.
You’ll likely already have seen my photography gracing the pages of Performance BMW and other magazines before, but if you want to see more head to my website www.richpearce.co.uk or my Instagram @richpearcephoto; also once you’re done with the tutorial, be sure to tag me in your finished photo on Instagram.
For anybody that doesn’t know, Adobe Photoshop is the leader in software for digital image manipulation. You can create just about anything your imagination can conjure up with this neat bit of software. Pretty much all major companies and brands will have used Photoshop to create logos, marketing material, adverts etc. Car companies, including BMW, will use professionals to create their eye-catching images for new car launches, images that are seen all around the world, and these images are likely to have been manipulated in some way in Photoshop. If you don’t have Photoshop, Adobe offers subscription-based access to all their products, via their Creative Cloud service. Have a look on their website, and you can even try the software for free.
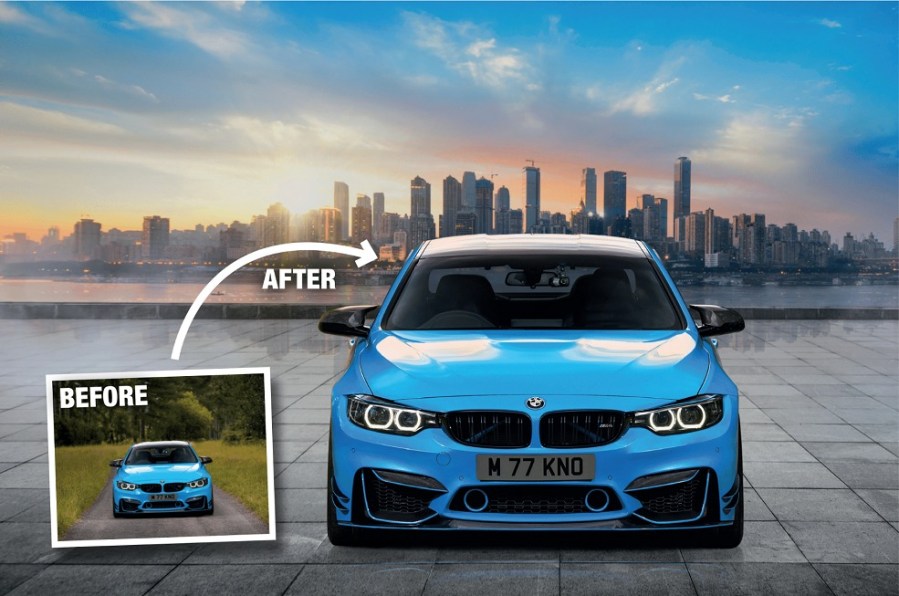
In this Photoshop tutorial for beginners, I’ll show you how to use an image of any car, and place it into a scene somewhere completely different. With practice, you’ll be able to create an image that is so clean and polished that the viewer will believe the car was photographed there. I’m using an image of an M4 Coupé that I originally photographed in a wooded area for a previous issue of PBMW.
Step by step photoshop tutorial for beginners
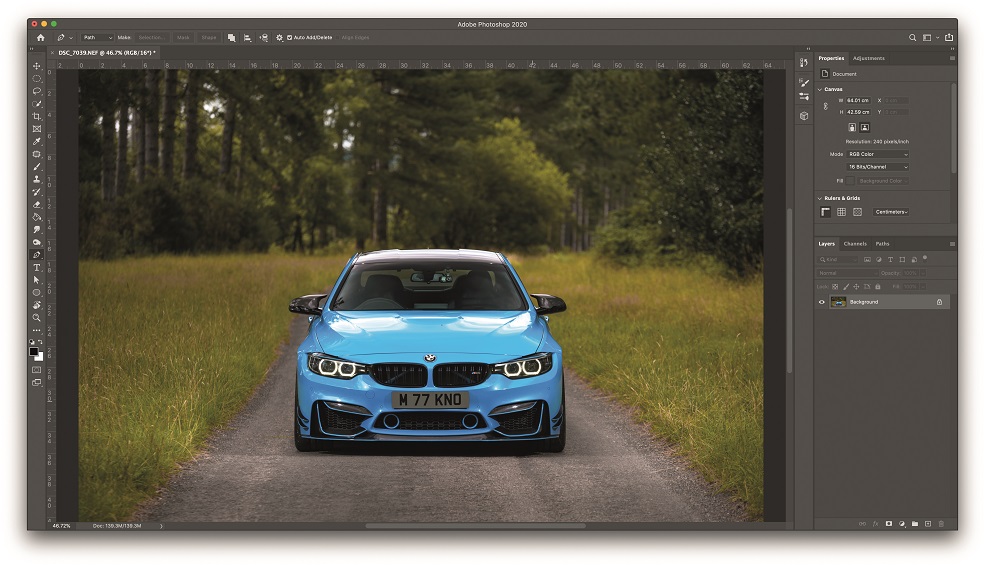
Step 1
With your image open in Photoshop, the first thing is to cut the car out of the original shot. To do this, I prefer to use the pen tool, which works by joining anchor points all around the car to make a selection. The more care is taken here, to select close around the lines of the car and shadow, the greater the benefit will be later on. Once the whole car has been drawn around, make your selection by right-clicking and selecting ‘Make Selection’.
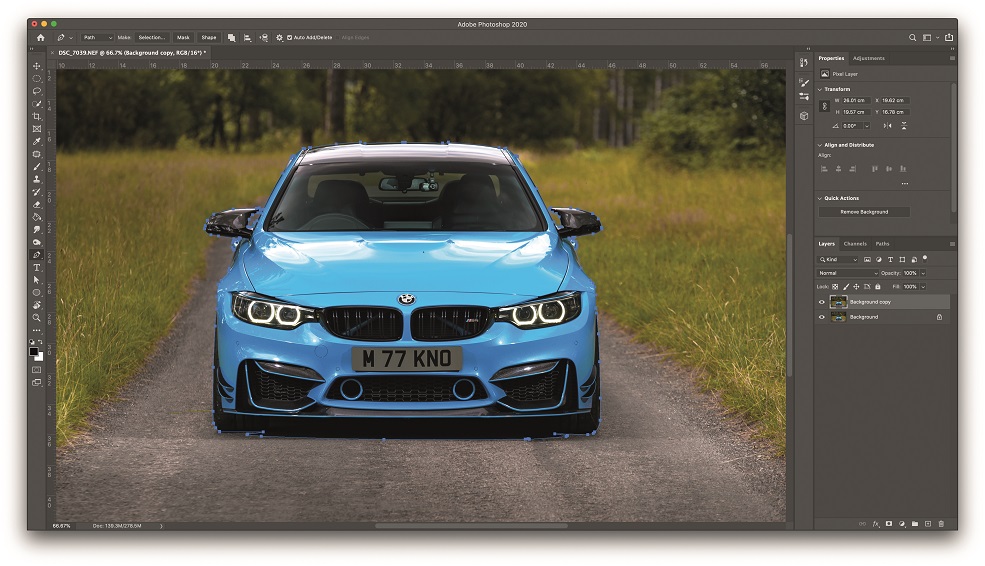
Step 2
Now create a new layer with the car cut out from the background; to do this go to ‘Layer’, ‘New’ and ‘Layer Via Cut’. Tip: when creating new layers, always name them so you know what they are for. This can be done by clicking on the name in the layers panel to the right.
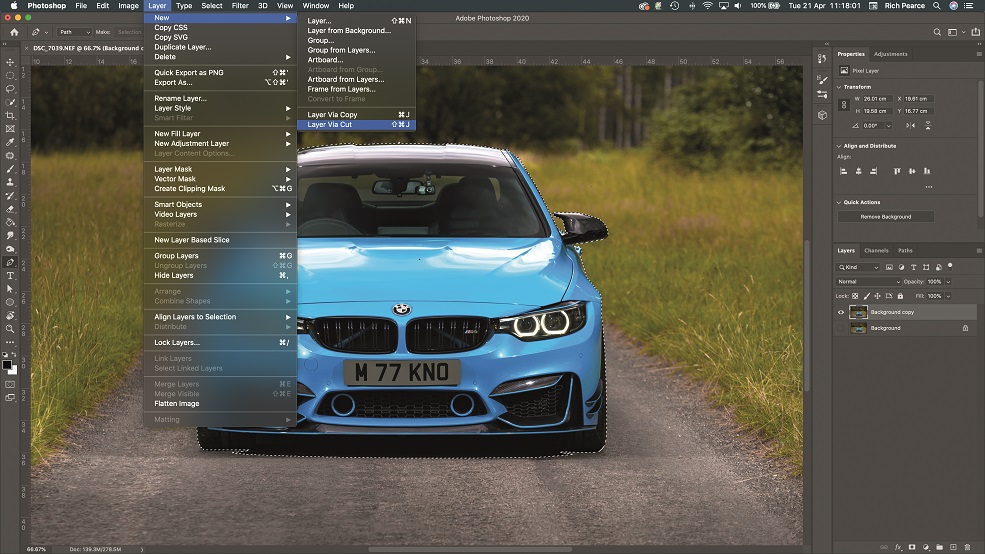
Step 3
After this, you’ll have a new layer with just the car cut out, so hide the other layers by clicking the eye icon on your layers panel on the right.
Step 4
Next up, you’ll need your new background for the shot. When choosing this, keep in mind how the car photo has been lit, so which direction light is coming from, and the angle that the car has been photographed from; if you get these wrong, the car will never appear to sit properly in the new image. The background image can be something you’ve photographed or an image you’ve sourced online, just make sure the image is of good quality to avoid it looking pixelated.
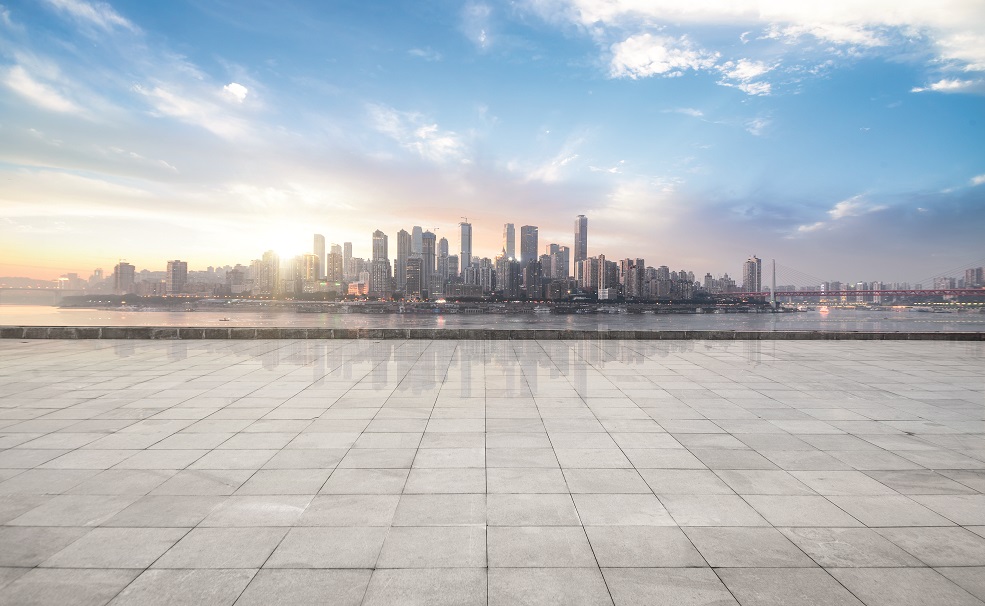
Step 5
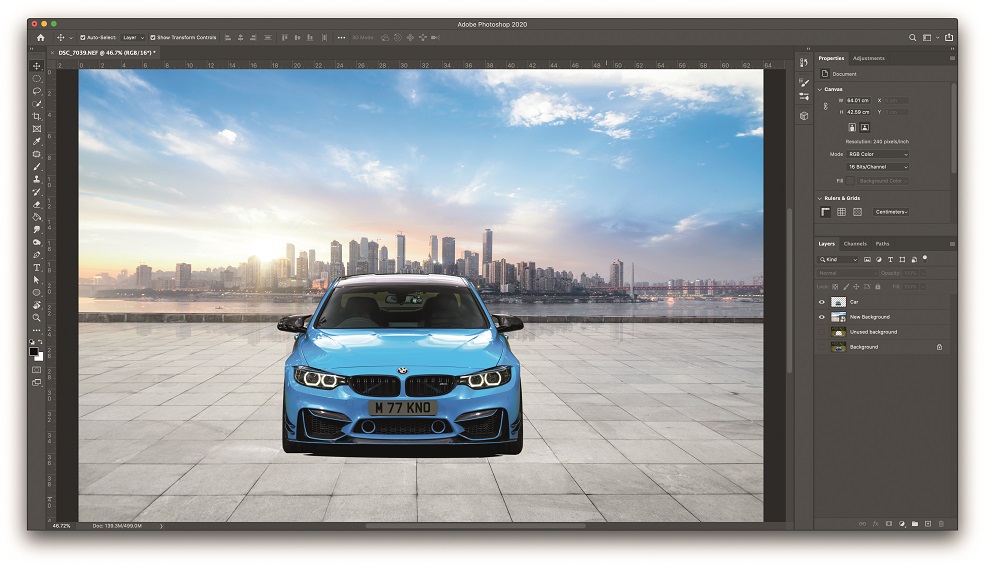
Now add the new image to a new layer in Photoshop (below the car layer); to create a new layer click the ‘Create A New Layer’ icon at the bottom right , now size and position the image to what looks good (this can be the hardest part!). When done, you’ll have something that looks like this below:
Step 6
Next is to cut out the areas in windows that show the original background, so in this image the area of the windscreen that shows background needs to be selected and cut out in the same way that we did the car, with the pen tool. Tip: when making selections, it’s best to save the selection in the ‘Select’ tab at the top, so that you can bring up the same selection easily later on if required.
Step 7
Once the windscreen is clear with the background showing through, you’ll usually need to colour blend that area, to match the edges of the windscreen that haven’t been cut out. To do this, on a new blank layer above the car layer, load your windscreen selection again, and colour in this area as needed with the brush tool on a low opacity setting. Once this is done, you can merge your windscreen colour layer with the car layer, simply by selecting those two layers on the right layers panel, and right-clicking and selecting ‘Merge Layers’.
Step 8
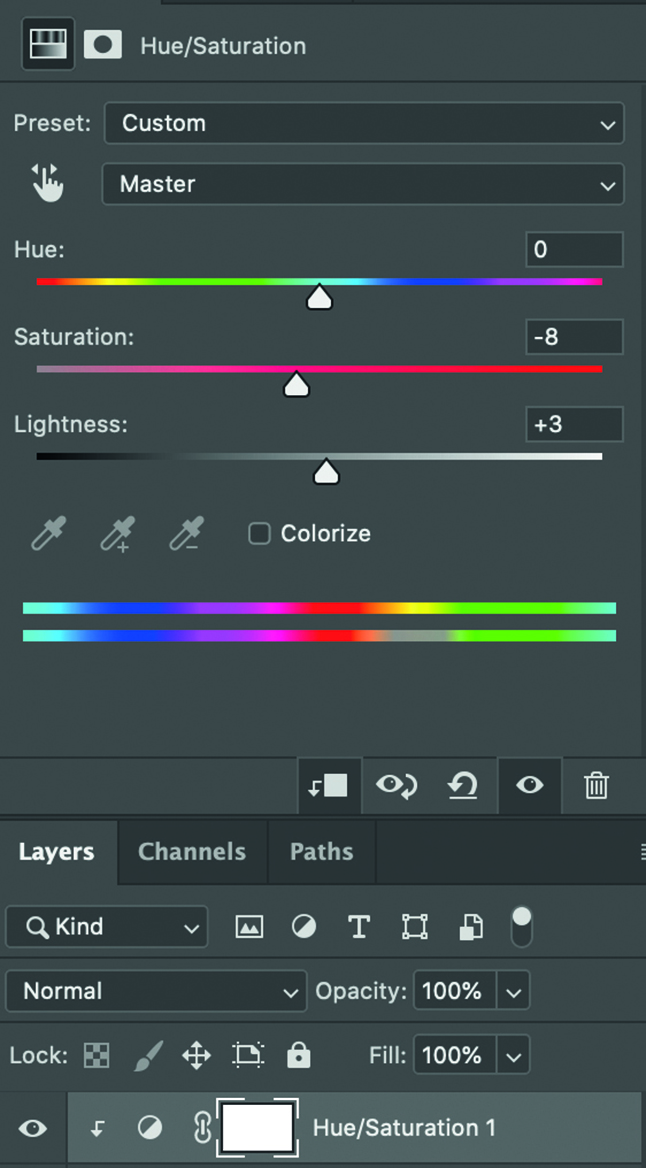
At this point, I find it best to adjust the colour hue and saturation levels of the car, to closer match the background. This is another way of further blending the car into the environment. To do this create a ‘Hue/Saturation’ layer above your car layer, and ‘Create Clipping Mask’ to this layer, doing this will ensure any changes only affect the car layer.
Step 9
After all this is done, now it’s down to the finer touches to blend the car into the scene. This includes adding shadows and reflections on the floor, removing unwanted reflections in the car’s paintwork, plus using the dodge tool and burn tools, you can emphasise the car’s shape with highlights and shadows. This section takes a lot of trial and error, finding what works so it will take some time and practice to get right and it’s too involved to be able to go into detail here. Tip: head to YouTube for individual tutorials on doing this.
Step 10
To finish, I add some colour grading to the image – this is what gives it its overall feel and look in terms of the colour throughout the image. This can be done in Photoshop using ‘Hue/Saturation’ layers, ‘Color Balance’ layers or a ‘Color Lookup’ layer. Or, if preferred, you can also save the image in Photoshop, then open it in Adobe Lightroom and edit it there. Here is what my stack of layers looks like on the final image:

The end result
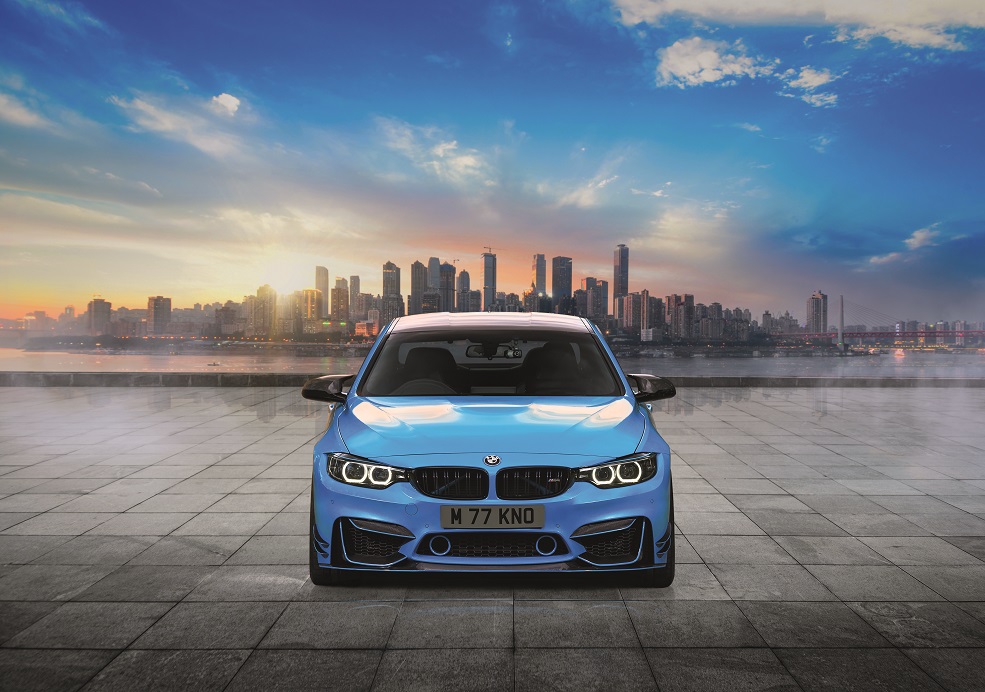
After all that work, hopefully, your finished image should look a little something like this – congratulations, you just Photoshopped your car! If you decide to show off your efforts on Instagram then make sure you tag me, and now there are only two things left to do – first of all, sit back and admire your work and, secondly, keep practising to improve your skills! Good luck! We hope you enjoyed this Photoshop tutorial for beginners.
Photoshop learning resources
Anyone who’s tried using Photoshop before knows just how mind-blowingly complex it appears at first! It’s only after many, many hours spent practising that it becomes a bit more friendly. I feel it helps to remember to just take it one step at a time, it’s made up of 100s of separate different tools, so just learn them one-by-one, when you need them!
We live in the best time ever to learn new computer-based skills, with sources all over the Internet that will help you, and best of all, most of them are free! I’ll share with you a couple of resources that have helped me immensely through the years, both on YouTube, so open a separate browser window while Photoshop is open, and jump in and out as needed. Search for the channels Phlearn and PiXimperfect.

