

A car air filter can take less than a minute to replace and may restore its performance and improve fuel economy. Follow our guide to discover what’s usually involved.
Most standard car air filters on engines consist of a paper construction that’s designed to trap dirt. So, instead of that dirt being sucked into the engine and causing damage, it stays on the filter. Over time, that build-up of dirt restricts the airflow to the engine, effectively strangling performance. And it also doesn’t help fuel consumption. Replacing the air filter is the best answer. The following information provides a general overview of what’s involved.
How To Change a Car Air Filter

1. Locate the car engine air filter
Most air filters are contained inside a plastic housing and, there may be two of them, especially on V8 engines. If you own a Jaguar XKR for instance, the air filters are accessed through the arch trim for the front fenders!
Consequently, the air filter isn’t always so obvious to spot. If you can’t find it, look for a black plastic box that’s roughly 8-10 inches across. Unfortunately, there may be a few of them, so you could uncover anything from the fuse box to the battery. At least you’ll get to know the components in the engine bay.
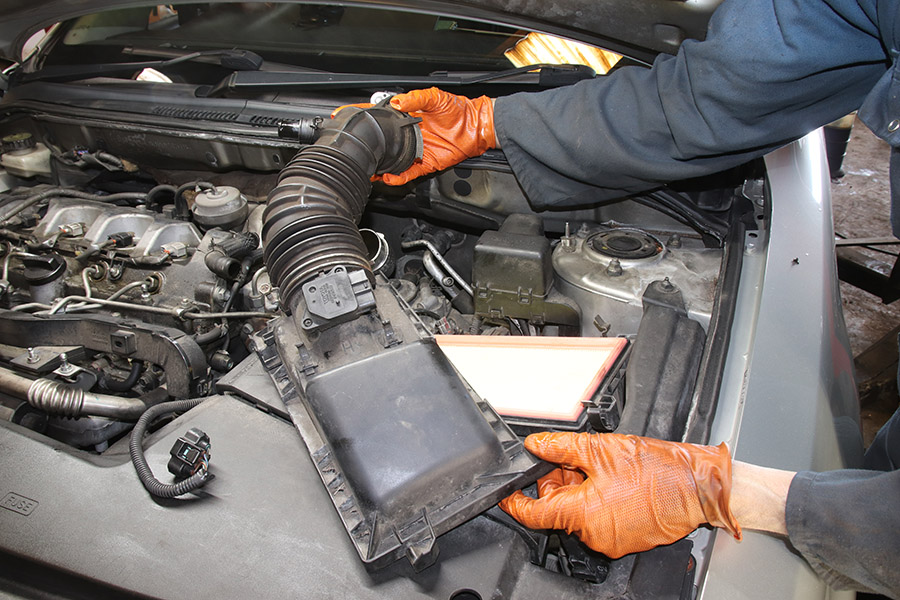
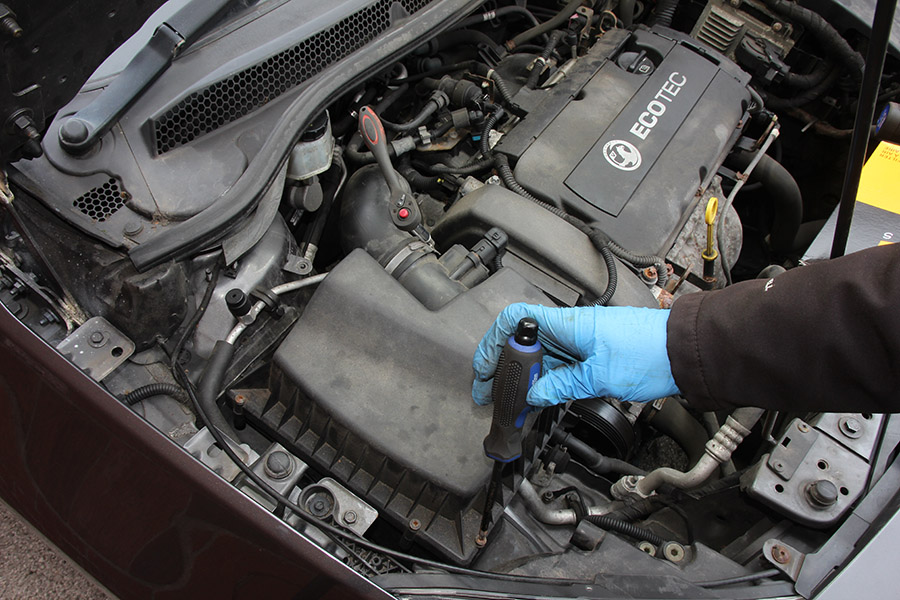
Remove the entire housing
On some cars, the entire air filter housing needs to be removed. As a result, this enables it to be split open to extract and change the air filter. The housing may be attached by a couple of hoses and some bolts. Once removed, there could be several screws to undo to access the air filter.
Dropping an engine air filter
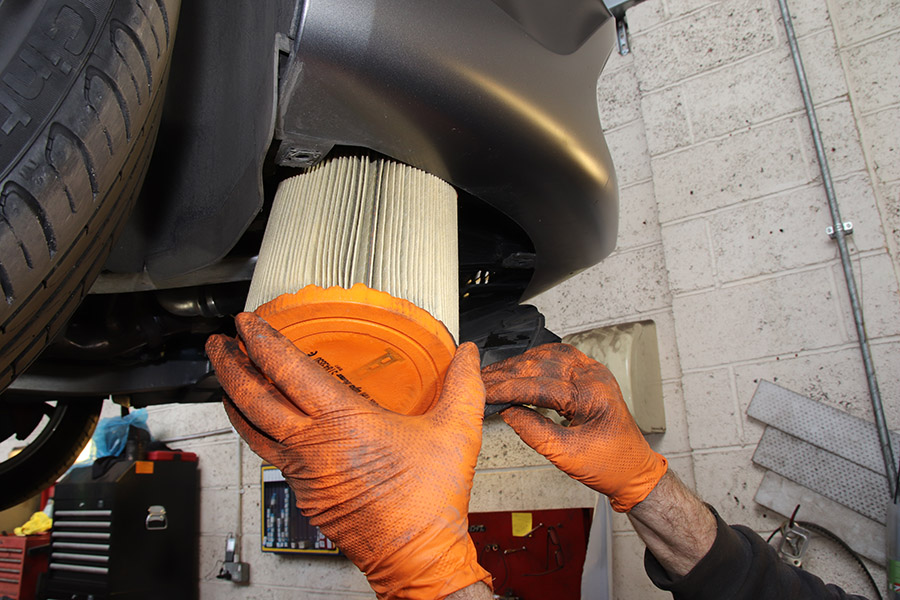
There are some peculiar locations for the air filter on particular vehicles. For example, the Alfa Romeo Giulietta (2014-2020), where on some engines, the air filter is removed from underneath the engine bay.
2. Undo the lid on the car air filter
The plastic air filter housing is usually sealed to avoid dirt from inside the engine bay getting sucked inside. Often, there’s a separate external air feed. However, there should be a lid to this housing, which can be released. The lid may be secured with metal spring clips or several screws. Typically, the spring clips may be awkward to release and any screws could be covered in rust. So, take your time with undoing or releasing anything and don’t lose your patience. Spray penetrating fluid over any rusty fastenings before trying to undo them.
Once the lid has been released, it probably won’t fall off to reveal the air filter. There may be a hose attached to it, so it won’t move too far. There may also be an electrical plug attached for a sensor such as the mass air flow (MAF). These may need to be detached to allow the lid to be fully removed. Alternatively, there may be just enough space to lift the lid and extract the old air filter.
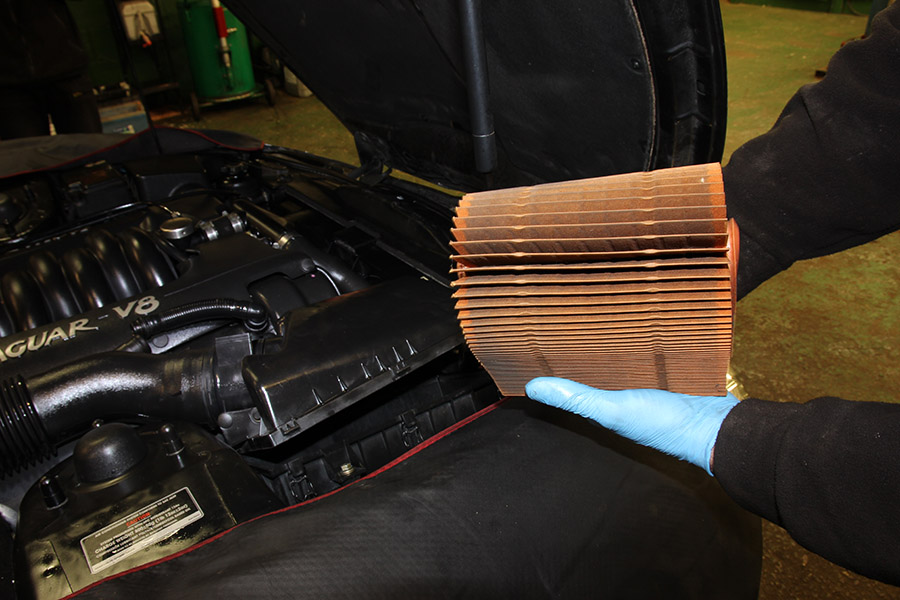
3. Check the old air filter
Once you manage to extract the old air filter, take a close look at it to check over its condition. Separate any pleats (usually on the underside) to see how much dirt has been collected and ingrained. If it’s choked with dirt, it should be replaced. If you are in any doubt, change it.
4. Clean inside the housing
Before you replace the car air filter with a new one, or even refitting the old one, there’s some cleaning to do. Look inside the air filter housing (where the filter was sat) and check it’s clean. There may be dirt and dry leaves inside. If there is, try to pick or wipe them out. Alternatively, if you have a vacuum cleaner, suck the dirt out with it.
The dirt may extend beyond the air filter housing, so check any feed pipes to it as these could be blocked.
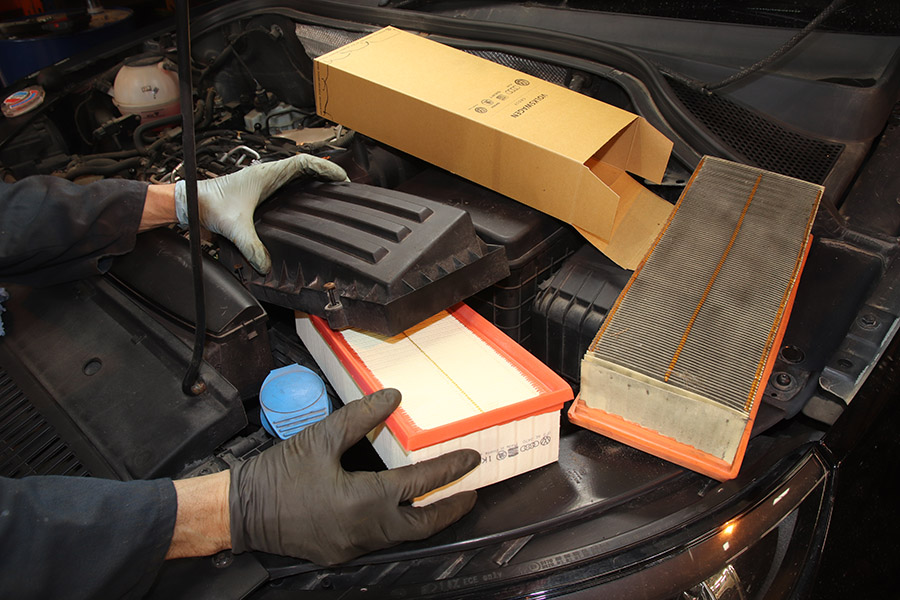
5. Replace the car air filter
If you are replacing an air filter, check the new one is the same shape and size as the old one. Compare the two side by side. Check all dimensions, particularly the depth.
6. Seal the air filter
When fitting an air filter into the housing, there are some points to note. If the air filter has a rubber seal around its edges, make sure the seal doesn’t hang over. If it does, the lid of the housing won’t fit correctly and the seal will get trapped. This may lead to an air leak, allowing dirt to bypass the filter.
7. Refit the air filter lid
Refitting the lid of the air filter housing can be finger-crunching. This is due to the fact that the metal spring clips can fall out or seem impossible to refit. Screws can refuse to line up and their heads may have rounded off. It’s essential to take your time. And the same goes for reattaching hoses and electrical plugs.
8. Check the car air filter for leaks
Once you’ve finished replacing an air filter, clear all your tools away, then start the engine. Listen around the air filter housing for air leaks. If you can hear air being sucked and it’s a noise that wasn’t there before, switch off the engine. Check all hoses and the lid to ensure they are fully fitted.
Relevant content:


