
Want better bass from your onboard speaker system? Here’s how to install a subwoofer in the trunk of your ride.
Installing a subwoofer is a relatively simple job and the sound gains are well worth the effort. To be honest, there’s not one passive sub and amplifier combo that can’t be fitted over the course of a weekend – you won’t be building an enclosure so we’re talking a matter of hours, not days. After all, these setups have been a DIY modding staple for years now, and that’s for good reason too.
Why do I need a subwoofer?
You see, without a woofer reproducing the sub-bass originally recorded on your music, you’re just not hearing it as the artist intended. You’re not getting the full picture. So a sub, no matter it’s size or output, is an essential.
That said, a well-designed, permanent install is a thing of beauty, but they’re not for everyone. Some of us like to have the option of being able to quickly and easily remove the lot for such tasks as trackdays, getting a washing machine in the back, or taking your mum to the airport (you put your mum in the trunk, Midge? – Jules). And that’s where the genius of active woofer systems come in.
An active woofer, is basically a sub and enclosure with a perfectly matched amplifier built in. They come in all shapes and sizes nowadays, from single 8-inchers to multiple ‘Twelves’ and everything in between. The thing to remember though, is that the fitting process may be more or less the same as with a passive woofer and amp (they’ve just connected both together for you), but these are mounted in one unit so are far easier to whip out should you need your boot space back. Anyway, installing a decent setup is a relatively easy job, so strap in because that’s exactly what we’re gonna do.
Our Chosen Gear
As with choosing any audio product, quality is everything. We’d always recommend going for a brand you trust (at the very least one you’ve actually heard of), and plumping for the best kit you can possibly afford.
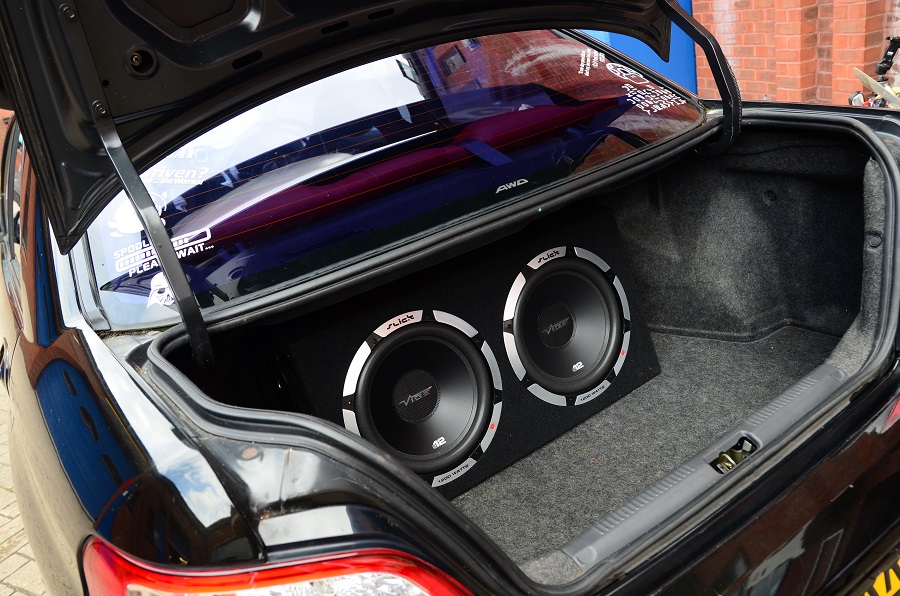
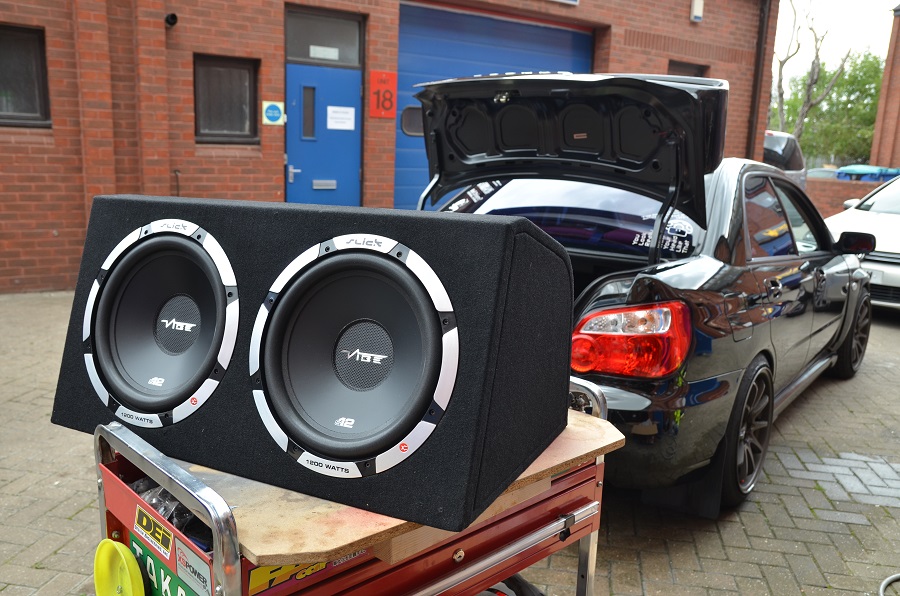
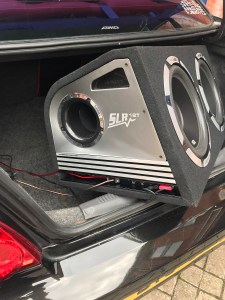
For this test we’ve chosen perhaps the biggest mother of all, VIBE Audio’s flagship SLR12 Twin Active. With a hardcore monoblock sticking 2400watts (800watts RMS) of sheer grunt straight up two of their award-winning Slick 12 woofers. But remember it’s all down to your personal application. This one’s designed to provide serious air-shifting ability which is not only perfect for our Scooby sedan test car (where the boot is separated from the cabin by more than a flimsy parcel shelf), but spot on for our particular owner who wants loads of hardcore bass on his daily drive, but the option to remove the kit quickly to go racing.
Yes, it’s huge, but don’t forget that’s missing the point. You can choose whatever size or configuration you want. From separate sub and amplifier systems, to under-seat active woofers and single boot-mounted bass cannons, fitting this bad boy is pretty much the same as all of them. And here’s how it’s done…
Want to check out some other options? Try these subwoofers instead.
Getting Started
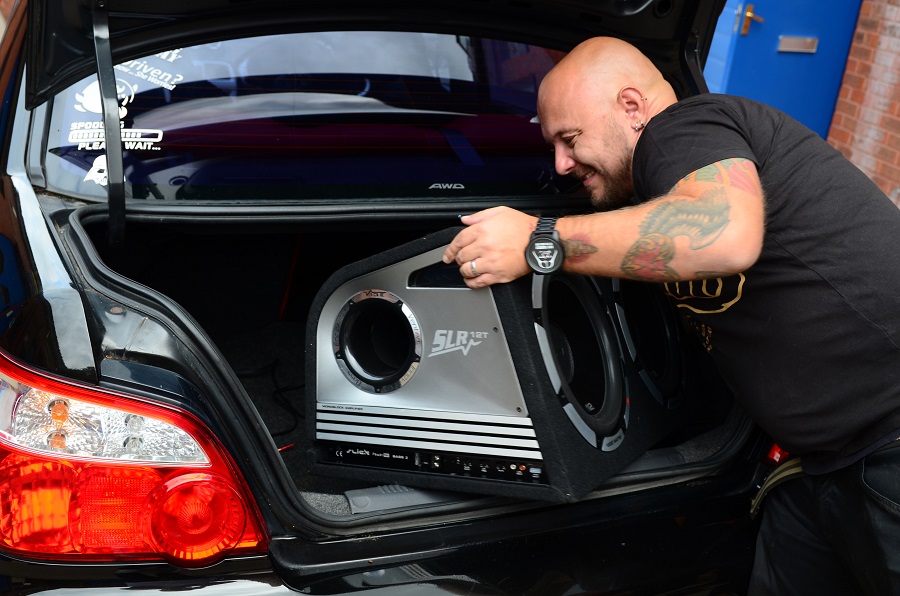
First things first, you need to check your gear fits. Whether that’s under the seat, in the rear of a two-seater or, as in our case, in the boot; test the space available, have a cuppa and make your master plan. Have a think about how you’re going to secure your enclosure. Some will need to be screwed down, others strapped and some you can simply secure with some Velcro tape or sticky pads. You don’t really want your expensive new kit sliding around all over the place, do you.
Most good quality, active subs, will come with dedicated wiring that’s perfectly matched to the built-in amplifier. For passive sub and amp setups, you’ll usually have to purchase a wiring kit separately. Get the right one for the power output of your amp, and always follow the manufacturer guidelines.
Last of all, make sure you have your head unit release keys handy. Fitting a sub nearly always includes popping out your stereo to get at the wiring behind, so you’ll need to be able to remove it. Now go and disconnect the battery (safety first) and we’ll get started.
Wiring
The bit that everyone seems to get hung up on is always the wiring but, if you’re methodical, it’s actually pretty simple.
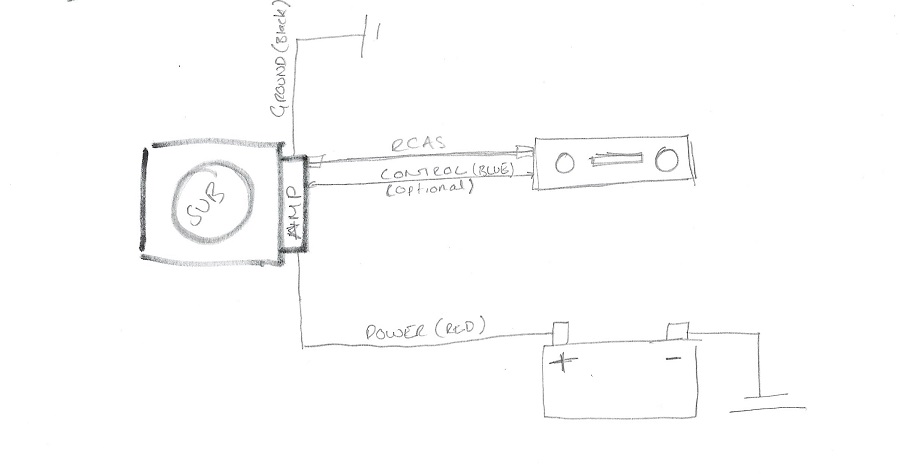
All amplifiers (whether they’re built into an active sub or not) need a 12-volt constant live (POWER) direct from the battery, a ground (or EARTH) wire connected to the chassis, and a way of getting the music signal from the head unit itself. In most cases (especially with aftermarket stereos like ours) you’ll get a signal by using low-level RCA leads. These literally plug into the pre-outs at the back of the head unit at one end and into the amp on the other – they’re even color-coded to make sure you can’t mess it up!
In some rare cases, usually with stock stereos, you won’t have head unit pre-outs so you’ll need to make use of the amplifier’s high-level input. This takes the signal directly from the speaker wires, utilizing a little plug that will need to be wired into the rear left and right speaker channels. The only real difference between an active sub and passive sub is that with the latter you’ll need to wire the sub to the amplifier yourself, and mount the hardware separately.
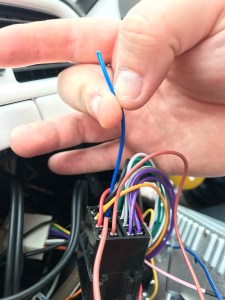
The Blue Wire
There is one other wire that you may or may not need. This is the fabled ‘blue’ wire (or REMOTE) and it’s used to tell the amplifier to switch on and off at the same time as the head unit. In most cases this can be connected to the electric antenna on/off output on the back of the head unit, which is the blue wire on the back on a standard ISO adaptor. Most wiring kits include a dedicated cable for this, and they usually make it a blue one to save any confusion. This also needs to be run to the head unit with your RCA leads.
Some modern active subs and amplifiers, (like this one), incorporate signal-sensing technology that automatically powers up the system as soon as it gets a music signal. In this case you don’t need a dedicated REMOTE wire. Winner.
Ground Wire
Personally, I like to make a start with the GROUND wire, simply because it’s all too easy to forget, run all the others, put the sub in the boot and then have to take it all out again to find somewhere to connect the bugger. I’ve lost count of the times I’ve done that, so now I just do it first, but you can do it whenever you like.
Anyway, the GROUND needs to go to a good, clean chassis earth. Usually it’s best to find a ‘common ground connection’ which is usually a bolt on the chassis that the manufacturer has chosen to earth various electrical components. If it’s good enough for the vehicle designers, it’s usually good enough for us but, to be fair, any bolt that goes directly to ground will usually do the job. Just make sure there’s enough cable to get to where you’ll be mounting your amp!
Power (12V+) Wire
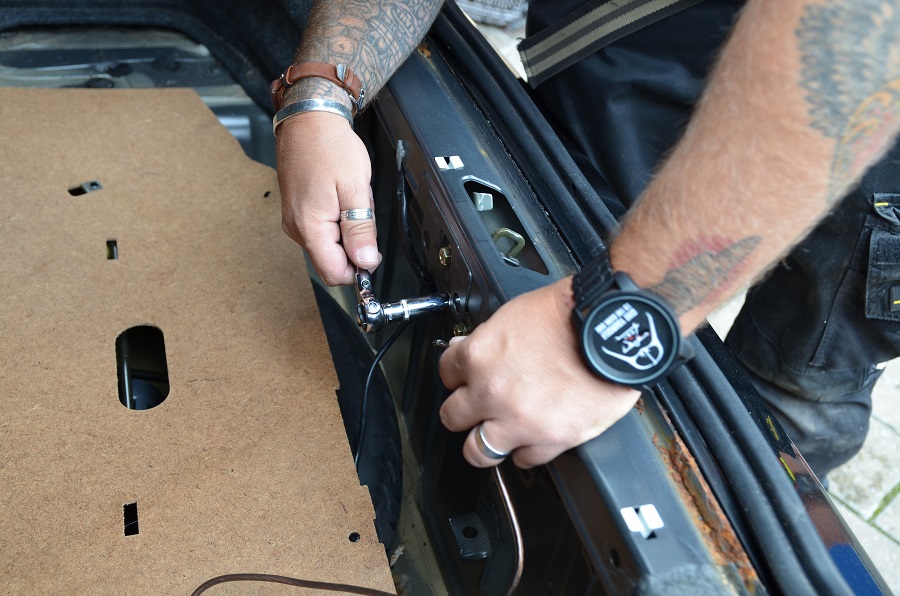
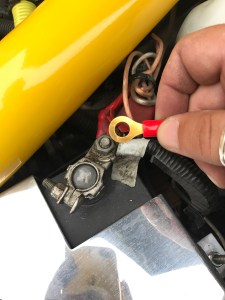
This will be the big red cable in your kit which goes, always via a big fuse or circuit breaker, to the positive terminal on your battery. You may be lucky and have your battery in the boot (like on some BMWs), in which case you’ll only need a short length of the cable. Chances are you’re not though, and that means you’ll have to route the cable through the car, behind the dash and into the engine bay.
The established way of doing this is to start under the bonnet and find a grommet in the bulkhead (or somewhere where the factory loom is coming through) to feed the cable through to behind the dash. Don’t hook it up to the battery terminal just yet or, if you do, make sure you’ve taken the fuse out first!
With the cable now in the cabin you can run it under the carpets between the doors and seats to wherever you’ve chosen to mount the sub. With most cars you can whip the plastic trims off and tuck the cable under the carpet. You’ll usually find a whole host of factory looms under there too.

Signal
High level input users can now connect the plug to the rear speaker cables. Most of the time though, you’ll be using RCA leads that you’ll need to route through the car and to the back of the head unit. While you’ve got all the trim out, it makes sense to run them under the carpet with the POWER cable. The vast majority of installers do it like this, but others prefer to run them down the other side of the car to prevent any electrical interference. It’s up to you, although personally I’ve never had any problems with running RCA and POWER cables on the same side. The final thing to consider here is the REMOTE (blue wire) if you need one, that you’ll need to run with the RCA leads.
Now, pull out your head unit and plug them all in – if you have dedicated ‘sub out’ pre-outs use those. If not, most people simply use the rear pre-outs and turn on the lowpass crossover on the amp (so it only gets the low frequencies).
Don’t put your head unit all the way back in for now and make sure there’s enough slack on the wires in the trunk, especially if you have a big, bulky box to try and hook up.
Hook up your kit
Now it’s time to connect all the wires to the amp (and connect your sub if applicable). It’s essential you get this right, but don’t worry, they’ll all be labelled, either on the hardware or in the instructions. It’s best practice to pull the fuse out of the amp before you do this too, just in case.
With that done you can have a quick test. Turn the gain control up slightly, connect the cable to the battery and pop the fuses back in. Turn on the head unit and put some music on, preferably some with hefty bass. Make sure the amp has fired up (there’s usually a power LED) and that you’re getting some sound from the sub. All good? Great, well, now here’s the important bit. Turn off your stereo and make sure the amp turns off (it may take a couple of seconds). If it does, you’re all wired in, so pop your head unit back in. If it doesn’t, recheck all your connections and be grateful you don’t have to remove the head unit all over again.
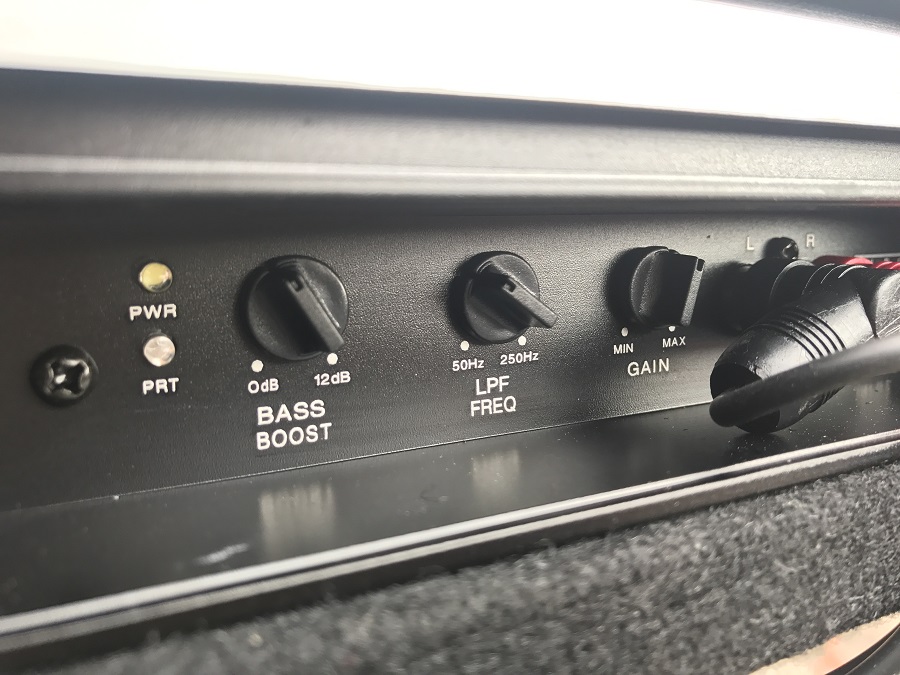
Set up your sound
Now you’re fully connected, the last thing is to set up the woofer. Most subs take a while to loosen up so don’t hit it with everything straight away. You’ll need to tweak the settings over a few weeks to get the exact sound you want, but that’s half the fun, right? Besides it’s different for everyone, so you can experiment with crossovers and bass boost as much as you like, what’s most important is that you don’t turn the gain all the way up until everything’s bedded in nicely. Even then you may not want to, it’s down to personal preference and often the size of the subs.
To get you started I’d recommend turning your head unit volume up to around three quarters, turn up the gain on the amplifier until you start to hear the beginnings of distortion, then back it off a little from there. Luckily for you, we’ve got a whole article about setting up your sound system, so feel free to read that next.


