
So, you’ve bought some upgraded brakes for your project car, but now what? Here’s how to fit brake rotors and pads like a pro.
Never has there been a more worthwhile mod than uprated brakes. After all, being able to stop your car is quite important and, at some point, those rotors (discs) and pads will need replacing anyway. So why not whack in something better than standard? You’ll be surprised just how much difference it makes.
In fact, this is probably the ultimate DIY job and it’s certainly one of our favorites. But what’s most important here is not to be scared of it. Yes, we are talking brakes, and yes, it’s absolutely essential that you do the job properly. But I have faith in you dear reader. It really is an easy job that anyone with a few mechanical skills can do safely and effectively.
How To Fit Brake Rotors & Pads
Which Rotors & Pads Should I Choose?
Normally this is the bit where I’d say you need to look for the very best quality gear. But you already know that. These are your brakes after all.
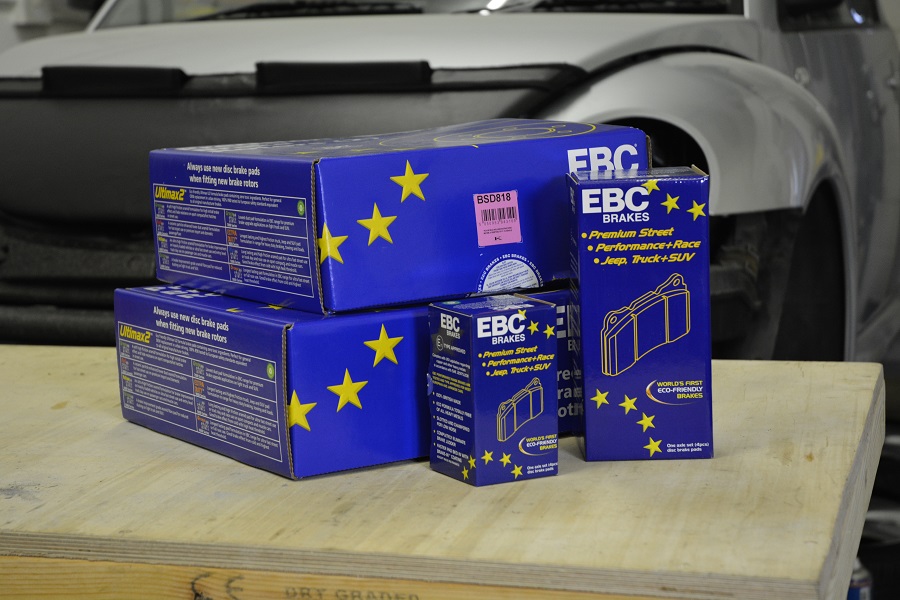
Swapping old stock parts for fresh new ones is exactly the same process, but since this is Fast Car, I’m going to be using a set of funky high-performance EBC BSD rotors in this example, paired with EBC’s fast-road Yellowstuff pads. You can get the same combination for your own car from online retailer demontweeks.
These are direct replacement parts and I’ll be doing the job on a car that carries the most common brake setup out there – floating single piston calipers (those with a separate sliding caliper and carrier). Some vehicles will have multi-piston floating calipers, and the fitting process is the same with those (you’ll just need to push in more pistons).
What about multi-pot fixed calipers?
Keep an eye out for stock performance offerings with multi-pot fixed calipers – the ones you’ll find on RS Audis, Subarus and the like. These are also the type of calipers you’ll find in most performance BBKs (big brake kits). In their case, the process is slightly different because they don’t have caliper carriers and you’ll need to remove the pads through the top of the caliper first (and fitted last). Very often replacing rotors and pads is much quicker with these setups, but then again, that’s the whole idea.
For the majority of us though, we’ll be looking at cars with normal floating calipers. So here’s exactly how it’s done.
Required Equipment
While you’re working, you’ll need to be able to push the piston (or pistons) back into the caliper. On front calipers, you can usually achieve this with a large pair of water pump pliers. For rear brake calipers (and some fronts) you’ll usually need a specialist tool to physically twist the piston back into the caliper.
Safety First
You’ll be fitting parts that are just like the ones you take off, so if the shape and size of the original pad or rotor looks different along the way, it’s the wrong one. This is where a trusted supplier comes in.
First thing’s first though. You’re going to need to jack up the car (on flat ground) and secure it on axle stands. Use your head for this part… no not literally, just make sure everything is solid and the car isn’t going to drop.
I’ve concentrated on the front brakes in this guide, chiefly because they’re the most important for stopping power. Doing the rear pads and rotors is essentially the same job, although you’ll usually need a piston winding tool and will have to remember to re-adjust the handbrake afterwards.
Caliper Removal
Once the car is secure, you’ll need to pop the wheel off (obviously). You’ll also have to get under the bonnet and take the cap off the brake fluid reservoir – this will become important later, to ease the pressure when you push the piston back in the caliper.
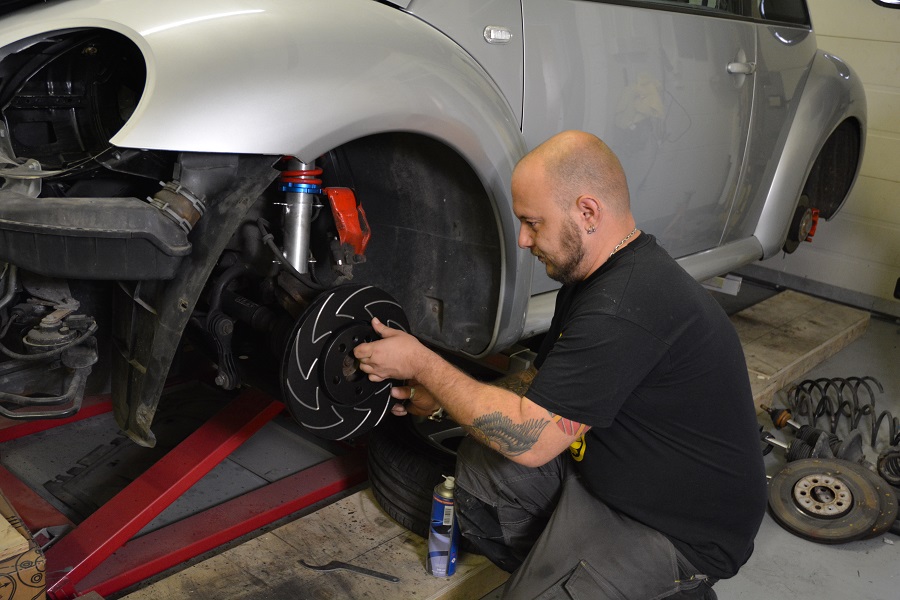
For now though, the first job is to remove the caliper and, even though I’ve clearly run out, I’d always recommend wearing nitrile gloves when handling these parts. Brake dust isn’t the best stuff for your skin. As for the main caliper body, you may have a metal spring clip on the front, so pull that off first. Then you’ll find it’s attached to the carrier with a couple of retaining bolts at the back. Quite often these have standard six-point bolt heads, so you can use a socket or spanner, although on many (this one, along with a load of other VAG cars and Fords) you’ll need a large hex key or socket. On some cars you’ll also need to use an open-ended spanner to stop the bolt spinning.
Once you’ve undone the caliper, pry it off with a large screwdriver or pry bar, unplug any electronic pad sensors and remove the old pads. In my case, the main calipers on this Beetle house the pads, but very often you’ll find the pads left on the carrier after you remove the caliper. It doesn’t matter which way around yours is, but just make a note of what pads go where for when you’re refitting them. After this you won’t need the caliper for a bit, but you still don’t want to leave it dangling around on the brake hose. Support it with an axle stand or tie it up out of the way.
Rotor/Disc Removal
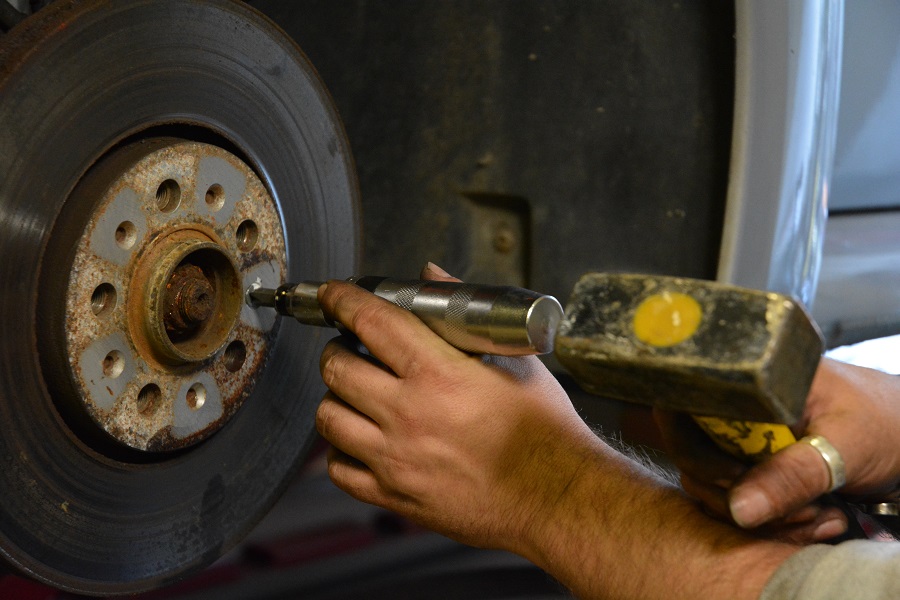
Next, it’s time to get the old rotor off. Most often the caliper carrier will be in the way, so again you’ll need to get behind the hub to locate the mounting bolts. Crack these off with a socket and remove the whole carrier. On some cars you’ll now be able to slide the rotor off, but on others (like my Beetle here) it will also be screwed to the hub. Be careful when removing this screw, as rounding it off will seriously ruin your day. If it’s on there tight, the best way is to use an impact driver rather than a standard screwdriver (or hex key).
These remove the screw by jolting rather than through sheer twisting torque, so you stand a much better chance of not causing damage. If it’s all undone and the rotor is still not coming off, give it a whack on the back with a hammer to free it up.
Fitting The New Rotor
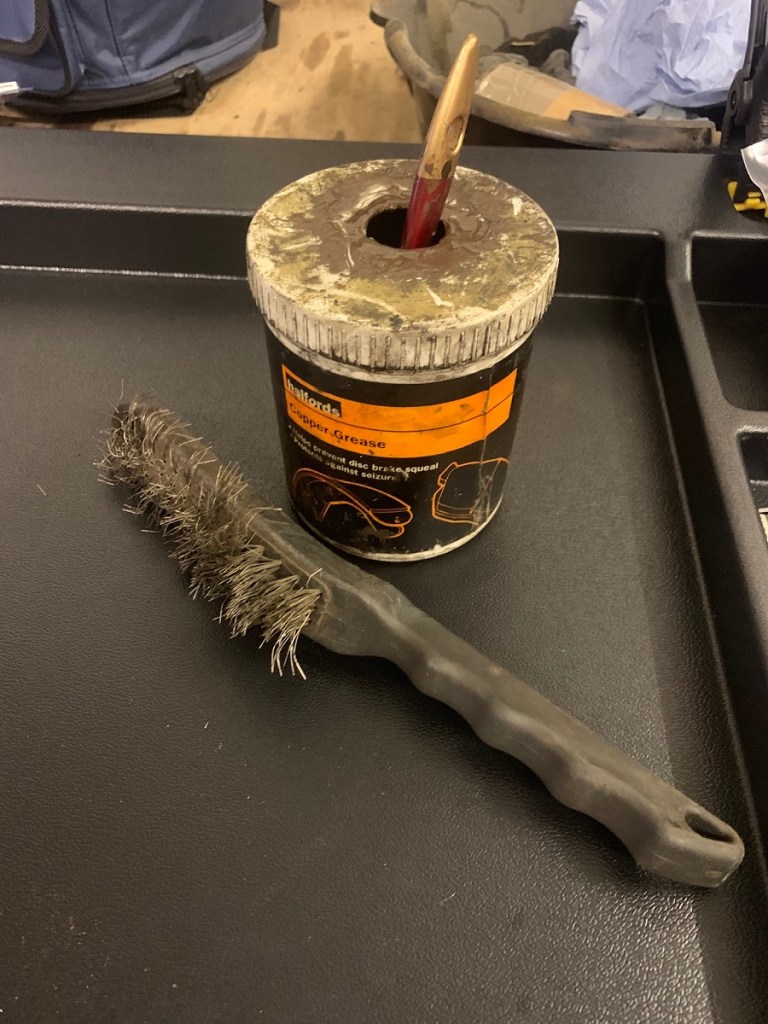
Fitting your new rotor is a simple case of sliding it on. Before you do that though, clean up the hub with a wire brush and some brake cleaner. The idea of this is to make sure the surfaces are flat to safeguard against any runout – you don’t want your rotors wobbling about, do you? No, you don’t. The rotors need to fit flush and it’s also best practice to apply a little copper grease to the mating surfaces to prevent seizing.
Now take your new rotor and give it a good going over with some brake cleaner. Rotors often have a special coating to stop them rusting in storage and you’ll want to get this off.
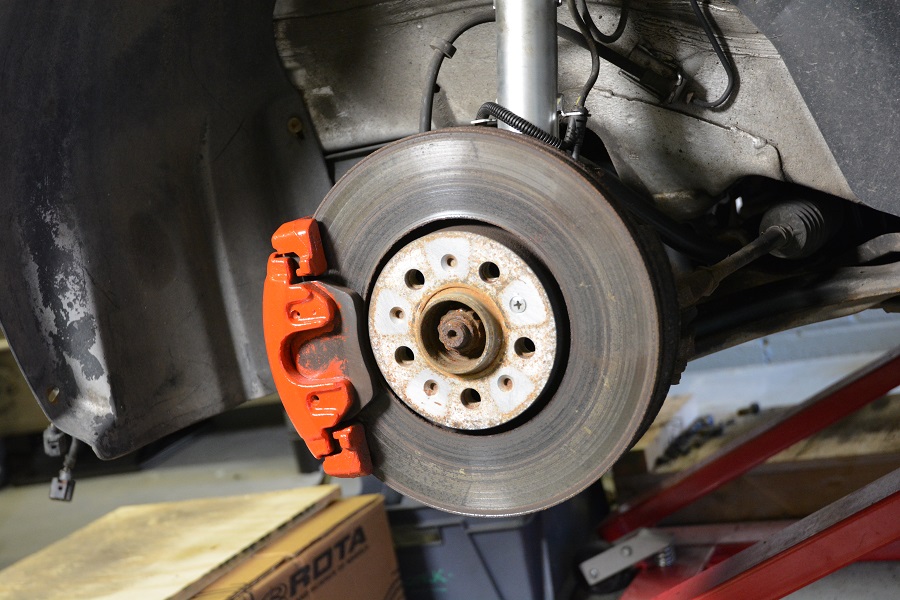
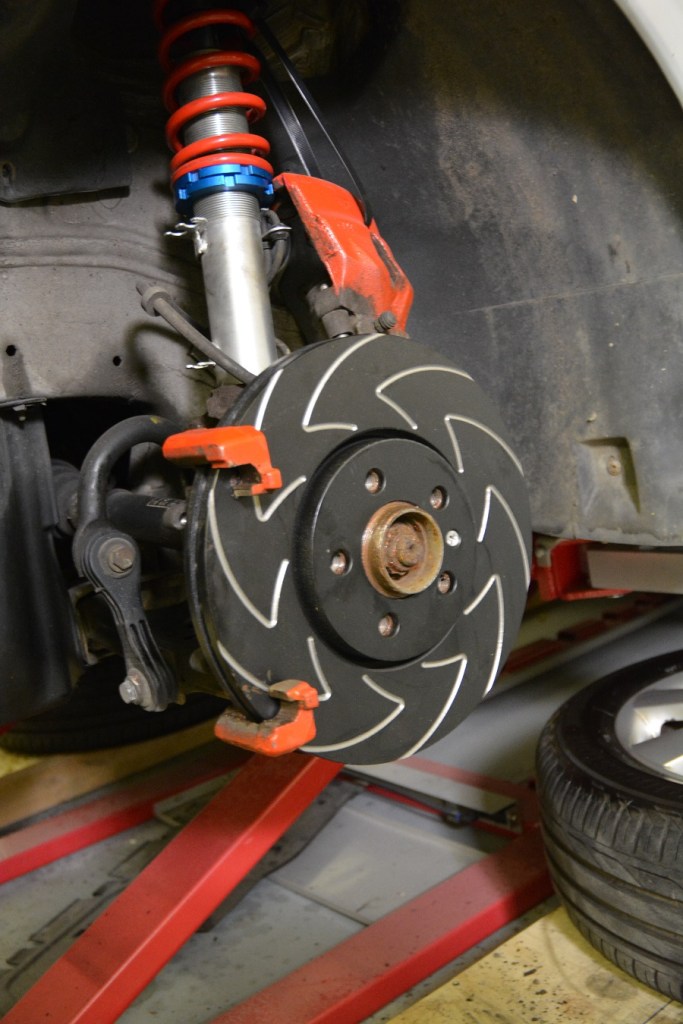
Now you can pop the rotor onto the hub, making sure it’s the right one as you go. Bear in mind that, because of the grooves, many performance items are directional. Once the rotor is back on, you can clean up and refit the carrier.
Pistons
Now you’ll want to give the caliper a good clean with your wire brush and brake cleaner, to remove any old brake dust and debris. But don’t go too mad. Make sure you don’t pop off and lose any metal clips that are on the caliper or carrier. You’ll be needing those.
Because your old pads will be more worn (and hence thinner) than your new pads, you’ll also need to push the piston back into the caliper housing to account for the extra thickness. For this you’ll usually need a big pair of water pump pliers or a specialist piston winder. This is also the bit where you get to pray your pistons aren’t seized out. Each one should slide back in smoothly.

Fitting New Brake Pads
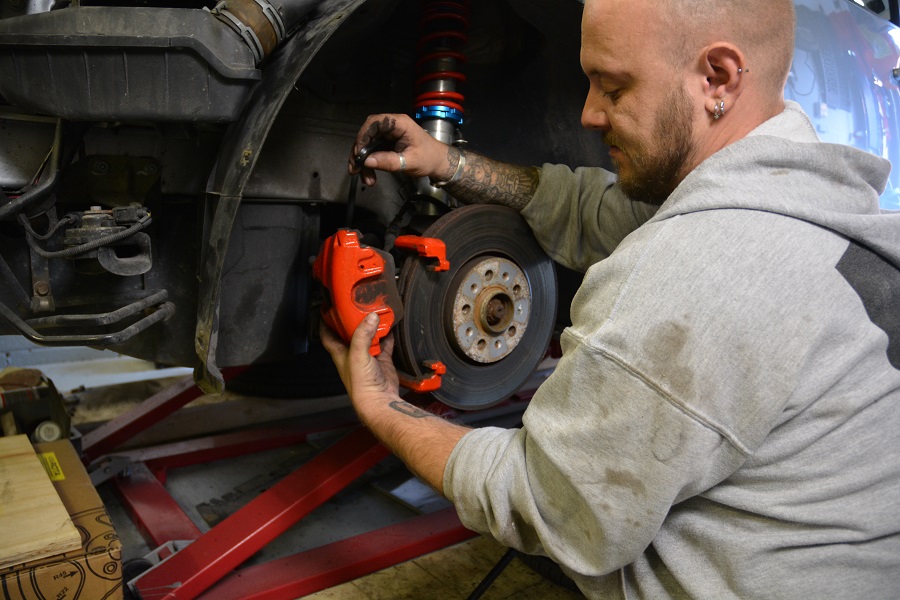
Grab your new pads and work out which ones go where. In our case it’s obvious because the pads have a retaining clip that fits into the piston, but that’s not always the case. Some also have an electronic wear sensor that you’ll need to plug in – that is unless the car doesn’t have the facility to monitor them in the first place, in which case you’ll need to cut ’em off. (Note: BMWs and MINIs often have a separate sensor that needs to be plugged into the pad and then the dash indicator reset).
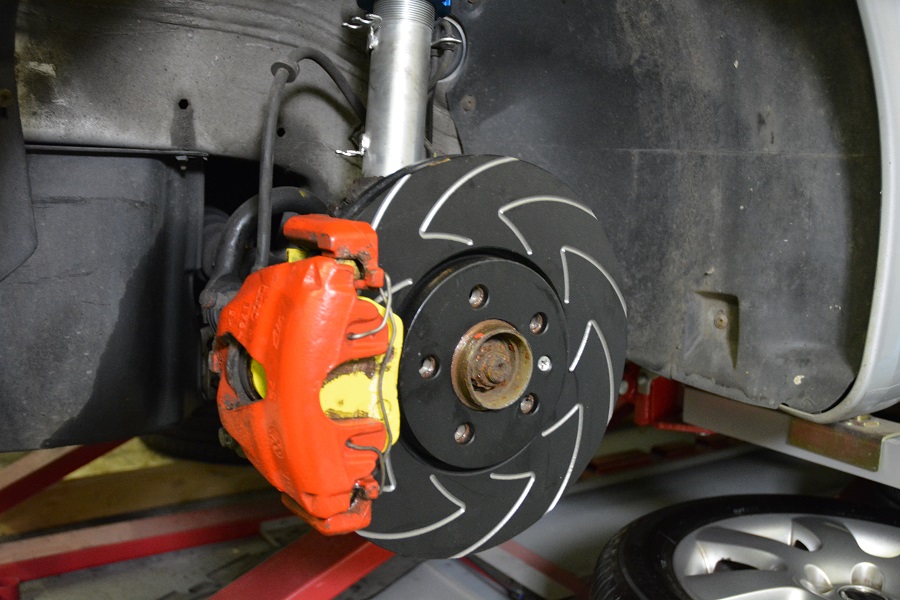
Before you fit your pads, slap a little copper grease on the edges where they make contact with the caliper or carrier, to help prevent squeaking and seizing. For obvious reasons, be careful not to get any on the rotor or the pad friction surface. Once you’ve mounted the pads, you can bolt the caliper back on in the reverse of how you took it off.
Don’t forget any metal retaining clips and be careful not to over-tighten the bolts as they’re usually small and easily snapped. Most people don’t, but it is best to refer to the manufacturer’s torque settings here.
Bedding-In
Once you’ve put the cap back on the fluid reservoir, you’re done for now (unless you’re doing the rear rotors and pads too). But bear in mind that you’ll need to bed your pads in over the next 100 miles or so. That means smooth, progressive braking until the friction surfaces are mated together perfectly for optimum bite.
There you go. Better stopping in no time at all!


