It’s all perfectly good getting a dash cam to guard the front of your car, but what if you get rear-ended? Well, it’s those scenarios where dual cam setups have got your back, keeping track of evidence at both the front and rear of your car. To see if this particular system is any good, keep reading this Thinkware X1000 dash cam review to find out how it performed when I put it through its paces.
How we tested the product
Whenever conducting these tests, I always aim to offer as much of a window into what it’s like to own one of these devices within the time I have available. That means going through the installation process as well as analyzing how the camera actually performs in different scenarios. So, hopefully by the end of this review you’ll feel as though you’ve got a well-rounded idea of all the key strengths and weaknesses to be aware of.
What qualifies me for that job? Well, while writing for Fast Car I’ve gained experience with most of the major dash cam brands on the market, which means I can reflect on how they stack up against each other. And that can only be a good thing.
What’s in the box?
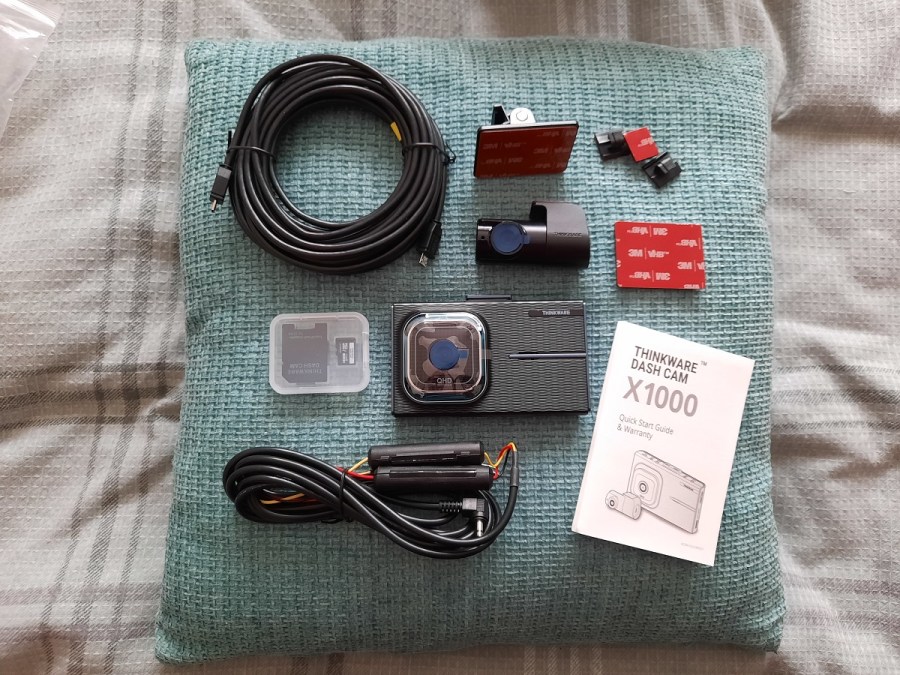
It’s all as expected inside the X1000’s box. You get two cameras – the large one is the front camera, the smaller one is for the rear. Handily, a cable to connect the two is also supplied, as is a memory card (which is a welcome rarity compared to rival brands). You can choose from either a 12V car port cable or a hardwiring kit to power your X1000, and in this instance we’ve got the hardwiring kit. An OBD2 power cable is also available at extra cost, but due to the less invasive nature of that OBD2 lead, I’ll be using that for the purpose of this test.
Elsewhere, you’ll find an adhesive mounting package and a short booklet of quick-start instructions. You can find a more comprehensive version online though, if need be.
Tech Specs (front & rear):
- Resolution:1440p @ 30fps
- Field of View: 156 degrees
- Extra Features: Parking mode-ready, driver assistance.
Mounting the camera
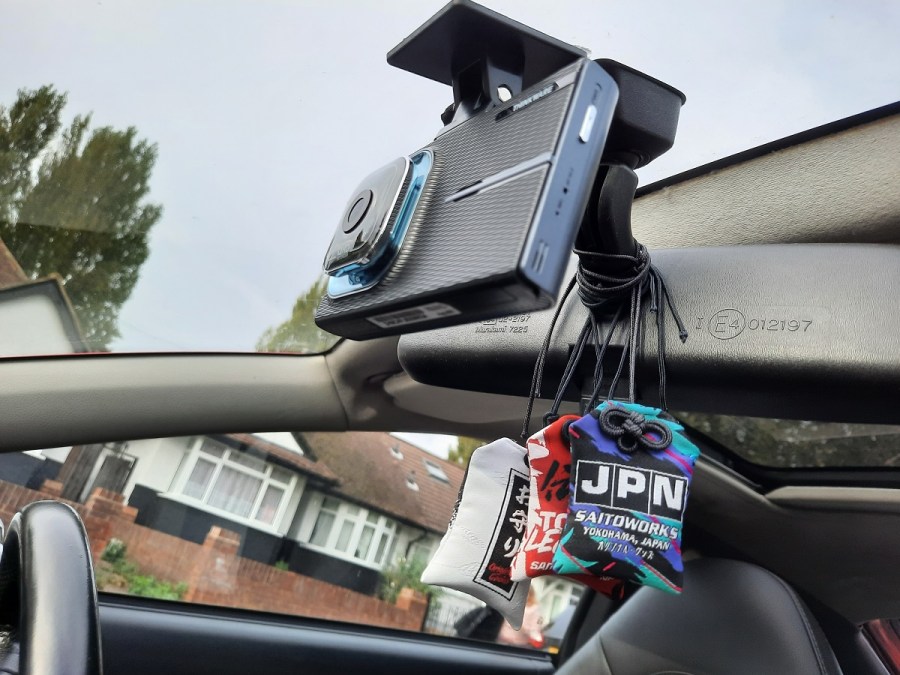
The good news for me was that the Thinkware X1000 shares the same mounting system with the Thinkware F70. That meant that as I had already installed the F70 previously, I could simply take the X1000 and slide it into position. Lovely. It also meant that I didn’t have to endure the adhesive nightmare that comes with sticking the mount to the windscreen. If you want to hear more about that, be sure to check out my review of the F70.
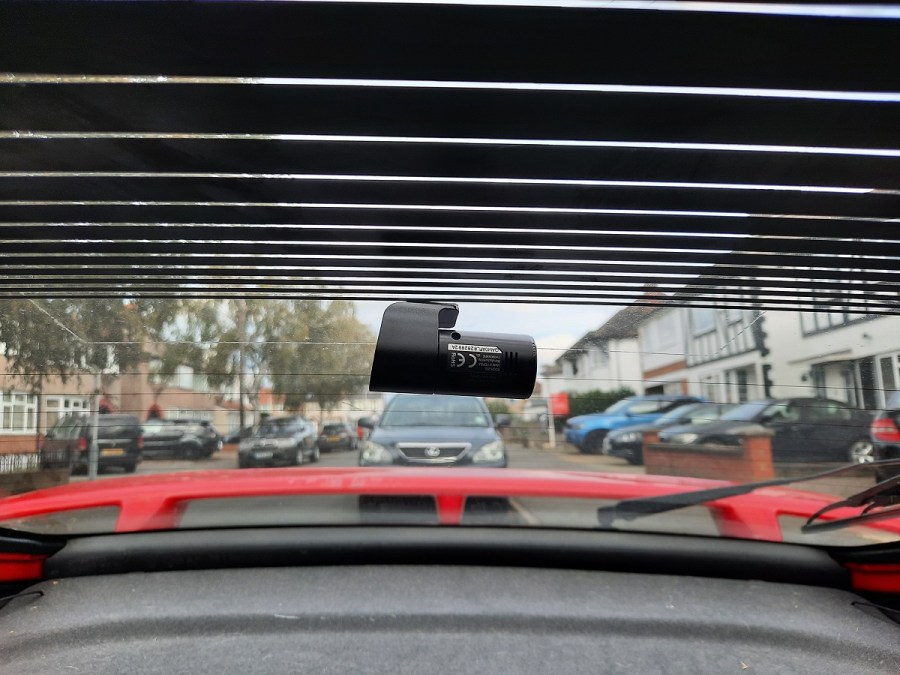
However, in your case, you probably wouldn’t have a pre-existing Thinkware mount ready and waiting in your car. And if you do, I have many questions. So, if you were starting from scratch, what you’d need to do is first remove the stubborn protective film on the mount back plate, and then place it somewhere high up and central on your windscreen (such as behind your rearview mirror, as I have done). This will not only give your camera lens the best vantage point, but also ensure that the camera itself doesn’t inhibit your own field of view.
Rear camera positioning
Ok, so you’ve sorted the front-facing camera, now you need to turn your attention to the rear one. This little fella is a much simpler being – it’s tiny and there’s no slide-on mounting clip, it’s just a case of pressing its adhesive strip onto the glass until it sticks.
As for location, you’re going to want to adhere to the same rules as the front camera. Aim for somewhere high up and central for the best view. That said, make sure that the lens’ view isn’t distorted by any sun strips that your car has on its rear window, otherwise half your video recording will just be a murky smudge. And that’s no good, is it?
To get the ideal placement, it’s always easier to use reference points as a guide. For example, my car’s rear wing has a central mounting point, so all I needed to do was roughly line the camera up with that (though in hindsight, it isn’t fully straight, so apologies to any of you with OCD). You can also pivot the body of the camera to different angles to adjust the direction that the lens is pointing.
Power & wiring
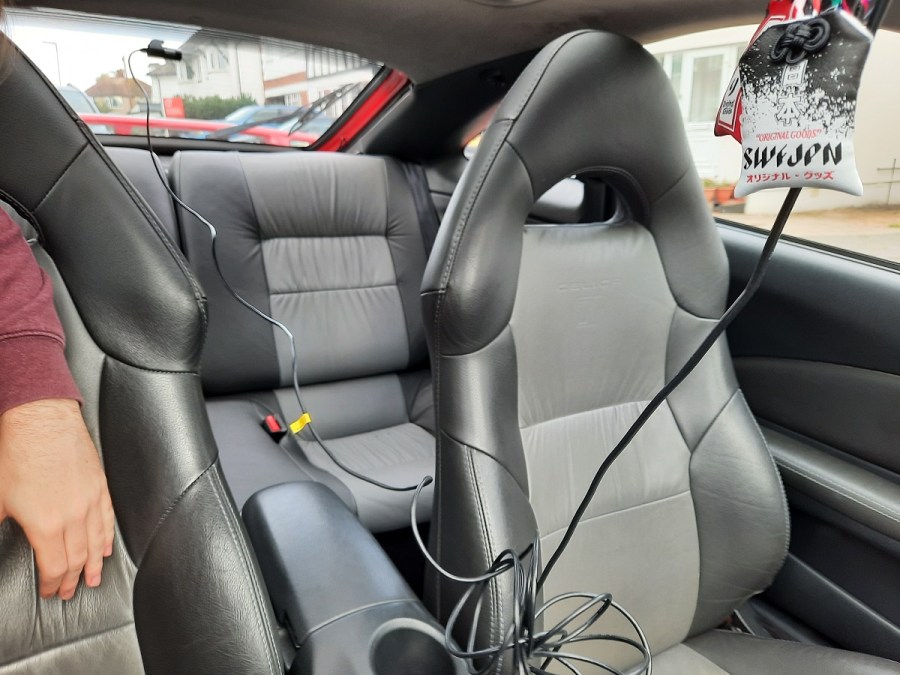
Now here’s the potentially troublesome bit when it comes to installing a dual camera setup – the wiring. Actually linking the two cameras is easy – you simply plug the rear camera into a DC jack, which then inserts into the front camera. This way, the rear cam can piggyback off of the front device’s battery and storage reserves. What it does mean, however, is that your car becomes rather entangled in cables, especially once you connect the front camera to a power source. In this case, it’s wired up to the OBD2 port.
Therefore, if you were installing a dual cam setup into your car for an intended long-term period of use, you’d absolutely have to tidy these wires away. For one, they’re a safety hazard, but they’re also a total ergonomic nuisance and an eyesore. As such, you’ll need to find creative ways of securely tucking the front power cable behind dashboard and pillar trim, while the cable hooked up to the rear camera will most likely need to be fed through your car’s headliner. You can get professionals to do this for you if you’re not keen on tearing your car’s interior apart by yourself.
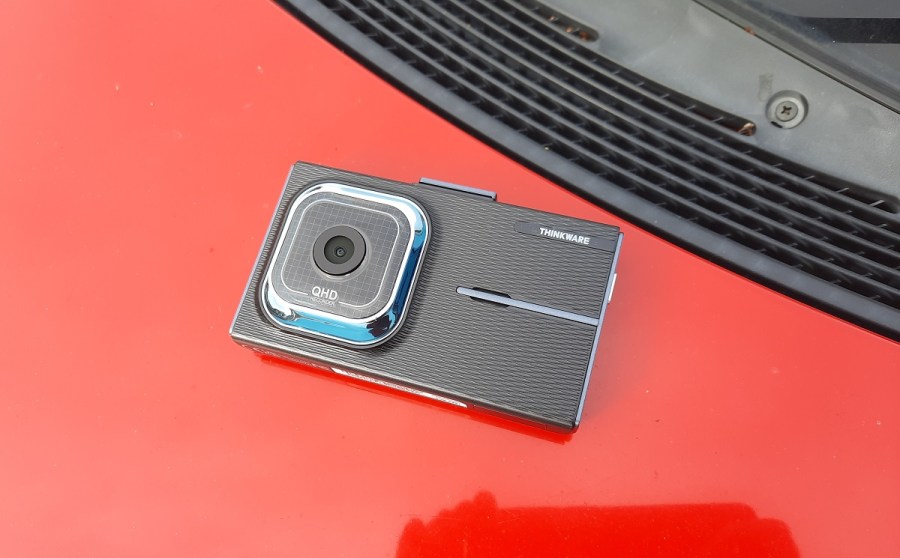
Front daytime image quality
Once I got the cameras set up, the natural next step was to take my car out for a drive and find out what the picture quality is like. So, here are a few clips which give you an idea about what to expect. Before we get into that though, it’s worth me pointing out that although the camera records in 1440p at 30fps, you might not quite get that resolution here due to file compression. But it should be close.
The first thing to tell you about is the field of view, which at 156 degrees is 16 degrees wider than average for a dash cam. That means you get a slightly better peripheral view. Overall, the X1000 performs well. Its original recordings are crisp and clear (slightly less grainy than what you might be seeing on this page) and the color palettes are reasonably accurate too. The day I took this footage was quite dreary, so it’s hard to give you a full representation of that. Crucially, when you go searching for the finer details like small signposts or vehicle registration plates, the text is easy to read.
One thing that did disappoint me, however, is the lack of GPS as standard. You can add it on at extra cost, but for a dash cam at this price point, it’s a real shame that it’s not included in the base package. After all, GPS data to do with location and speed can be vital in the court of law.
Rear daytime image quality
Despite being smaller in stature, the rear dash cam is technologically equal to the front device in regards to resolution and field of view. As such, it performs equally well, as you can see above.
Front night image quality
As usual when talking about picture quality in the dark, I have to caveat this with a simple fact about cameras. And that is that they won’t work quite as well at night as in day – there’s less light available to them, so it’s only natural. However, I must say that I was pleasantly surprised by the Thinkware X1000’s night time performance. It has some in-built tech which Thinkware calls Super Night Vision, and honestly I can see the difference.
The biggest plus point is the relative lack of glare. There is still a little bit, but if you search through some of my other dash cam reviews, you’ll see that it’s nothing in comparison to some other devices. So that’s great. What’s not so great is the prominence of interior reflections and the lack of fine detail – even the large road signs in this clip aren’t legible. However, those two things are something which pretty much every dash cam struggles with at night, so I can’t criticize it for that too much.
Rear night image quality
Again, expect similar things from the rear camera, but as an example have a look at the clip above. Do bear in mind that the weather was rather frosty, so apologies for the excess condensation on the glass.
Extra Features
As well as simple video recording, the Thinkware X1000 has a few extra features up its sleeve. The G sensor is an important one, as this forms the foundation of the camera’s parking mode. Essentially, when the car is parked and switched off, the camera will lay dormant (if you power it via an OBD2 lead or hardwiring kit), waiting for an impact. If/when it senses that impact, it’ll spring into life to catch the culprit red-handed. On top of that, the G sensor also operates as you’re driving. This is to detect if you’ve had a crash and thus store the footage safely. However, as you’ll see from the clip above, it doesn’t take much to trigger the sensor…
The bump I drive over just before the bridge isn’t exactly massive. And sure, my car has a slightly harsh ride at the moment, but it’s not like I’m running a track-focused spring and damper setup – this is the stock suspension, it’s just a bit worn from age. As you can imagine, the frequent beeping does get a little tiresome, and it’s not ideal to be clogging up file storage this way. Fortunately, you can change the sensor’s sensitivity in the settings, which unless you drive a Rolls-Royce, I’d highly recommend doing.
The camera also comes with driver assist features like lane & vehicle departure warnings, which might be useful if you’re a new or nervous driver. But for 90% of people on the road, they’ll just feel a bit unnecessary.
Verdict
So, does the Thinkware X1000 package get my recommendation? Yeah, it absolutely does. I really like the fact that the camera quality is pretty much equal at both the front and rear – that’s not always a given with dual cam setups. Plus, its performance at night was a positive surprise. Match that with good daytime picture quality, and you’re on to a winner. Of course, there are downsides. I’m not the biggest fan of the mounting process, and it’s a shame that you have to spend extra to get GPS capabilities for a camera with a punchy retail price as it is. The G sensor can be annoying, but it’s better to have to turn it down a notch rather than be left with a sensor that isn’t responsive enough instead. The core ingredients of the X1000 are good, and as such, I can forgive it those setbacks.