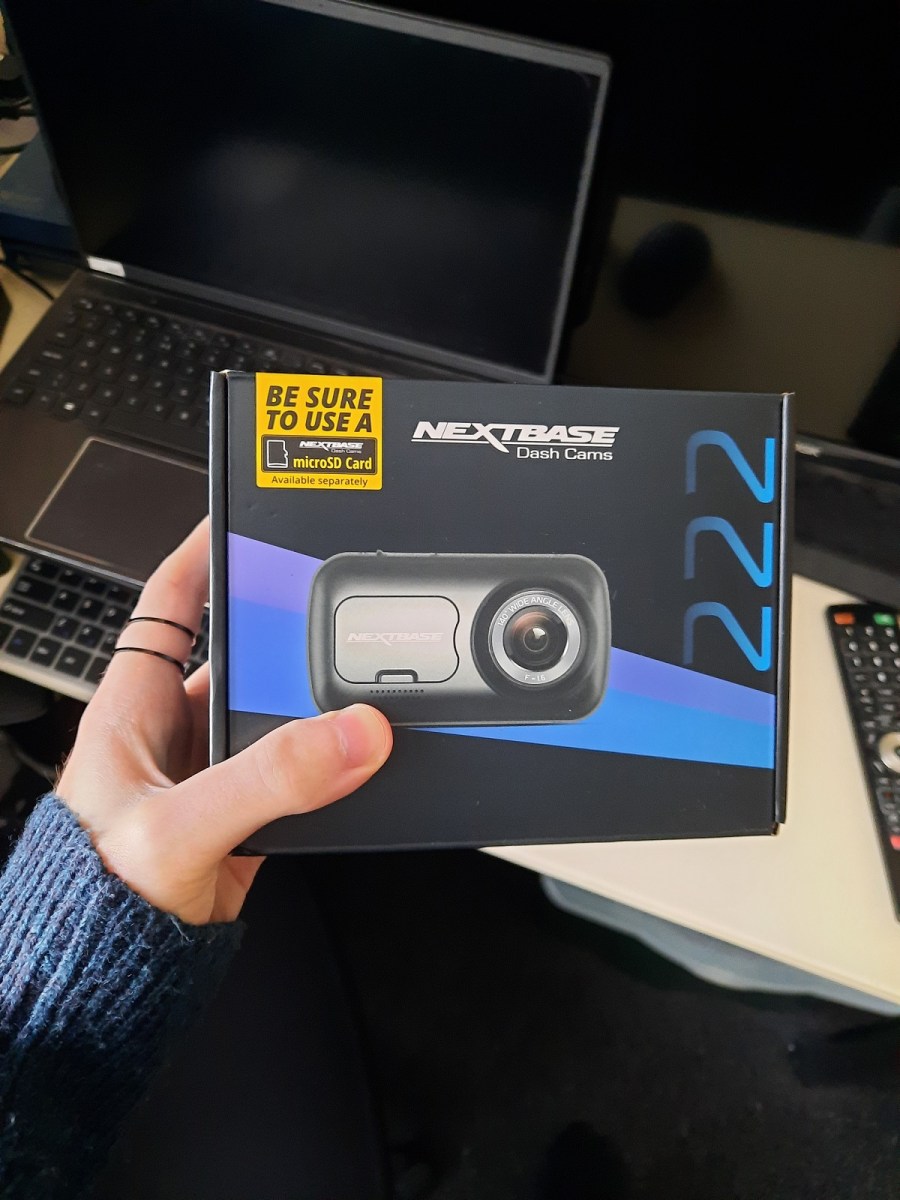
Dash cams can be expensive, but do they have to be? To find out, I decided to take a look at one of the top entry-level cameras on the market and put it through its paces. So, if you’re looking to save some money, have a read of this Nextbase 222 review to see if it’s up to the task.
How we tested the product
When reviewing the Nextbase 222, I wanted to try and create as much of a comprehensive ownership experience as possible. So, I’ll be letting you know what it’s like to install and operate, what quality of image you can expect, and I’ll also highlight any user grievances I come across along the way.
I’ve been driving for plenty of years now, and I understand the sort of scenarios where a dash cam would be important. So, when I show you the results of the Nextbase 222’s video recordings later on, I’ll guide you through the important details. What’s more, while working for Fast Car, I’ve come into contact with quite a range of dash cams, so I’ll be able to judge how it compares to some of its key rivals.
RRP: $99.99, buy now / £79.99, buy now.
What’s in the box?
Well, this is the first dash cam that’s made me chuckle a bit. The reason being is that when you open the box, the first thing you see is an easy-peel window decal, upon which there’s a little camera icon, joined by the text, “WARNING – Protected by Nextbase Dash Cams”. It’s a fun little freebie which I’ve never seen any other dash cam brand throw into the mix, so I guess it just caught me off guard a little. I suppose it could work as a deterrent against thieves or any vengeful drivers you meet on the road, but personally it’s not the sort of thing I’d put on my own car.
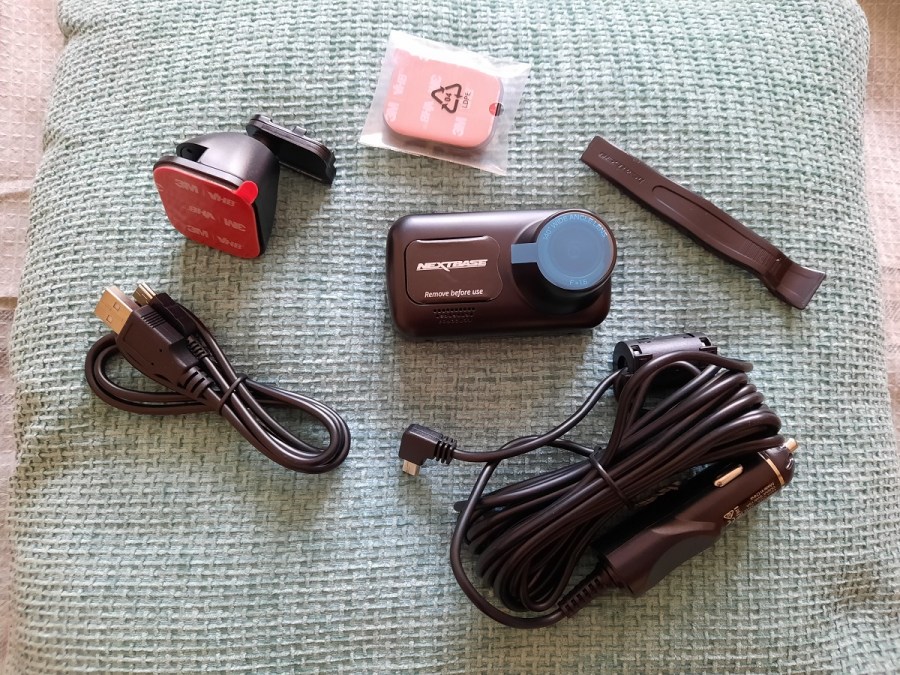
Anyway, it’s the rest of what’s in the box which is most important. Once you dig beneath the decal and quick-start user’s manual (the full one is online), you’ll find the camera itself as well as a 12V power cable, Click&Go PRO mount, and plastic trim tool. There’s also a spare adhesive mount back plate and USB cable, but no microSD memory card. You have to buy that separately. Overall, the packaging is very well presented with the camera neatly segregated from its accessories.
Tech Specs:
- Resolution: 1080p at 30fps, or 720p at 60fps
- Field of View: 140 degrees
- Extra Features: parking mode-ready, photo mode, 2.5-inch HD control screen
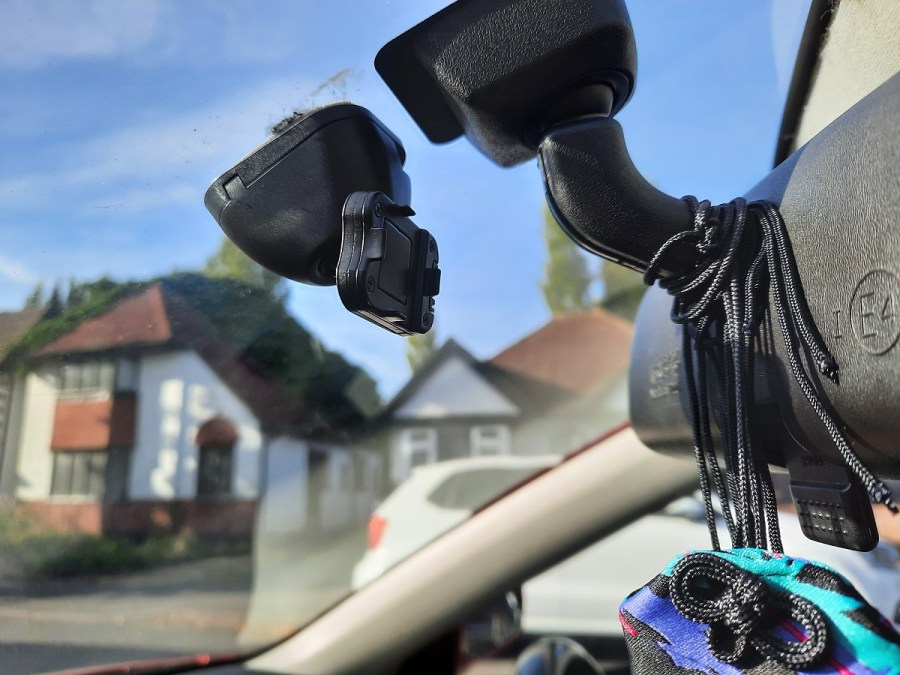
Positioning the camera
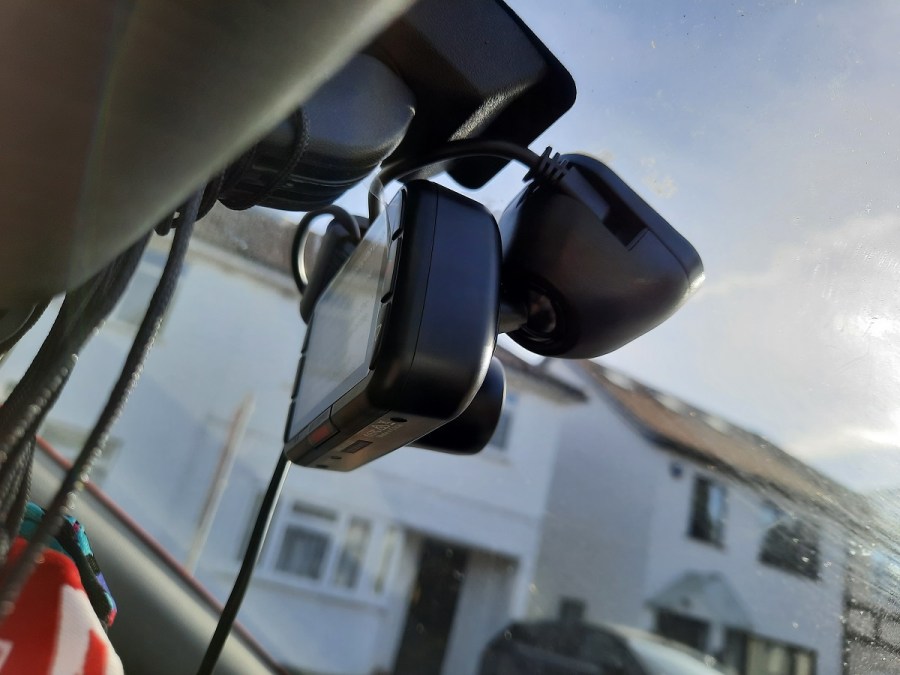
Positioning the camera and its mount is a relatively straightforward job. You simply remove the protective cover from the mount’s adhesive cover and stick it to your windscreen. When choosing a location, it’s best to go high up and central. This will not only give you a good view of all forward-facing angles, but also reduce the risk of the dash cam interfering with your line of vision. As a result, I like to tuck dash cams behind my car’s rearview mirror.
Once you’ve got the mount in position, fitting the camera in place couldn’t be easier. Nextbase uses a magnetic system, so there’s no need to intricately clip the camera in place or get more adhesive tape involved. You can literally do it one-handed. In fact, the magnets have a real kick to them, which takes you by surprise at first, but is brilliant for ensuring a strong and secure fitment. I have to say, it’s probably my favorite dash cam mounting setup that I’ve come across so far.
One final thing to bear in mind though is the lens offset, which I only clocked after installing the camera. See, the camera lens is to the side of the camera’s mounting point. That means that the lens is just off-center to the left. Fortunately, it’s easy to adjust the camera’s orientation to make up for this (as you’ll hopefully agree when watching the videos below), but for the best results, it may serve you well to keep that lens offset in mind when choosing the exact spot to locate your mount.
Connecting to a power source
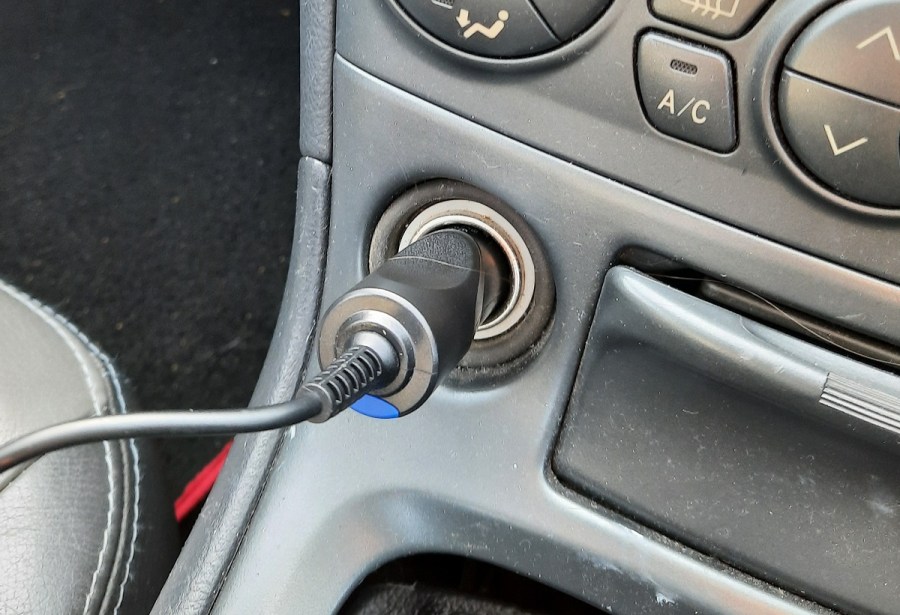
To connect the Nextbase 222 to a power source, you’ll need to make use of the supplied 12V car charger. I was surprised to learn that the power cable actually inserts into the mount rather than the camera itself – a relative rarity in design amongst the dash cams that I’ve come across. This makes it easier to quick-release the camera from its mount.
Alternatively, instead of using the 12V charger, you can hardwire the Nextbase 222 into your car’s wiring system. Nextbase’s hardwiring kit is available to purchase separately. Whichever option you choose, if you plan on having this camera in your car for the long term, you’ll need to find a way to hide the connecting cables behind the car’s interior trim. Nextbase supplies a handy trim tool to help you do this, but it might take some creativity on your part.
When you first power the camera up, you’ll need to go through a quick and simple setup routine. This will ask you to select a language and set the time and date; the latter likely because the camera doesn’t have in-built WiFi. In the settings menu, you can then change attributes such as resolution and exposure, as well as toggling audio on or off (there’s also a simple button to do this). You can even change the length of video recording files, and adjust the sensitivity of the inbuilt G sensor. For the purpose of this review though, I’ll be testing the Nextbase 222 on its default settings.
Operation
Once you’re up and running, the camera will automatically switch on and begin recording once it receives power as a result of you turning the ignition on. You can then just let the camera do its thing. Bear in mind though that it’ll eventually run out of storage space, at which point the camera will automatically delete the oldest recordings to make way for new files. So, if you’re using the 16GB Nextbase microSD card, it’s worth backing up any recordings you want to save after every 90 minutes of driving. Double that time period to every 180 minutes for the 32GB microSD, and so on. You can also manually prioritize footage of an event that’s just unfolded in front of you. You can do so by pressing the lower central button beneath the control screen, which will save that specific recording from the camera’s automatic deletion process.
It’s also worth mentioning that there’s a photo mode that you can switch to if you want to manually take a still image. Meanwhile, playback mode allows you to look back at video footage or photographs that the camera has stored.
How can I engage parking mode?
Parking mode is your eyes and ears when you’re away from your vehicle. If the camera’s onboard G sensor registers any movement, the camera will kick into life to try and catch any potential culprits of contact red-handed. Unfortunately, you can’t access parking mode while using the simple 12V car charger, as for it to work the camera needs a constant power source. For that reason, parking mode is only accessible if you hardwire the dash cam into your car.
How can I view my footage?
The easiest way to view your footage is to do what I did – take the microSD card, place it in the supplied PC/laptop adaptor and view the recording files directly from your desktop. However, Nextbase also offers free services such as MyNextbasePlayer, which once downloaded, allows you to make a wide range of edits. You can inspect footage frame by frame and even add annotations. So, if you’re faced with a legal situation, or if you’re using your dash cam for social media purposes, it’s well worth looking into. When testing it, I found it simple and intuitive to use. Similarly, Nextbase’s cloud system makes it easy to access and share your recordings online from any device. Unfortunately, the Nextbase 222 is not compatible with Nextbase’s cloud-based smartphone app though.
Daytime Performance
Right, now we’re onto the practical bit. I took my car out for a drive with the Nextbase 222 attached in both daytime and night conditions. These clips are taken from those journeys, and will hopefully give you a realistic idea about what sort of image quality you can expect from the camera.
Let’s start with the daytime recording. As you would expect of a 1080p, 30fps device, the results are very positive. The image is crisp and the color palettes are vibrant. The real test of the image quality is when you start to examine the details with forensic interest. To see what I mean, pretend you’re a detective looking for clues or evidence in the environment. Can you read street signs and shop signs? Or what about the license plate of the grey SUV that emerges from a side road? How about the face of the person who abruptly appears in the road? At full playback speed, these fine details might pass you by. But I find that when you pause the footage, these important aspects become crystal clear. To me, that’s the mark of a good dash cam.
One thing that it does lack, however, is GPS. That means that the footage won’t have any accompanying data about location – or perhaps more importantly, speed.
Night Performance
As for the night performance, well the camera was always going to struggle a bit more. This is the norm for dash cams, or any camera, really. The lack of available light means that those fine details I mentioned above become ineligible 95% of the time, even if you pause the video. Interior reflections also become a larger issue. But again, that’s common for dash cams, especially ones at this price point. The general picture is reasonable enough, but the biggest standout issue was glare. Glare is a common problem at night, but to my eyes at least, this was quite a severe example of it.
For the sake of fairness, it’s also worth pointing out that these conditions weren’t the most optimal. Rain is always a wildcard, hence me setting my windscreen wipers to a rather brisk pace in the hope of maintaining a relatively clear view for the camera. In hindsight, it also becomes clear that my car’s windshield was dirtier than I realized before recording. So, theoretically, could you get better nighttime results than this? Well, yes, I suppose you could. But not to the extent that would be game-changing.
Can I improve the quality of the image?
Yes, you can. You can buy a polarizing filter for the camera lens, which should help to reduce the presence of interior reflections and suppress the amount of glare. You can also try playing about with the exposure settings in the menu.
Verdict
Overall, there’s a lot to like about the Nextbase 222. It has, in my opinion, one of the best mounting systems of all the big-name dash cam brands. Setup is nice and simple, and the daytime video footage is certainly up to scratch. Sure, parking mode is only available if you buy the optional extra hardwiring kit, meaning added expense, but that’s the same with many other dash cams across most brands. The lack of GPS might be a particular gripe for some though, and in standard form, I felt that the nighttime performance of the camera left a lot to be desired, caveats of sub-optimal conditions aside.
So, whether I would recommend this dash cam comes down to what you want to get out of it. If you’re after an entry-level package which simply records good daytime footage, then you can’t go wrong with the Nextbase 222. However, if you’re a more avid dash cam user who wants the best possible coverage for legal defence, or are somebody who spends a lot of time on the road at night, then it might be worth looking elsewhere. Still, the Nextbase 222 is a commendable effort, especially when you consider you can often purchase it for less than the RRP.