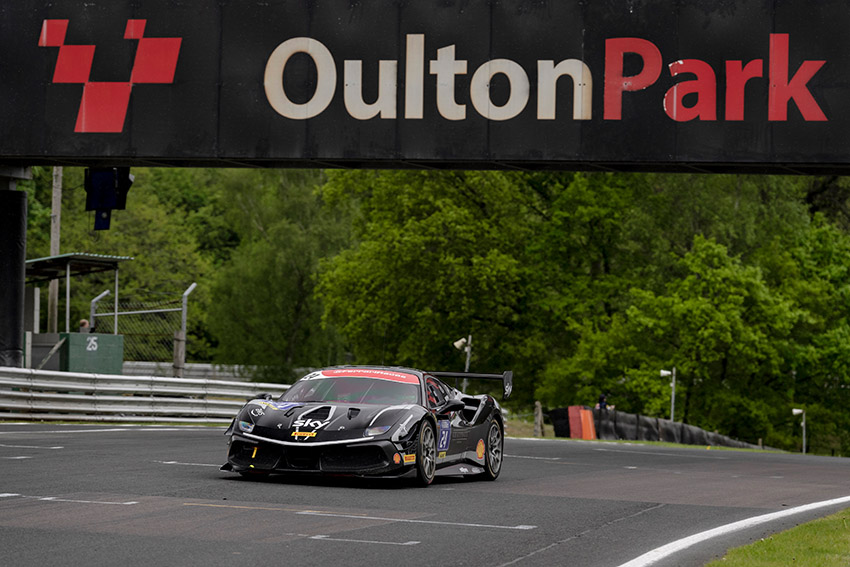
With a corner-by-corner breakdown, our Oulton Park track guide will help you get the most out of your next track day around the picturesque yet demanding circuit.
Guide from Fast Ford magazine. Words: Alex Nevill.
Oulton Park is one of the most challenging, picturesque and enjoyable circuits that British motorsport has to offer. Situated in Cheshire, it’s a favourite of BTCC fans and drivers alike.
It’s a track that commands precision and bravery from the driver; it’s easy to get it wrong, but it’s also one of the most rewarding laps you can drive when it all comes together.
Corners such as Cascades and Druids require a high level of commitment to get right, and the whole lap is incredibly intense.
Oulton Park track guide
1 – Old Hall
The first corner on our Oulton Park track guide is Old Hall; a fast, narrow, and slightly banked right-hand bend. The start/finish straight curves to the left, so you’ll want to position the car around the middle of the circuit as you cross the start/finish line and from there point the nose towards the left-hand side of the circuit, which will allow you to brake for the corner in a straight line.
The corner itself always feels quite shallow, and it really narrows on the exit. Turn in late so you don’t run out of road on the exit, and be gentle so you don’t generate understeer that will push you off of the racing line.
2 – Denton’s
You’ll want to keep left on the exit of Old Hall, and turn from there into Denton’s. It isn’t much of a corner, so just make sure you’re soft and gentle on the wheel so that you don’t scrub off speed.
On the exit keep right, as you’ll be heading straight into the braking zone for Cascades.
3 – Cascades
The third corner on our Oulton Park track guide is Cascades, and it’s a difficult corner to get right, but an important one as it leads on to a long straight. The braking zone is bumpy and there’s one particular bump that you won’t see but you’ll definitely feel.
You can use this as a reference point; to start with brake well before the bump, but as you get more confident you can start to brake later and with more pressure.
The inside half of the circuit at Cascades features more positive camber than the outside, so the fastest way through the corner is to dive into it early and let the camber hold the car into place.
The apex itself is about three-quarters of the way around the corner, and from there you’ll need to be on full throttle and running back out to the right-hand side for the straight that follows.
4 – Island Bend
At the end of the straight is Island Bend, which is the most daunting corner on the circuit. Use the kerb for the hairpin on the shorter circuit as a turn-in marker and make sure you’re relaxed and gentle on the wheel.
It’s quite a late apex here – right at the end of the inside kerb – and as with Cascades the camber is better on the inside, so if the car will let you, try to keep to the left-hand side on the exit of the corner.
5 – Shell Oils Hairpin
The Shell Oils Hairpin follows soon afterwards. Again, it features a considerable amount of banking, so you can carry a fair bit of speed through here. You’ll want to capitalise on this by diving into the corner quite early, which will shorten the distance you travel while the banking means you can hold the tighter line without losing speed.
The apex is halfway around the corner, and from there you want to be accelerating hard and letting the car run out to the left on the exit of the corner.
6 – Britten’s
After a sweeping right-hander that’ll put you back on the right-hand side of the circuit you’ll arrive at Britten’s chicane.
The first left should just be used to set yourself up for the right, braking all the way through the corner. You can use the kerb here, but avoid the sausage kerb as they will throw the car off line.
Use the kerb and all of the road on the exit to give yourself the best exit speed, and then the left at the end is just a kink where you’ll let the car run back out to the right-hand side.
After the chicane the circuit goes uphill, but the hill is slightly steeper on the left of the track than it is on the right.
So, make sure you keep to the right until you reach the top of the hill, at which point you’ll want to move over to the left to prepare for the Hislop’s chicane.
7- Hislop’s
The 7th corner on our Oulton Park track guide is Hislop’s chicane, which flows a lot nicer than the Britten’s chicane, and is rewarding when you get it right.
The chicane is a right-left, with the right-hander at Knickerbrook following immediately afterwards. The right-hander part of Hislop’s should be used to set yourself up for the longer left, so make sure you exit it in the middle of the circuit for the best turn into the left. You can use the kerb on the right but avoid the sausage kerb.
The apex for the left is about halfway around the inside kerb, and from there you only want to use half of the circuit on the exit to set yourself up for Knickerbrook.
8 – Knickerbrook
You have to go off the feel and rhythm you’ll develop with each lap here. In most cases a lift or dab of brakes is needed as you go in, but then it’s flat on the throttle all the way up to Druids. Any understeer or oversteer will scrub off speed and kill time up the straight.
9 – Druids
After climbing Clay Hill, the next corner is Druids. It’s a double apex right-hander with a crest at the end, after which the circuit cuts back slightly. If you’re wide on the exit, you can easily find yourself on the grass at speed.
There’s a slight left-hand kink on the approach, and you’ll need to keep left afterwards for the best line into the corner. From there you’ll need some braking, but how much will depend on the car/driver.
Turn in for the first apex, and then let the car run back out to the middle of the circuit (but no further) before cutting back into the second apex.
The straight that follows is quite long, so it’s important to keep up momentum.
10 – Lodge Corner
The final corner on our Oulton Park track guide is Lodge, and the braking for it is incredibly bumpy, but as with Cascades you can use the bumps for reference points. Use your sighting laps and your first few laps at speed to get a feel for them, and you’ll soon find some markers.
Vision is key to this corner; the apex is later than you think. The elevation of the circuit drops away steeply on the exit of the corner, so if you’re already letting the car run to the outside it’s easy to run out of circuit here.
Instead, you want a late apex – just past the access road on the inside of the corner, which is towards the end of the kerb.
#Finish Line
Now it’s hard on the throttle and run out to the exit kerb on the left as the circuit drops downhill. Then cut back towards the middle of the circuit for the left-hand kink at Deer Leap as you climb back up the hill.
From here it’s full throttle across the line to start another lap. That’s our Oulton Park track guide. Make sure you check out our other track guides.

