RRP: $549.00, buy here. £529.00, buy here.
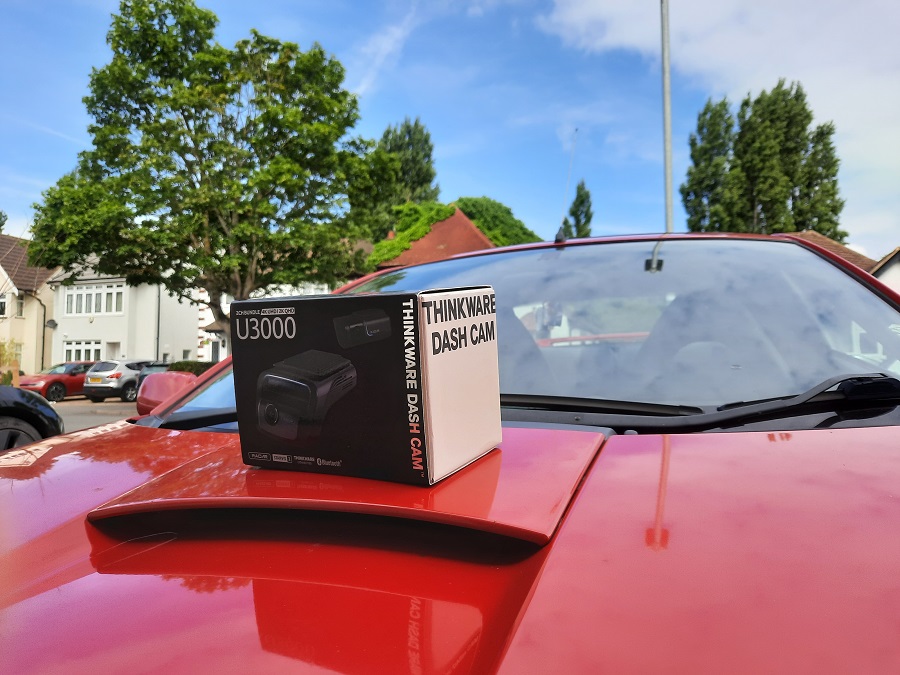
If you’re in the market for a dash cam, it’s quite likely that you’ll have come across the Thinkware brand. Within this market niche, Thinkware is a pretty big name, so we figured they’d give us a great benchmark to get an understanding of what the industry standard for dash cams is like. Kindly, they sent us one of their latest cameras – the U3000, complete with optional rear-facing camera – for us to put through its paces. So, is the Thinkware U3000 worth your hard-earned money? Let’s find out…
How I tested the Thinkware U3000
How do you comprehensively test a dash cam in a limited space of time? With a weekend road trip of course!
There were two main criteria I wanted to test during my time with the Thinkware U3000; namely, ease of installation, and quality of results. So, this review is split into two major segments. In the opening segment, we’ll discuss what sort of skill level you’ll need to install it into your car. Then, we’ll hit the road and see how the camera performs.
Sound good? Cool. Let’s get into it!
Installing the Thinkware U3000
What’s in the box?
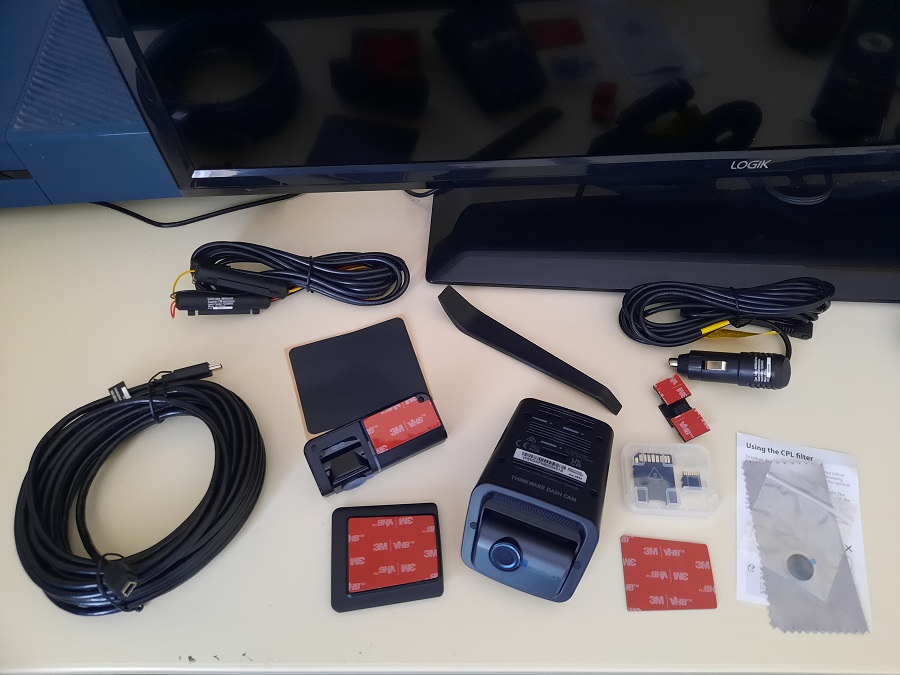
Before we begin properly, let’s first see what the package actually includes. In the box, you’ll find a front-facing dash cam (obviously), a mount for it, heat-blocking film, and a car charger power lead. There is also a small plastic box containing a MicroSD memory card and an adapter to plug it into older/less fancy laptops. On top of that, you’ll find a hardwiring cable, CPL filter for the camera lens, plastic trim lever tool, and an adhesive cable holder.
There is no physical user’s manual supplied. Instead, you’ll need to scan a QR code on the warranty leaflet, and use the associated link to download the manual online.
Naturally, if you’ve opted for the dual cam setup, you’ll also get a small rear-facing camera provided too, and a cable to connect it to the one at the front. The hardwiring cable is an optional add-on ($34.99), and if you’d rather power your camera via Thinkware’s OBD2 power lead, you can do so for an additional $54.99 / £29.99. As you can see, this is no entry level product, so hopefully when we test it later, the quality will stack up to the price tag.
Check out price comparisons for your region below:
Setting up the front mount
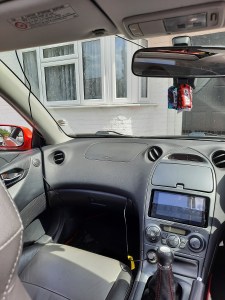
First things first, you’ll need to identify where you’re going to place the front camera. There are a few ground rules to consider here. Obviously, you don’t want to put it anywhere that’ll obstruct your view, and perhaps less obviously, Thinkware also recommends that if you’re running a separate aftermarket GPS then the camera should be at least 8 inches/20cm away. Otherwise, you might find that the camera obstructs your sat-nav’s reception. You’ll want to position the camera centrally in line with your rearview mirror for the best view of the road ahead, so if this is problematic, the easiest solution would be to reposition your standalone sat nav rather than compromise your footage.
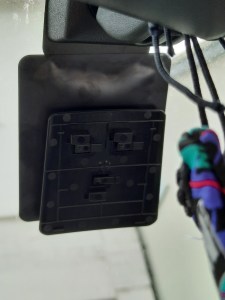
Once you’ve decided where you’re going to place the camera, the next step is to secure the mounts. To begin, attach the heat blocking film to the installation location. Then, remove the protective tape from the adhesive mount and stick the two surfaces together. Next, remove the protective film off of the camera mount and mate it up with the adhesive surface you’ve just added to the heat blocking pad. When you do this, apply a reasonable amount of pressure to ensure a firm hold.
Top tip – removing the protective film is much easier if you haven’t bitten your nails down to nothing…
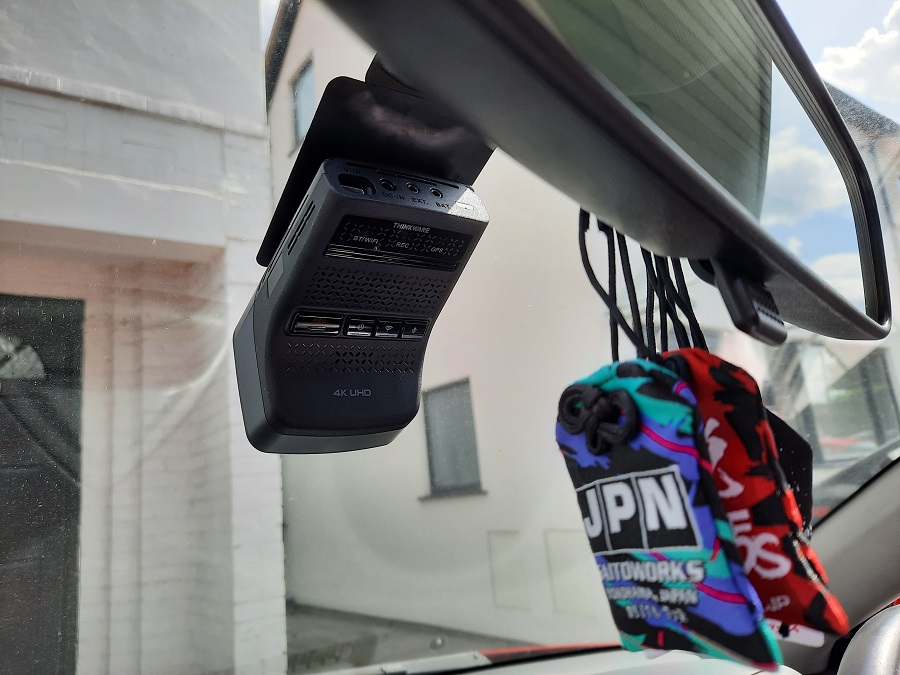
Mounting the camera
Now, attach the camera to its mount. It’ll only go on a certain way, so it’s just a case of matching up the correct pegs to the correct holes. You’ll hear a click when it locks into position.
At this point, it’s likely that the camera lens will be pointing downwards. Fortunately, it’s designed to swivel upwards for a better view. The lens housing might seem reluctant to move at first, but gently apply gradually increasing pressure, and it’ll soon point in a more useful direction.
Connecting to a power source
With the camera mounted, you now need to connect it to a power source. The easiest way to do this is by using the charger adapter provided. Simply plug it into the camera’s DC-in input and connect the other end to the car’s 12V DC power socket.
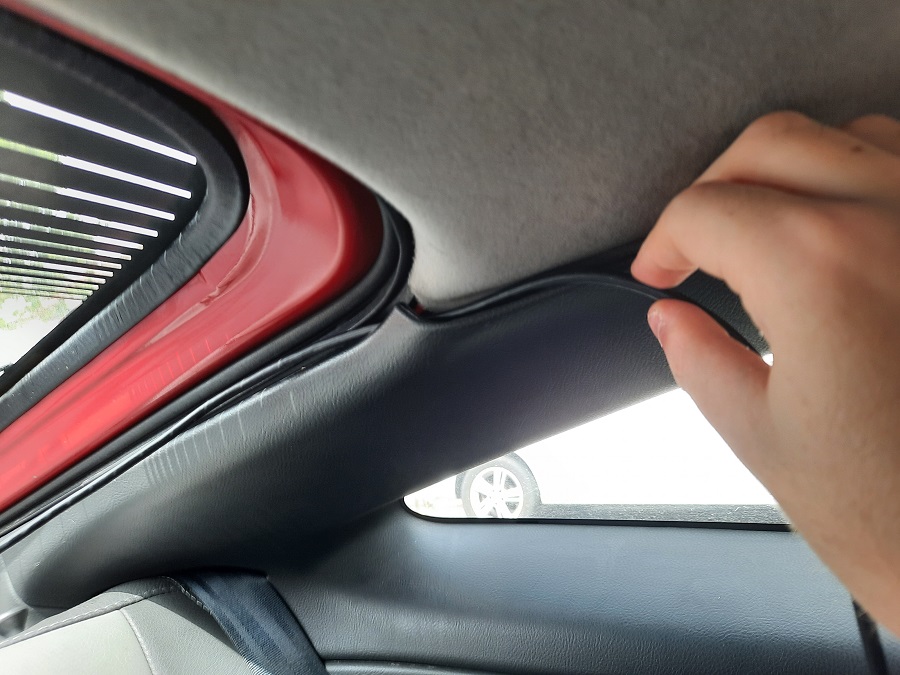
To prevent the wires from being an ergonomic nuisance (or safety hazard, even), it’s best to tuck them away behind headliner and interior trim. Depending on your car, this might be easy or difficult. For example, the Celica we’re using in this test has fabric headliner which is easy enough to peel back, but the actual dash and surrounding panels offer little in the way of obvious channels to run wire through (without unbolting bits, that is). In this instance, we didn’t worry too much about presentation, but if you were to permanently install this camera into your car, we’d highly recommend using the supplied trim tool and adhesive cable holder to tuck it away more neatly. Overall though, hopefully you get the idea.
Once that’s sorted, the camera should automatically boot up when you switch the car’s ignition on, and then it’ll switch off again when you park up and turn the engine off.
There is another way to connect the camera to a power source though…
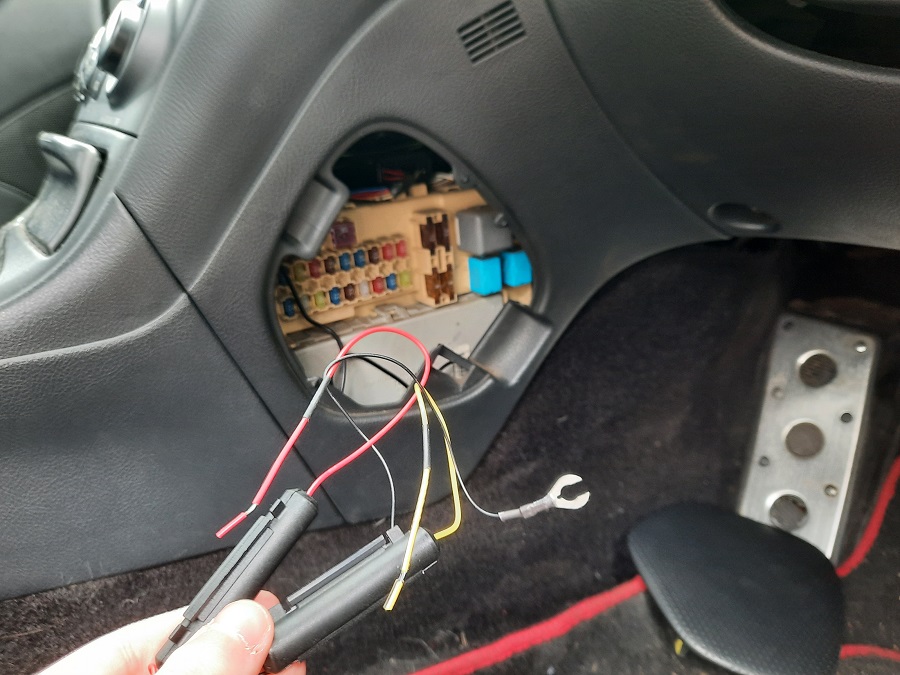
Hardwiring for parking mode
The alternative to using the 12V power socket is to hardwire the dash cam into your car’s onboard fuse box. Thinkware provides a separate set of hardwiring cables for you to do this, as pictured above.
In my Celica, it’s easy to locate the fuse box. You simply pop open a little plastic cover on the right side of the center console, et voila, there it is. Every vehicle differs in terms of the exact location of its fuses, however the vast majority will be behind some sort of plastic trim or cover on the driver’s side of the car. If you’re stumped, consult a forum, or check the owner’s manual.
What’s the point?
The next question we need to answer is: why would you want to hardwire the dash cam into your car’s core wiring setup anyway? Well, to put it simply, doing this unlocks another feature: parking mode. Parking mode allows your camera to run on standby (thanks to a supply of energy from the car’s battery) when you’re parked up, ready and waiting to record once it detects a collision. Essentially, this covers you against any damage gained from a hit and run while you’re away from the car.
You’ll have to forgive me for not being too keen on putting that theory to the test with my own vehicle, so as we aren’t missing out on anything else (besides the ability to timelapse) by not doing it, I decided to bypass this bit of the install and instead stick with the 12V power socket option.
However, I’m sure there are plenty of you that will want to use parking mode if you buy one of these, so fear not. Thinkware provides a handy tutorial on its YouTube page which discusses how to hardwire your dash cam into the fuse box and what sort of specialist tools you’ll need to do it. Watch the video here.
Will it drain my battery?
If you’re anxious about the dash cam draining your battery when parked, don’t worry too much. Thinkware’s top products (like this U3000 model) will shut off once they detect that the battery has reached a certain minimal threshold of charge. However, to verge on the side of caution, we’d avoid leaving the car sat for extended periods of time, just to be safe.
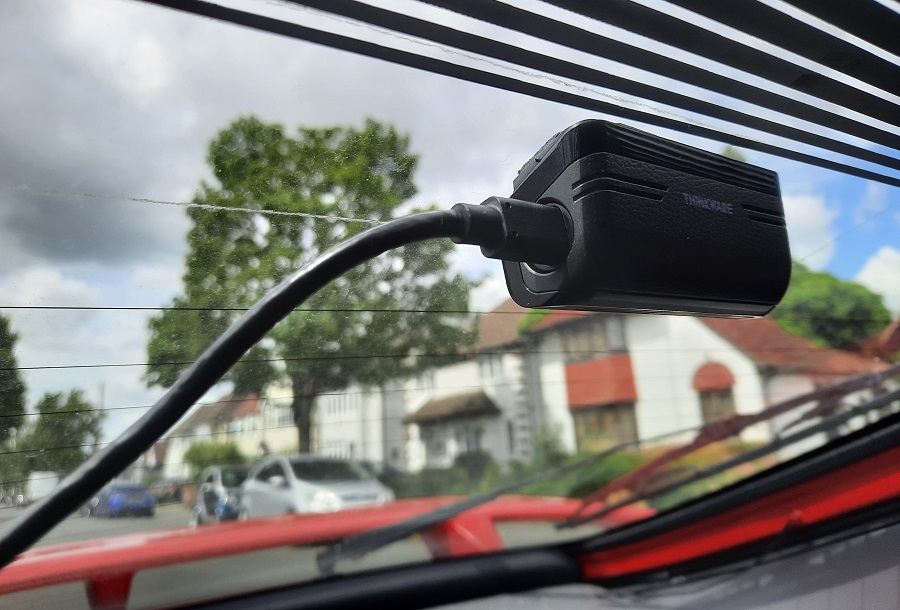
Installing the rear camera
Right, let’s shift our focus to the rear camera. Happily, this little dude is even easier to install than its buddy up front. All you need to do is remove the protective film, and stick it to your rear windshield.
Again, pick somewhere central, and clean that area of the screen before attaching the camera. Apply a reasonable amount of pressure to ensure a firm hold, and in hindsight try to do a better job of lining it up straight than I did. Apologies to anyone reading this with OCD…
Running the cable
The rear camera essentially piggy-backs off of the front camera’s power and memory card. So, to get it working properly, you need to connect the two with a supplied cable. Again, you’ll need to find channels within the interior trim to tuck the cable away nicely, and in fact, you might even want to temporarily remove the weather strip around the doors to place the cable up there.
With this done, you’re all good to go. Now, remember to insert the MicroSD card before you set off, otherwise you’ll record a grand total of nowt.
Thinkware U3000 Features & Image Quality
Right then, with everything set up, there’s only one thing for it – grab a few mates and head to the beach! Along the way, we’ll pick up a load of footage which we can then analyze later.
However, before we do so, there’s one quick caveat that I want to mention before dissecting the Thinkware U3000’s performance. Throughout this test, I wanted to get an idea of the U3000’s baseline quality, and as such, we ran it in bone ‘stock’ conditions. There are some (supplied) mods you can make to improve certain elements of the camera’s performance, but we’ll touch on those when we get to them.
Daytime recording
Now, if the whole background to this test was a day trip to one of England’s popular coasts, you might be wondering why I’m showing you footage of a dull residential area, and not some cool sweeping country lanes or sandy shores. Well, there’s a good reason for that. It turns out that, due to storage limits, the continuous recording will eventually overwrite itself. And, as this was a particularly long journey (around 300-mile round trip), by the time I’d loaded up the footage – more on how you do that later – the sunny first half of our route had already been replaced by the dark drive home. Cue an expletive-laden utterance from my desk…
So, to give you an idea of what the picture quality is like during the day, I took the car for a quick spin around the local area. As you can see, the standard image resolution is pretty good! Thinkware lists the camera specs as 4k UHD at the front and 2k QHD at the rear, which in practice translates to a crystal clear picture. Even finer details like license plates or road signs (which could be very important if you intend to use your dash cam as evidence in the event of an accident) are simple to make sense of when you hit the pause button. The color palette is vibrant and true to life as well, so overall, it gets a thumbs-up from me. Check out the video above to see for yourself.
Driver assist features
As well as recording your journey, the Thinkware U3000 also has a few driver assists up its sleeve designed to help you stay out of trouble. Using its radar and GPS, the system offers lane departure warnings, as well as front and rear proximity warnings – you can even tailor these by choosing at which speed they begin to activate. For the most part, I found these relatively non-invasive, so I’m fairly confident that if you set these features up right, you’ll only hear them when necessary.
All in all, these features are designed to prevent collisions. However, if the worst happens and you do have a bit of an accident, the Thinkware camera is prepared for that as well. It can detect when the car receives an impact, and when that happens it’ll make sure to prioritize that recording. Unfortunately, while this feature makes sense on paper, in practice it was one that I wasn’t hugely keen on.
Even when set to low sensitivity, any pothole or particularly high speed bump would set off the impact trigger. Admittedly, it probably wasn’t helped by my Celica’s slightly crashy ride (time to put some new coilovers on the wish list), but after a while the high-pitched beep does get rather annoying. Luckily, we drowned it out with music and/or chatter on this trip, but I can imagine it’d become rather tiresome on a solo journey.
Night time recording
In its stock configuration, night time is when the Thinkware U3000 begins to fall a little bit out of its comfort zone. Bright lights, such as the traffic signals I encountered in the video above cause quite considerable dazzling and you get a lot of reflection from inside the cabin. As I pass by different light sources, you can see the Celica’s dashboard, head unit, and even a crochet dinosaur come into view as reflections against the windshield.
However, it’s not fair to judge the Thinkware U3000 on this alone. Within the package, there are a few supplied modifications that make a big difference. The CPL Filter is a big one. By attaching this polarizing filter to the front camera’s lens, those distracting reflections are greatly minimized and you get a better color contrast too. Plus, if you go into the camera’s settings (either via the accompanying app or PC viewer), you can engage Super Night Vision, which brightens up the whole scene for a clearer view.
Wait until the end of the clip above to see what I mean about that impact detection sensitivity. You can hear the car go over a bump in the road, followed by a sharp beep from the camera.
Detail at night
As we saw in the daytime recording, the Thinkware U3000 offers quite impressive levels of detail in daytime conditions. However, understandably, finer details are a lot harder to catch at night.
Watch the clip above. There’s plenty going on, but when you’re watching, see if you can make out features such as license plates, people’s faces, or even shop signs. For the most part, I find them pretty difficult to make out when watching that clip back. Again though, had that footage been recorded with the CPL Filter attached and Super Night Vision switched on, it’s fair to say it would be a different story.
Oh, and I know what you’re thinking – no, that busted up FN2 Civic wasn’t Jules and Midge on their way back from another Big Build episode…
So, in summary. You can pretty much leave the camera in its stock configuration when using it during the day. But if you travel at night, it’s well worth adding the CPL filter into the mix and switching on Super Night Vision too.
How can I access my recordings?
Once the journey’s over and you want to check out the video files that your camera has recorded, you can access them through two different avenues.
First, there’s the Thinkware Dash Cam Link app which you can download to your smartphone. This relies on a Bluetooth connection between the camera and your phone, allowing you to access recording files and adjust camera settings. You can even watch a live feed of the camera on the app, assuming that the camera is powered up. In our case, that meant when the ignition was on, but if you hardwire your setup, you should also be able to access the live feed at any point even when the car is switched off.
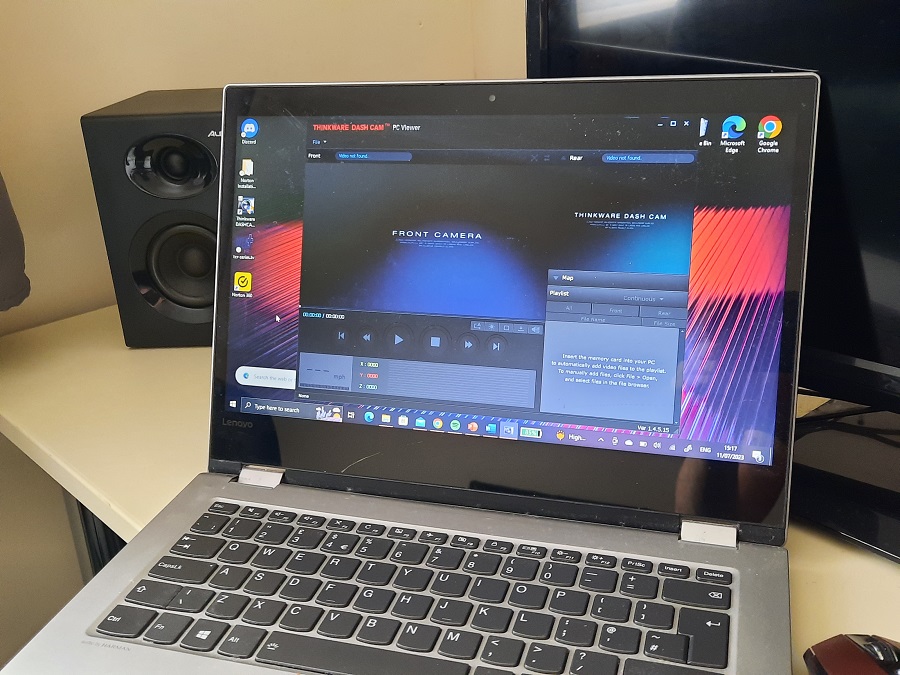
The second option is by downloading the PC Viewer onto your desktop. From there you can insert the MicroSD into your computer (using the adapter if needed) and the PC Viewer will pick up your files effortlessly. It’ll also give you cool data readouts, such as your location on a map at the time of recording, as well as speed.
Initially you may find that the videos look choppy on the PC viewer, and when you download them they may struggle to load. If that happens, you’ll likely be prompted to download another bit of software (which costs less than a single dollar/pound sterling). After employing that new software, all your playback woes will be over. Furthermore, if the videos above appear choppy on this web page, do bear in mind that it’ll either be due to internet connection or upload compression. I can confirm that the original files play nice and smooth.
Verdict
So, is the Thinkware U3000 worth getting? Well, yes – if you’re in the market for a comprehensive dash cam set-up. We purposely tested it as cruelly as possible, and even in that context, it performed admirably. I have no complaints about its daytime recording capabilities, and we’ve established that you can easily improve its night time performance by adding on a couple of mods that Thinkware supplies in the box at no extra cost. If I was to pick out one gripe, it would be that impact detection, but hey – if your car rides smoother than mine, perhaps that wouldn’t be too much of an issue either. Besides, in the event of a real accident that’s not your fault, you’ll be glad that it picked up absolutely everything on film…